10-Minute Leaf-Print Clay Trinket Dishes: The Two-Stick Rule That Stops the Rim Curling
The first clay dish I ever made dried into a crisp. I pressed a fern into a round of white air-dry clay on a Tuesday evening, set it on the kitchen windowsill, and by Thursday the rim had lifted off the table on one side and there was a hairline split running across the base like a dried-up riverbed. It rocked when you put it down. I put it in the bin and told myself air-dry clay was rubbish.
It is not rubbish. I had rolled the clay by eye, so one side of that dish was a good deal thinner than the other, and the thin side dried first and shrank while the thick side was still wet. An uneven slab dries unevenly, and a slab that dries unevenly pulls itself out of shape.
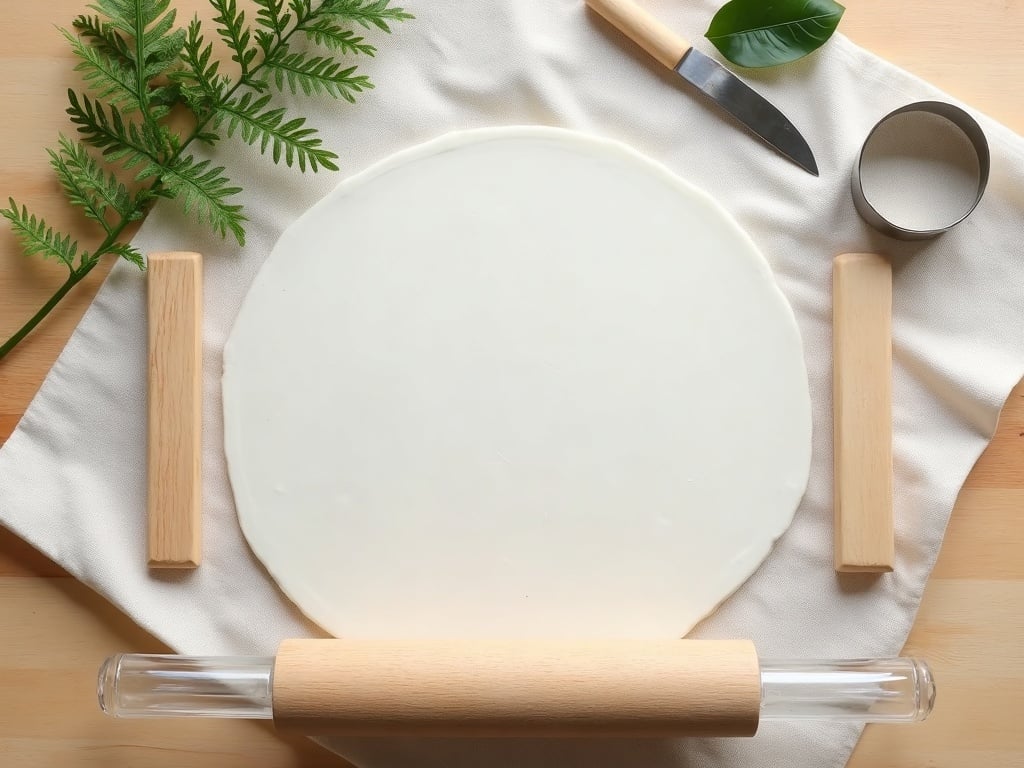
The fix costs nothing and takes ten seconds. Lay two flat sticks of the same thickness either side of your clay and roll the pin across the top of them. The pin cannot go lower than the sticks, so the slab comes out dead even, and an even slab dries at one speed instead of two. I have made maybe forty dishes since and not one of them has curled.
What we are making
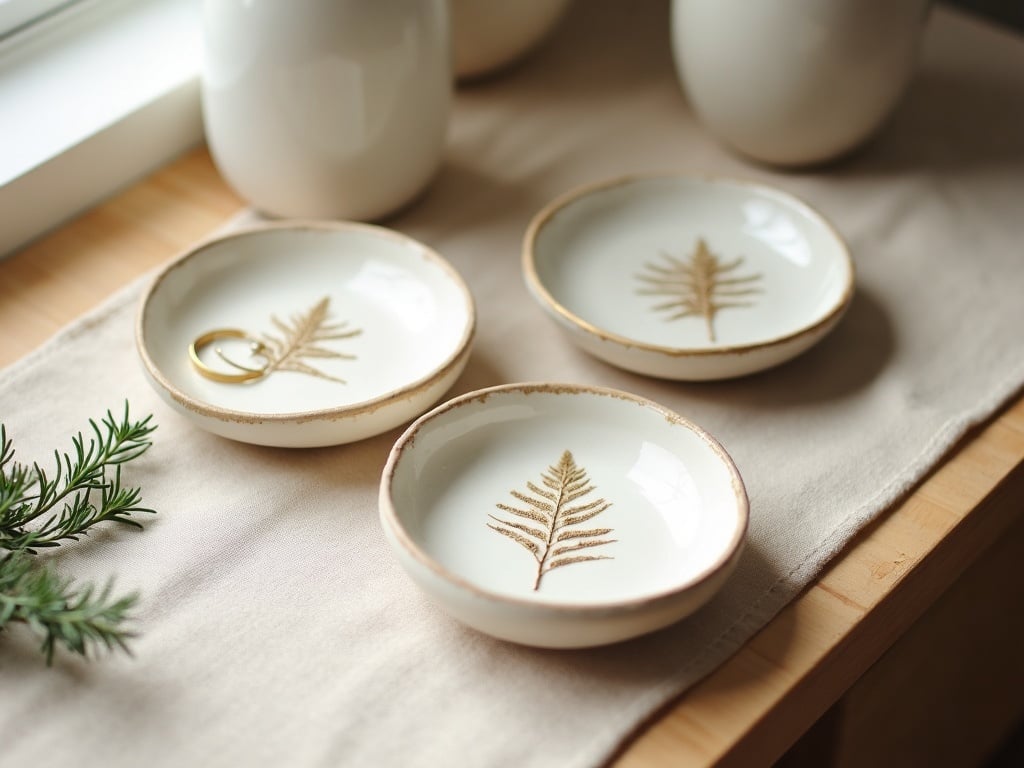
A shallow round dish, three to five inches across, with a real leaf pressed into the face of it so the veins show, dried in the curve of a cereal bowl and finished with a painted gold rim. It holds rings, earrings, hairpins, paperclips, a wedding band by the kitchen sink. Potters call this shape a slab dish, because the clay is rolled flat rather than thrown, and it is the first thing anyone should make out of clay.
Hands-on time is ten minutes, and I mean the ten minutes: roll, press, cut, drape, walk away. The clay then needs a day or two to dry on its own while you do nothing at all, and a further five minutes of painting once it has. So it is a ten-minute make with a wait in the middle, like bread.
Air-dry clay is not fired and not waterproof, so let me be honest about the limits before you spend anything. These dishes are for dry things. They are not food-safe, they will not survive a wash-up bowl, and a sealed one will still soften if you leave water standing in it. For jewellery on a nightstand they will outlast the nightstand.
What you’ll need
- White air-dry clay, about a pound. One pound makes three or four dishes. Get white rather than terracotta if you plan to paint, because a colour underneath dulls everything you put on top of it. Keep the bag sealed and squeeze the air out of it between sessions, since the enemy of an opened pack is the four days it sits on the shelf. (white air-dry clay)
- Two identical flat sticks, a quarter inch thick. This is the entire trick and it can cost you nothing. Wooden paint stirrers from the hardware store, two wooden rulers, or a pair of quarter-inch square dowels cut to a foot. What matters is only that the two are the same thickness as each other. If your stirrers are thinner than a quarter inch, tape two together per side. (clay thickness guide sticks)
- An acrylic rolling pin. Clay sticks to wood and does not stick to acrylic, and the smooth face leaves no grain print in the surface. A straight-sided glass tumbler or a wine bottle works if you would rather not buy one, though the short length makes you roll in more passes. (acrylic clay rolling pin)
- A round cutter, or a glass and a knife. A four-inch cutter gives the size I make most. Failing that, set a glass or a jar lid on the slab and run a butter knife round it, holding the knife upright so the edge comes out square and not bevelled. (graduated round cutter set)
- Leaves with strong veins. Free, outside, this afternoon. Fern, sage, mint, oak, maple, and the flat-leaf parsley in your fridge drawer. Pick them fresh; a leaf that has gone leathery has lost the raised veins that do the work.
- Gold acrylic paint or a leafing pen. The rim is the five minutes that makes people ask where you bought it. A leafing pen gives a brighter metallic than bottled acrylic because the pigment sits denser, and it is easier to run round a curve steadily. (gold leafing pen)
- Water-based acrylic sealer. Unsealed air-dry clay chalks off on your fingers and marks with everything. Two thin coats of matte or gloss acrylic sealer stops that. Thin coats, not one thick one, or it pools in the leaf print and fills the detail you worked for. (water-based acrylic sealer)
- A cereal bowl and a sheet of baking parchment. The bowl is the mould. The parchment stops the clay sticking to it. Both are already in your kitchen.
The two-stick rule, and why an even slab matters so much
Air-dry clay dries by losing water to the air, and as the water leaves, the clay shrinks. That much is obvious. What is not obvious is that the shrinking happens at whatever pace each part of the piece dries, and the parts do not dry together.
Roll a slab by eye and you will be off by a good deal more than you think. Mine used to come out a quarter inch at one edge and a shade over an eighth at the other. The thin edge gives up its water first, shrinks first, and pulls against a thick middle that is still soft and still full-size. Something has to give, so the thin edge lifts. That is your curl. If the pull is strong enough and the clay is drier, it splits instead, and that is your crack across the base.
Lay a stick either side of the clay and the problem disappears, because the rolling pin rides on the sticks and cannot press the clay any thinner than they are. Every part of the slab is now the same thickness, so every part loses its water at the same rate, so every part shrinks by the same amount at the same time. Nothing pulls against anything.
Quarter inch is the number. Thinner than that and the dish is fragile and dries so fast it cracks anyway. Thicker than a third of an inch and the outside skins over while the middle is still wet, which traps water in the core and gives you a dish that feels dry, gets sealed, and then develops a crack a fortnight later as the trapped water finally leaves.
How to make one, start to finish
1. Knead the clay for thirty seconds. Straight out of the bag it holds air pockets and dry patches. Squash it, fold it, squash it again until it feels like the same thing all the way through. Air pockets become craters when you roll.
2. Set your sticks and roll. Clay on the parchment, a stick either side, roll from the middle out. Give it a quarter turn between passes so it spreads round rather than long. You will feel the pin stop biting the moment it makes contact with both sticks. That is the signal to stop, and it is a better signal than your eyes will ever give you.
3. Press the leaf, vein side down. The underside of a leaf carries the raised veins, so that is the face that prints. Lay it on the slab, put the parchment back over the top, and roll once with light pressure. Once, in one direction. Rolling it back and forth shifts the leaf a hair and you get a doubled ghost print.
4. Peel the leaf off straight away. Lift a corner with the point of a knife and pull it back slowly. A leaf left sitting in the clay glues itself in as the clay stiffens, and getting it out then means picking at your own print.
5. Cut your circle. Press the cutter down in one movement and lift it straight up. If you are using a glass and a knife, keep the blade vertical the whole way round. A knife held at an angle gives you a bevelled edge, which looks fine now and looks like a mistake once it is painted.
6. Smooth the cut edge with one damp fingertip. Damp, not wet. Dip a finger and wipe it on a cloth first. Run it round the rim once and the raw fuzzy edge turns into a soft round one. Water is the thing beginners overdo here: soaking the edge makes it slump now and crack later, because you have added water that then has to leave again.
7. Drape it into the bowl. Parchment in the bottom of a cereal bowl, disc on top of it, and press gently at the centre so the clay settles into the curve. The rim will lift slightly off the bowl wall and that is correct; a dish that touches everywhere has been forced. A deeper bowl gives you a deeper dish. A dinner plate gives you a coaster.
8. Now leave it, and flip it at twenty-four hours. This is the step everyone skips. The face is open to the air and the back is sitting on parchment, so the face dries faster, and the two-speed problem you just solved with the sticks walks straight back in through the other door. At twenty-four hours the dish will hold its shape on its own. Lift it out, turn it upside down on a wire cooling rack, and let the back dry with air on both sides for another day.
9. Sand, paint the rim, seal. Bone dry means it has stopped feeling cool against the inside of your wrist. Knock the edge back with a fine sanding pad, run the gold pen round the rim in one continuous pass rather than short strokes, let it dry an hour, then two thin coats of sealer with an hour between them.
The mistakes I made so you don’t have to
Drying it on a radiator. I was impatient with the second one. Forced heat dries the outside in an hour and leaves the middle wet, and the crack that follows goes right through. Room temperature, out of direct sun, and away from the draught of an open window.
Using a leaf I had picked the week before. It printed as a flat blob with no veins. Leaves lose their turgidity within a day and the raised ridges go with it. Pick it, walk inside, use it.
Wetting the surface to smooth out a fingerprint. It smoothed the fingerprint and softened the leaf print at the same time, and I lost the detail that was the entire point. Fingerprints in the clay sand out easily once it is dry. Leave them.
One thick coat of sealer. It pooled in the veins of the fern and dried as a shiny puddle that filled in the finest lines. Two thin coats give a better finish than one thick one at every stage of every craft, and I still have to remind myself.
Sealing it too early. A dish that feels dry on the surface at thirty-six hours can still be damp in the core, and a sealed skin traps that water in. Give it forty-eight hours in an ordinary room, longer if your house is humid.
Making them look like a gift
Three dishes in graduated sizes, nested, tied with a length of jute and a sprig of something green tucked under the knot, is a present that costs about two pounds of materials and reads as a shop-bought set. Make the three from one slab and one leaf variety so they match.
A single dish with a wedding band already in it, given to a couple on their anniversary with the date pencilled on the underside before you seal it, is the one I have given most often and the one people keep. Pencil marks under sealer stay put for good.
If you want to sell them at a fair, price the leaf variety as the difference: fern, sage and oak read as three separate products on a table even though they came off the same slab in the same ten minutes.
Grab the free dish template and drying chart
The measurements are easy enough to hold in your head right up until you are standing at the table with a slab going firm and no idea whether a four-inch disc will fit the bowl you have chosen.
The free Clay Dish Template & Drying Chart is a one-page printable with 1:1 circles at three, four and five inches so you can lay the cutter or the glass straight onto the page and know before you cut, a bowl-to-dish depth guide so you can pick the right mould out of your own cupboard, the leaf-pressing crib sheet for which garden leaves print well and which ones disappoint, and the drying timetable with the twenty-four-hour flip marked so you cannot forget it.
The circles are drawn at actual size, so print it at 100% rather than fit to page, or your four-inch dish will come out at three and three quarters.
Print it, prop it against the flour tin, and you will need it for the first dish only. After that your hands know what a quarter inch feels like.
Happy crafting, and go and press the first one with something out of your own garden. A dish with the fern from your back step in it beats a dish with a shape from a shop in it every single time.