10-Minute Mini Hoop Wreaths (The One-Third Rule That Stops Yours Looking Homemade)
The first wreath I ever made took me an hour and a half, and I hung it on the front door for exactly one afternoon before I quietly took it back down. It had little dried flowers spaced all the way around the ring, evenly, the way I thought a wreath was supposed to look. And it looked like a craft project. Not like the ones in the shop window, but like something a person had made at their kitchen table while feeling optimistic.
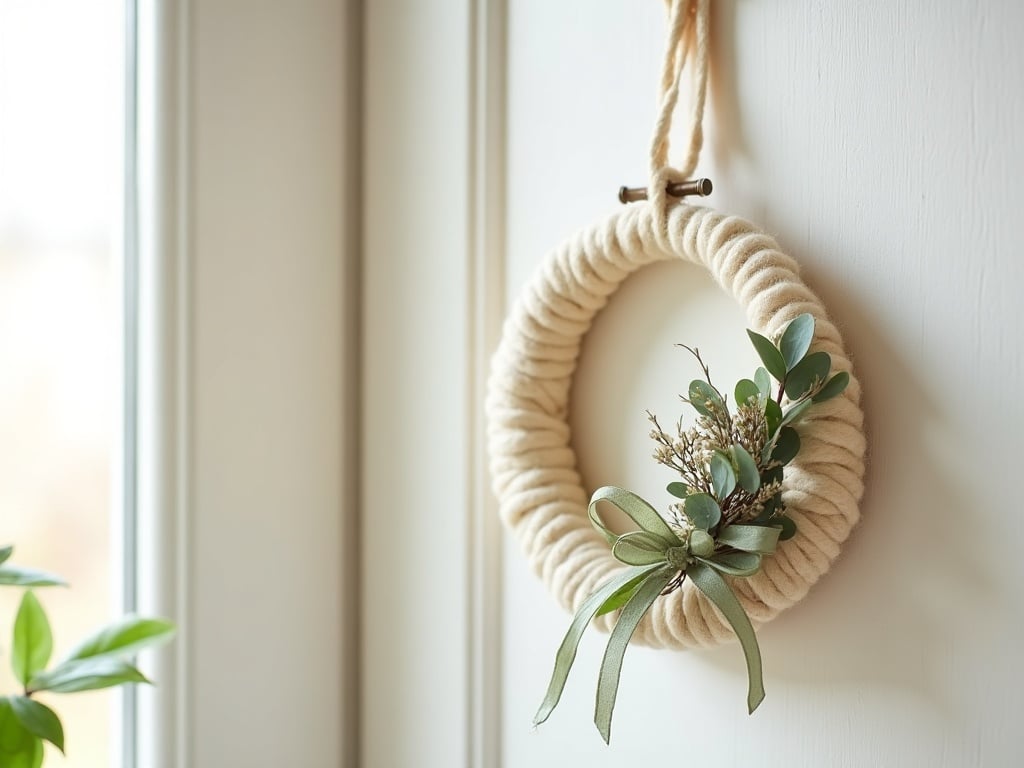
A friend of mine who worked in a flower shop for years took one look at it and said the most useful thing anybody has ever said to me about crafting: “You’ve decorated too much of it. Take two thirds back off.” She was right. I stripped it back, glued everything into one cluster down at the bottom right, and left the rest of the hoop bare. Same flowers, same hoop, same glue. Four minutes later it looked like it came from her shop.
Why mini hoop wreaths are worth your ten minutes
A mini hoop wreath is a small wooden embroidery hoop wrapped in yarn, with a little cluster of greenery on one side. It works about six different ways: on a front door, on a bedroom door, tied to the top of a wrapped gift instead of a bow, hung on a kitchen cabinet, propped on a shelf, or clipped to a Christmas tree as an oversized ornament.
It costs a couple of dollars and takes ten minutes once you know the rule, and it doesn’t need a single skill you don’t already have. If you can wrap a bandage, you can make one. And unlike a full-size wreath, you’re not committing to a forty-dollar pile of florals to find out whether you enjoy it.
What you’ll need
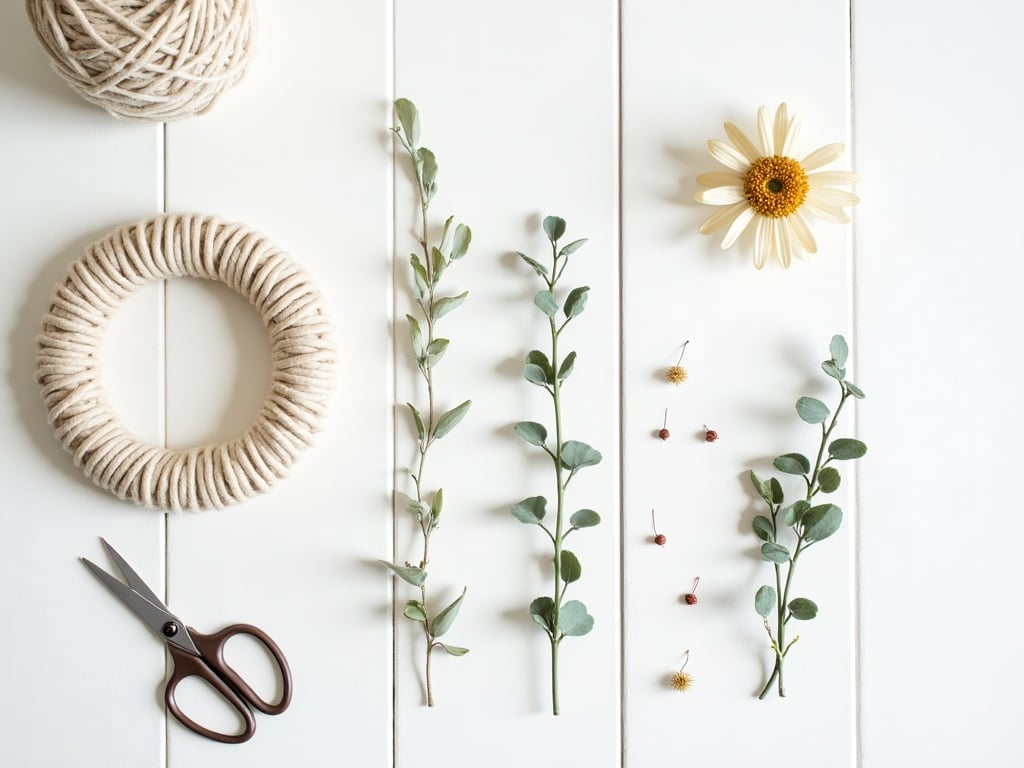
- A wooden embroidery hoop. Four to six inches is the sweet spot, big enough to look deliberate and small enough to finish fast. Here’s the part nobody mentions: you only use the inner ring. Unscrew the hoop, set the outer ring with the hardware aside, and wrap the plain inner circle. No screw bracket sticking out the top, nothing to hide. (wooden embroidery hoop sets)
- Yarn. Worsted weight, in cream, oatmeal, sage or dusty rose. A neutral makes the flowers do the talking. One small skein wraps several hoops with plenty left over. Skip anything fuzzy or novelty, because the halo blurs the clean line of the ring, and that clean line is doing half the work. (worsted weight yarn in neutrals)
- Dried or faux greenery. Eucalyptus sprigs, bunny tails, preserved ferns, tiny berry stems. A mixed bundle is better value than one type, because you need three different textures and you’ll see why in a minute. (dried flower and greenery bundles)
- Thin ribbon. Quarter-inch silk or satin, for the hanging loop and a tail or two. Keep it thin. A wide ribbon on a small hoop reads as a gift bow and fights the wreath for attention. (quarter-inch craft ribbon)
- A hot glue gun. Low-temp is fine and kinder to fingertips. This is one of those tools that makes twenty other crafts possible, so if you don’t own one it earns its keep fast. (mini hot glue guns)
- Scissors, the sharp ones, not the drawer ones. Dried stems crush instead of cutting under a dull blade.
The one-third rule
Decorate about one third of the hoop and leave the other two thirds bare. That one habit separates the wreaths I’m proud of from the one I took back off the door.
Every instinct you have says the opposite. You bought the flowers, you want to see the flowers, so you spread them around the ring to get your money’s worth. That even spacing is what makes a wreath look homemade. When decoration sits evenly all the way around, your eye has nowhere to land, and it travels the circle hunting for the interesting part. When two thirds of the ring stays bare, the bare wood turns into a frame, and the cluster becomes the thing you’re looking at.
Placement matters as much as quantity. Put the cluster off-centre, at roughly the four or five o’clock position on the ring, or seven o’clock if you’d rather it lean the other way. A cluster centred at the top or the bottom looks posed, in the way a picture hung an inch off looks wrong without you knowing why. Off-centre looks like a florist did it on purpose.
Two more things carry the cluster once you’ve placed it. Use three sizes: one biggest element that your eye lands on first, two or three medium sprigs of greenery, and a few tiny accents like berries or bunny tails. All-same-size is the other reason homemade wreaths look flat. And run the greenery along the curve of the hoop in two directions, with a long tail sweeping one way and a shorter tail the other. That asymmetry does more work than any single flower you glue on.
How to make it
1. Wrap the hoop. Put a dab of glue on the inner ring, press the yarn end into it, and start wrapping. Keep steady tension the whole way around and overlap each pass by about half the width of the yarn so no wood peeks through. Glue only at the start and the finish, never as you go. Glue in the middle of a wrap creates hard lumps you can feel and see through the yarn.
Two to three minutes for a four-inch hoop. If the wrap slides around when you touch it, you wrapped too loose. The tension holds it, not the glue.
2. Cut your greenery short. Shorter than feels right, two to three inches per sprig on a small hoop. Long stems turn a mini wreath into a mess, because they overshoot the ring and the whole thing loses its shape.
3. Lay the cluster out before you glue anything. Arrange it dry on the table, right where it’ll sit on the hoop. Greenery first as your base layer, following the curve, long tail one direction and short tail the other. Then the focal bloom. Then the little accents tucked into whatever gaps are left. Look at it, move it, then glue it in that same order, bottom layer first.
4. Glue in layers, one small dot at a time. A dot the size of a pea on the stem end only, pressed against the yarn and held for five seconds. Glue on stem ends disappears. Glue smeared across the yarn wrap shows forever as a shiny patch.
5. Add the hanging loop. Tie a length of thin ribbon at the top of the hoop, opposite your cluster or near enough, and knot the ends together. If you want ribbon tails trailing from the cluster itself, glue those in before the focal bloom so the knot end disappears underneath it.
The mistakes I made so you don’t have to
Wrapping over the hoop hardware. My first three used the outer ring with the screw bracket still on it, and I spent ages trying to bury a metal bracket under yarn. Use the inner ring. It’s already a perfect plain circle.
Gluing the cluster before laying it out. Hot glue gives you about four seconds of adjustment time. Dry-arranging costs a minute and saves the whole wreath.
Symmetry. If you find yourself adding a matching sprig to the other side to “balance” it, stop. That impulse is the one-third rule’s natural enemy. The balance comes from the bare wood.
Too much ribbon. One thin hanging loop, and at most two short tails. Wide bows and long streamers turn a wreath into a gift topper, which is lovely if that’s what you’re making, but pick one.
Change it up through the year
The hoop and the rule stay the same, and only the cluster changes. Eucalyptus and white blooms for spring. Bunny tails and dried grasses through summer. Wheat sprigs, orange berries and a rust ribbon for autumn. Pine, cinnamon sticks and a red check ribbon for December. Same ten minutes every time.
They make a good gift on their own too, small enough to post, personal enough to mean something, and cheap enough to make six of. I’ve started tying them to the top of wrapped presents instead of a bow, and people take them off and hang them up, which no bow has ever managed.
Grab the free placement guide
The placement is the part that takes longest to trust, so I put it on paper. The free Mini Wreath Placement Guide is a one-page printable with the clock-position diagram showing where the cluster goes and how far around it should reach, a hoop-size chart telling you how much yarn and how many sprigs each size needs, and the three-sizes cluster recipe so you can build one without guessing.
Print it, keep it on the craft table, and you’ll only need it for the first two. After that the one-third rule is just how you make wreaths.
Planning a craft night?
Turn this mini wreath into an easy group project with the supply list, prep timeline, theme cards, kit labels, and take-home tags already organized for you.
Get the printable Craft Night Kit Planner — $7
Instant download. Print at home and reuse for personal craft nights.
Happy crafting, and remember: if it looks a little too plain, you’ve probably got it exactly right.