10-Minute Origami Gift Boxes: The Four-Fold Rule That Makes the Lid Actually Fit
A masu box is eight folds and a square of paper. No glue, no tape, no template to print. It is the box we reach for when something handmade needs to arrive in something handmade, and it is the first piece of origami most people finish on their first try.
Then they go to make the lid. Every tutorial says the same encouraging thing: a lid is just a second masu box, so cut another square the same size and fold it again. So you do exactly that, cutting a second square off the same sheet. Both boxes come out beautiful. And the lid will not go over the base by any amount at all, not by a hair, not with pressure.
You refold it more carefully. That does not help, because carefulness was never the problem. Two boxes folded from identical squares come out identically sized, so the space between them is zero before the thickness of the paper is even counted. The instruction to cut two matching squares is the failure. Below is the fix, the reason the usual version of that fix still leaves people stuck, and the way to get the right number for the paper sitting on your own table.
What we are making
A lidded gift box, folded from two squares of the same paper, sized to whatever you are putting in it. Scrapbook paper, cardstock, or thin origami paper all work, and the paper you pick changes one measurement, which is the whole point of this article.
Hands-on time is about nine minutes for the pair. Here is where it goes: a minute to cut two squares, forty-five seconds to work out the gap, about three minutes for the base, three and a half for the lid because it has a marking step the base does not, and fifty seconds at the end to sharpen the creases and test the fit. That is five hundred and forty seconds, and it includes the fussy bits rather than just the folding.
Why the lid will not fit
Start with the size of the box itself, because everything follows from it.
Fold the four corners of a square into the centre. Those four creases land exactly on the midpoints of the paper’s edges, which leaves you a smaller square turned forty-five degrees. Fold each edge of that smaller square in to its own centre line, in both directions, and you have ruled it into a grid four cells by four. The middle four cells become the floor of the box. The border of single cells folds up to make the walls.
So the inside of the box is half the width of that turned square, and the walls are a quarter of it. Run the numbers back to the paper you started with and a masu box has an inside width of the starting square divided by two root two, with a depth of exactly half that width. A standard fifteen centimetre origami sheet gives a box 53.0 mm across and 26.5 mm deep, which matches the size published for that sheet to within a twentieth of a millimetre.
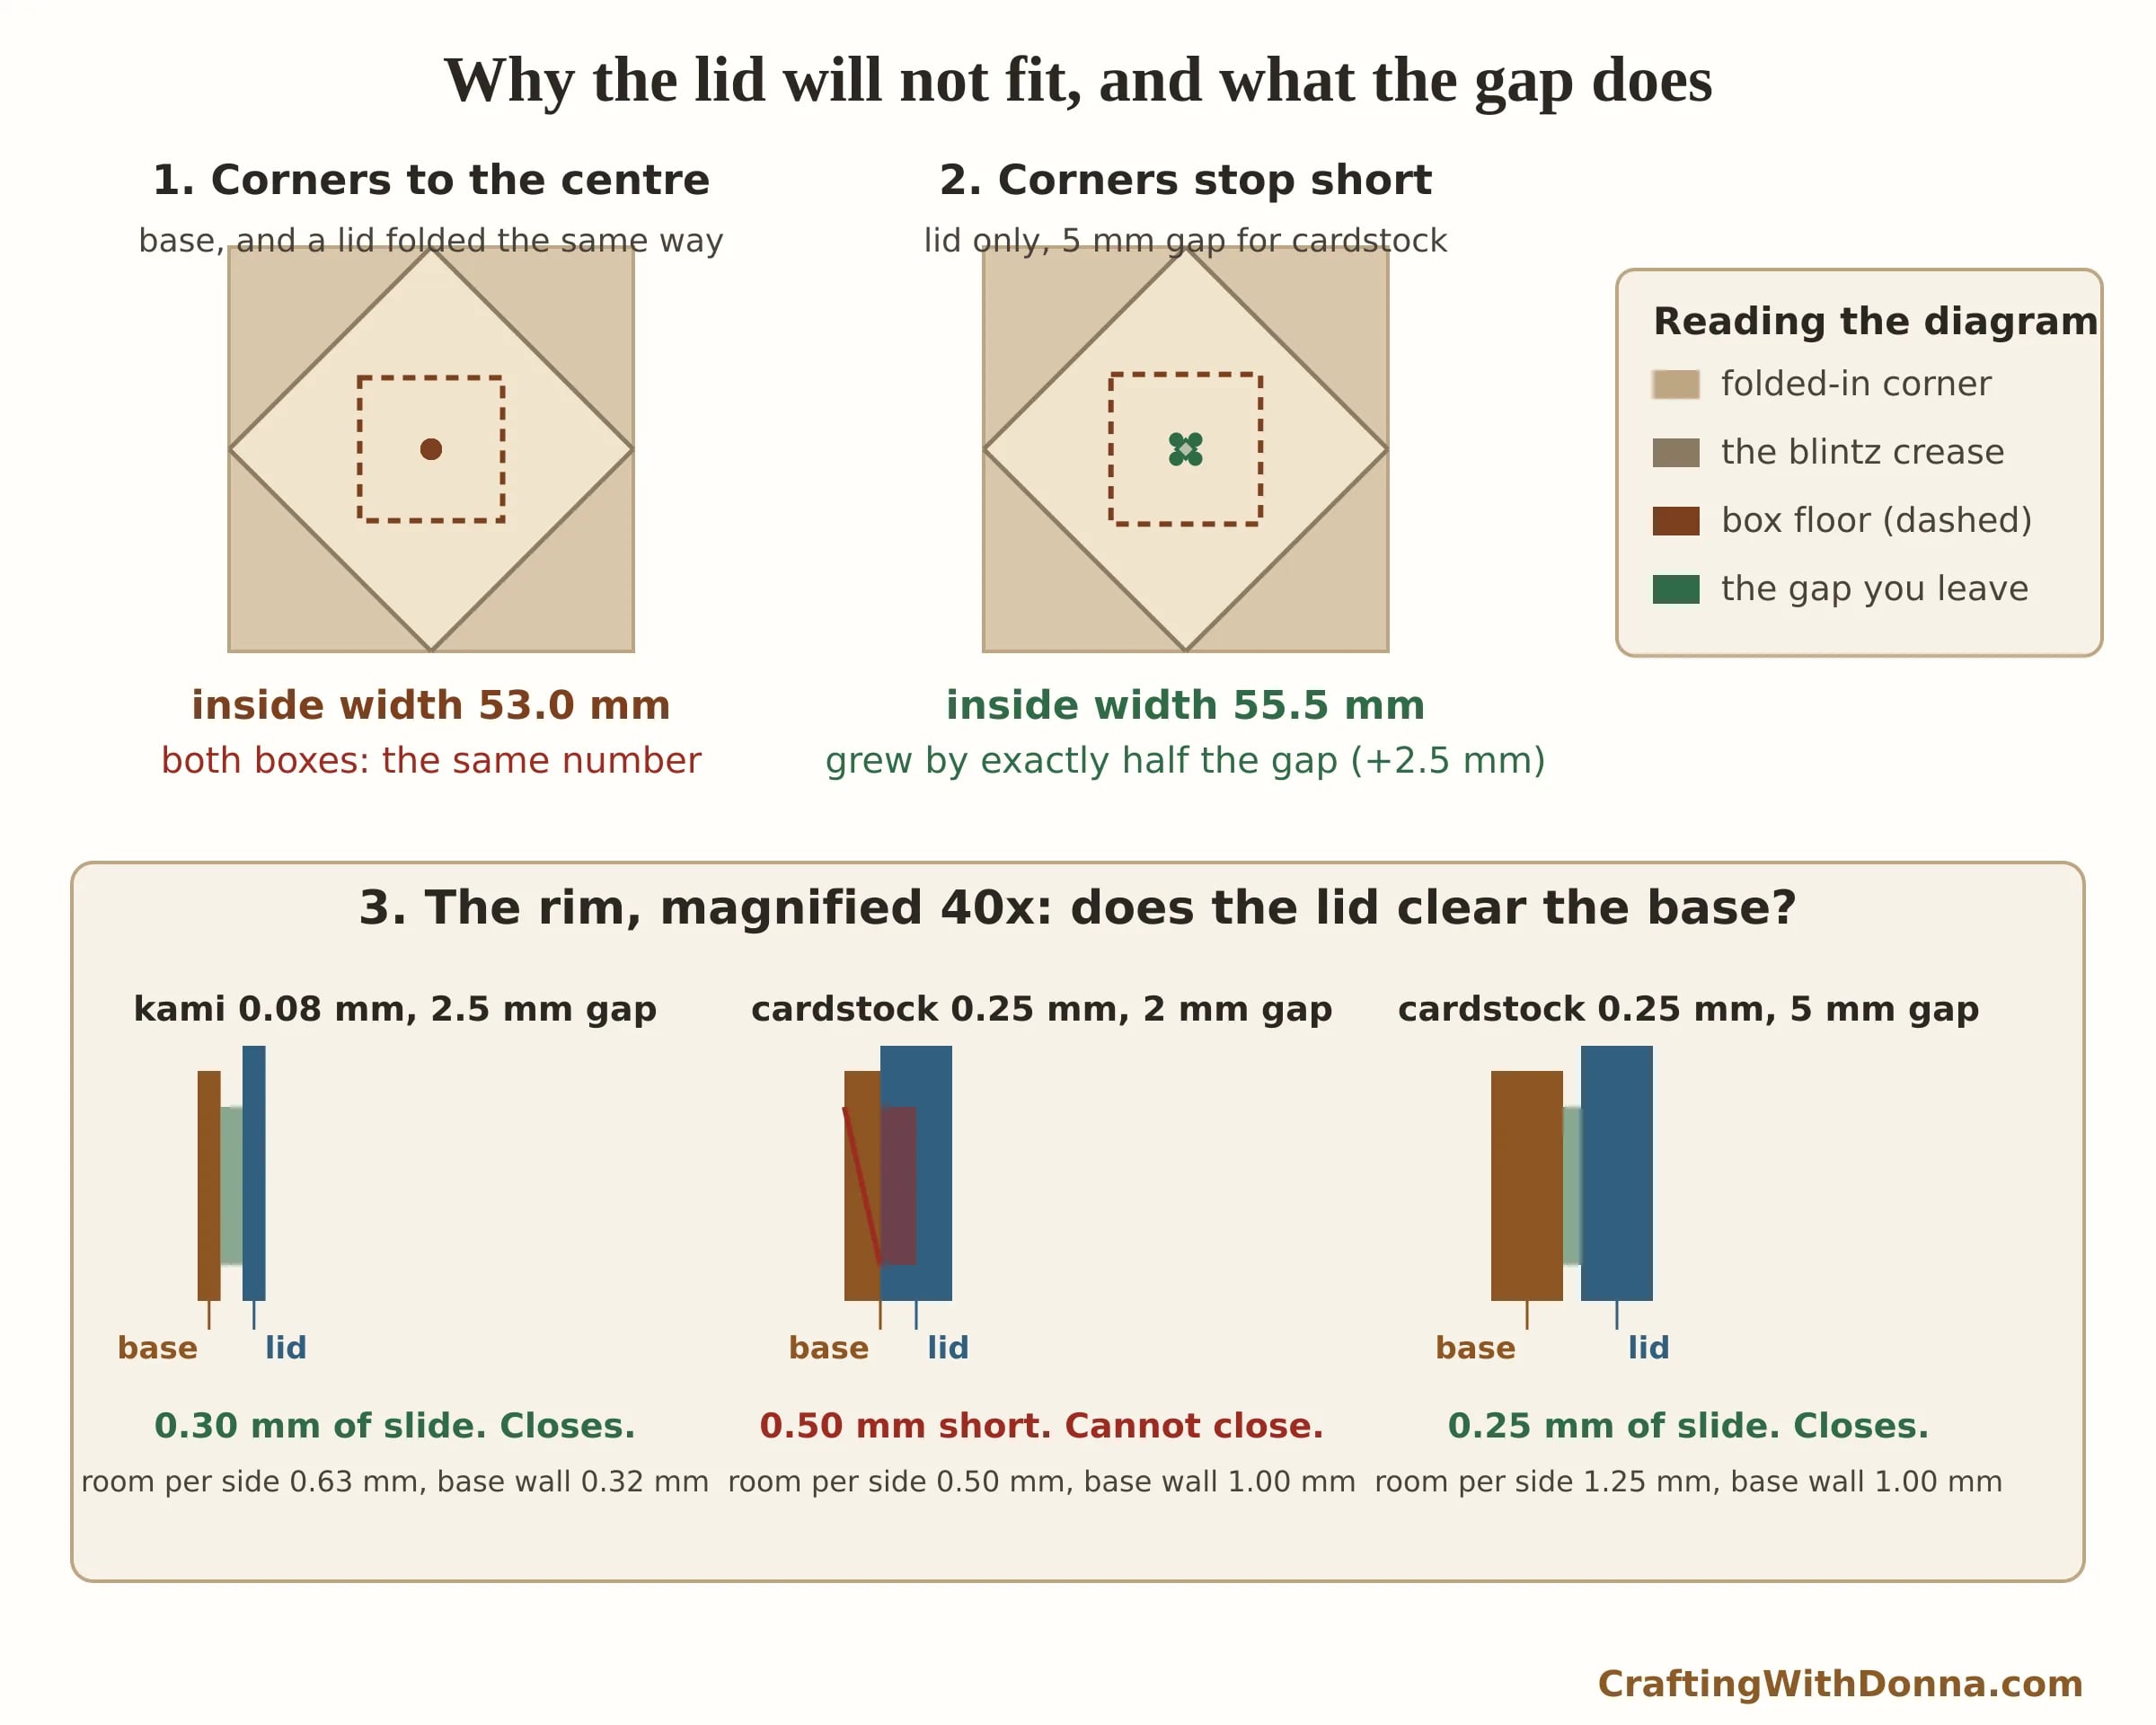
Now look at what that means for a lid. Cut a second square the same size, fold it the same way, and it produces a box with the same inside width, to the last decimal place. The lid is not slightly too tight. It is exactly the same size, and then you ask it to swallow a base that has four folded walls of real paper on the outside of it. It was never going to close.
This is worth sitting with for a second, because it is the part that stops people blaming themselves. Nothing about your creasing changed the outcome. The two boxes were always going to be twins.
The fix, and why it still failed for you
The standard fix circulates in most good origami tutorials, and it is correct. When you fold the four corners in on the lid, stop them short of the centre instead of meeting there. Leave a gap. The corners no longer touch, the turned square comes out bigger, and so does the finished box.
How much bigger has a short answer. Whatever gap you leave, the finished box grows by exactly half of it. Leave four millimetres and the inside width goes up by two.
The usual number quoted for that gap is about two millimetres, and here is where a lot of people come unstuck. That two millimetres is right, for the paper it was worked out on, which is tissue-thin origami kami around 0.08 mm thick. Almost nobody folding a gift box uses kami. They use scrapbook paper or cardstock, because a gift box wants to stand up on its own, and 200 gsm cardstock runs about 0.25 mm. That is three times thicker, and every one of those layers has to be cleared by the lid.
Work the fit out properly and a masu wall is a stack of folded layers, either three or four of them depending on how you count the corner tucks. The lid has to clear its own wall, the base’s wall, and enough slack to slide. On kami that lands between 1.96 and 2.28 mm, which is the two millimetres everyone quotes, so the standard advice checks out. On 200 gsm cardstock the same arithmetic asks for 5.00 mm. The number was never wrong. It was measured on paper that is not the paper you are holding.
The four-fold rule
You could measure your paper with callipers and do the arithmetic. You do not have to, and this is my favourite part.
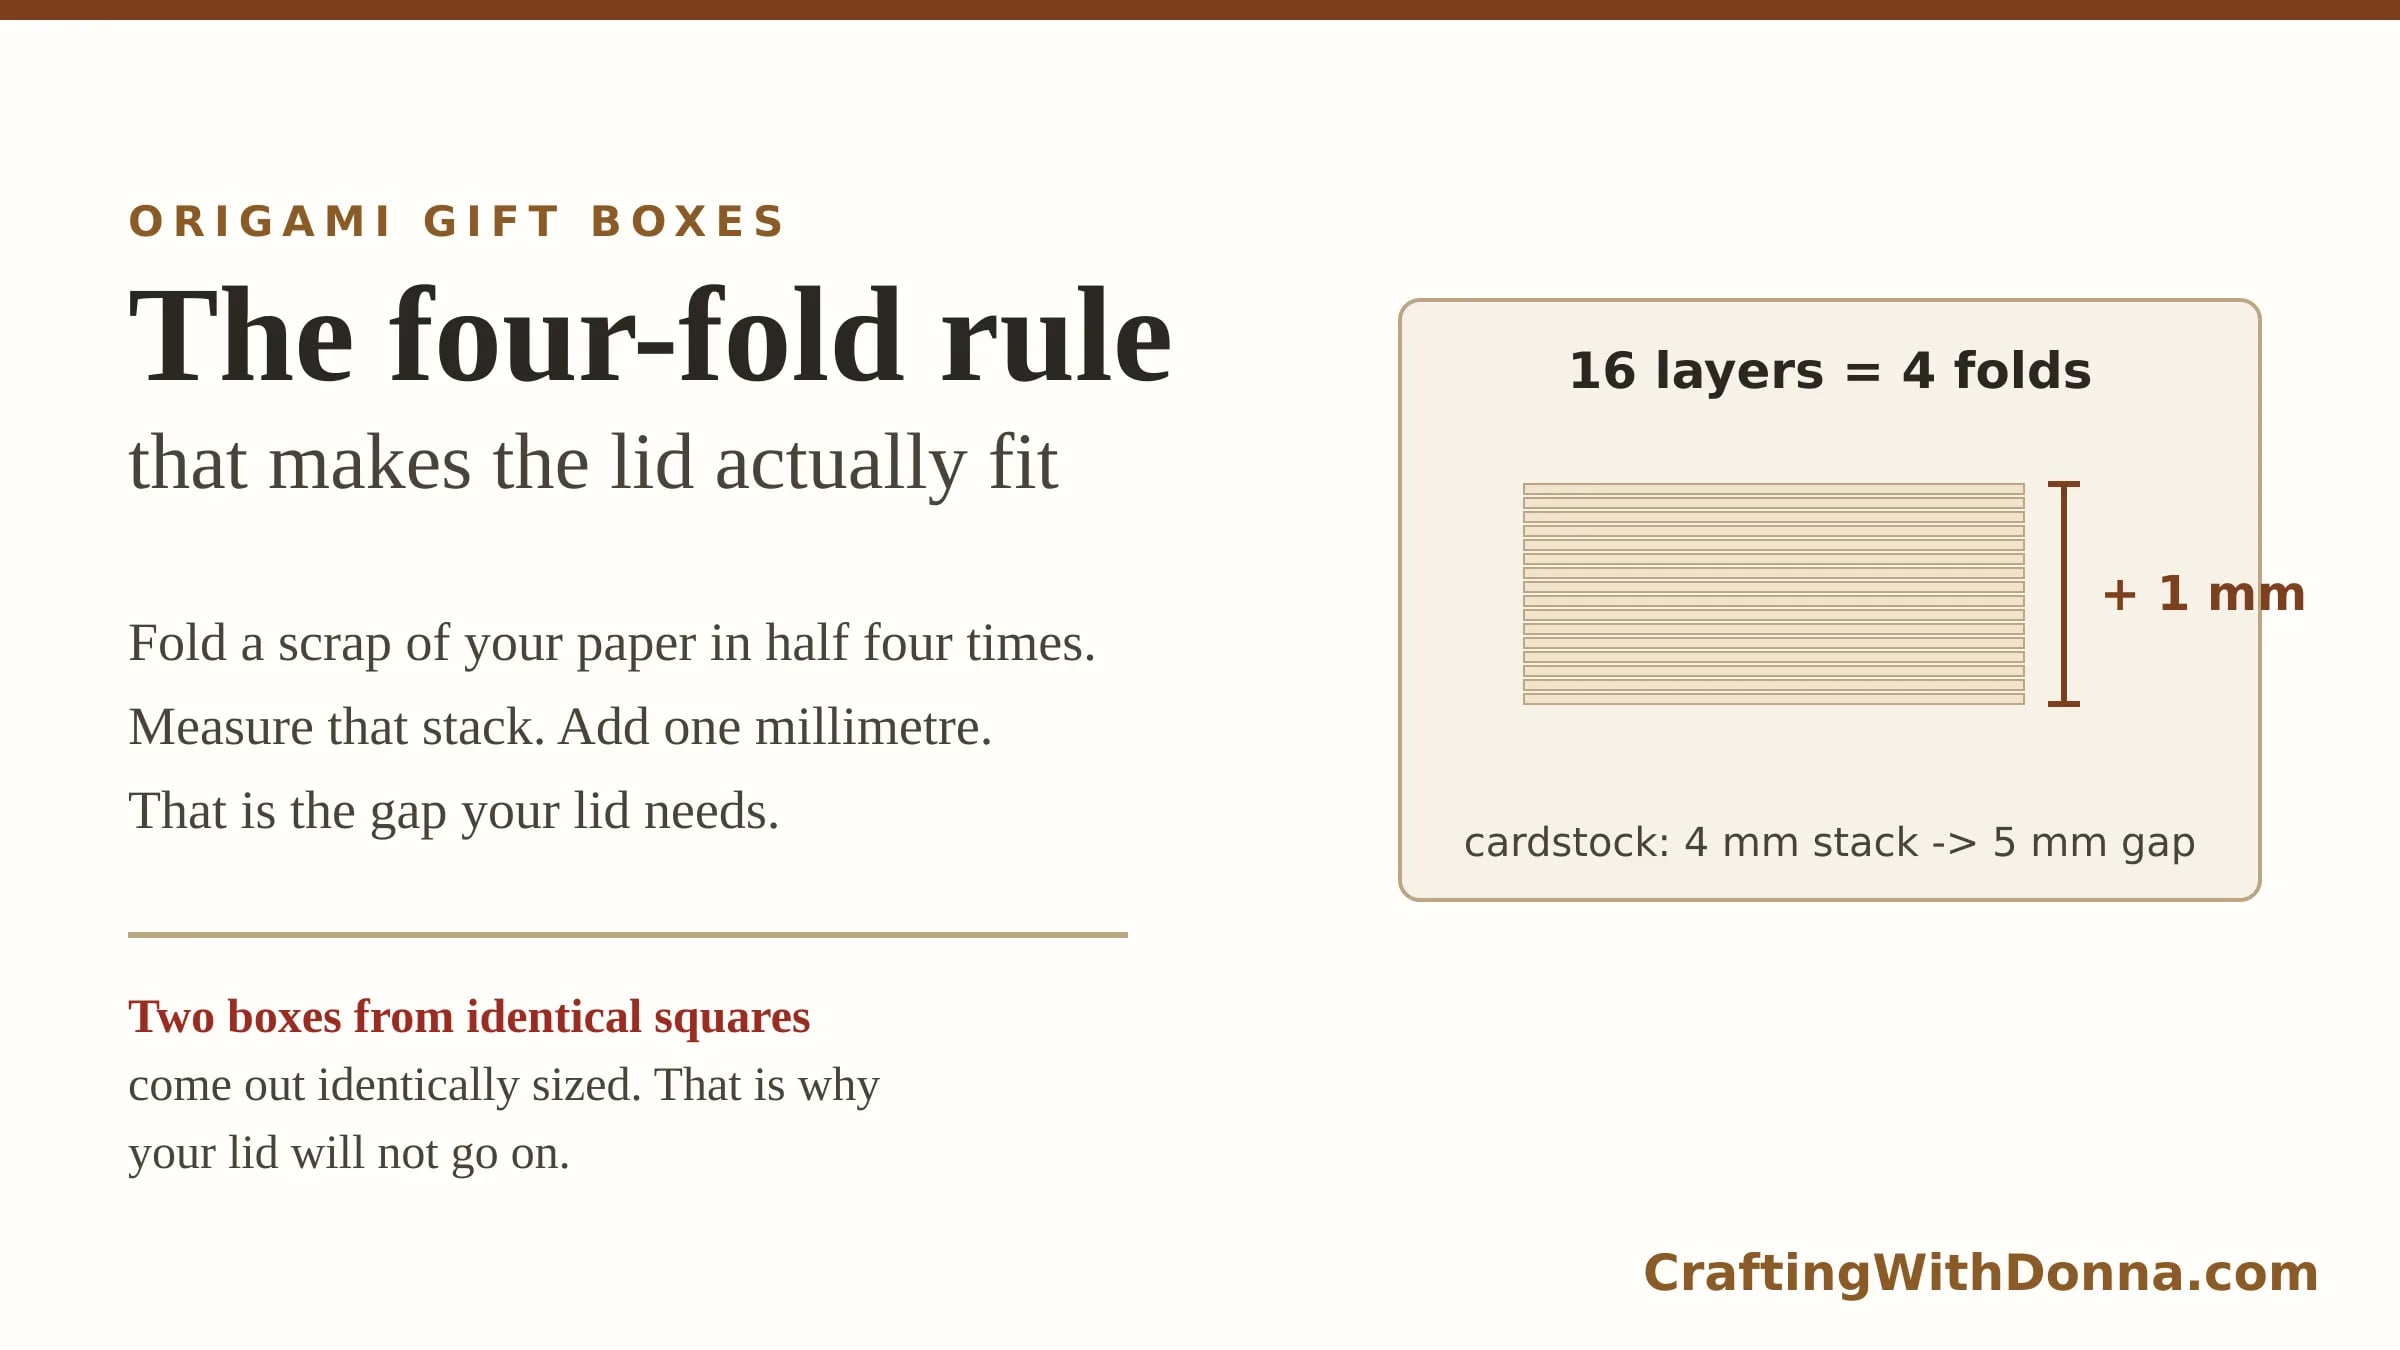
Take a scrap of the paper you are actually using. Fold it in half four times. That gives you sixteen layers, because doubling four times is sixteen. Measure that little stack against a ruler and add one millimetre. That is your gap.
It is not a rough guide. Sixteen thicknesses plus a millimetre is algebraically the same quantity as the fit calculation above, at every paper thickness, so the folded scrap is doing the measuring and the arithmetic at once. Thin paper gives a thin stack and a small gap. Cardstock gives a fat stack and a big one. The paper answers the question about itself.
Two practical notes. Heavy cardstock will not fold in half four times without fighting you, so stack sixteen loose sheets and measure those instead. And round your answer up to the next half millimetre rather than down. A lid a little loose still closes and looks fine. A lid a little tight will not close at all.
If you would rather just read it off a table, here is where common papers land.
| Paper | Thickness | Gap to leave |
|---|---|---|
| Kami origami paper, 60 to 70 gsm | 0.08 mm | 2.5 mm |
| Printer paper, 80 gsm | 0.10 mm | 3 mm |
| Scrapbook paper, 160 gsm | 0.20 mm | 4.5 mm |
| Light cardstock, 200 gsm | 0.25 mm | 5 mm |
| Heavy cardstock, 250 gsm | 0.30 mm | 6 mm |
Notice how far apart the ends of that table are. Someone folding cardstock with the kami number is leaving less than half the gap they need, which is why so many people follow the standard instruction to the letter and still end up with a lid that will not go on.
What size square to cut
The other question that wastes a beginner’s afternoon is what size paper to start with, and it has an equally short answer.
Divide by two root two, or multiply by 2.8 if you want a number you can do in your head. The paper square you need is 2.8 times the box you want. Want a 75 mm box for a bracelet? Cut a 215 mm square. That ratio holds at every size, because it comes out of the folding pattern rather than out of any particular sheet.
Read the other way, your finished box is a bit over a third of your paper, and it is always exactly half as deep as it is wide.
| Paper square | Finished box, inside |
|---|---|
| 150 mm (15 cm origami sheet) | 53 x 53 x 26.5 mm |
| 200 mm | 71 x 71 x 35 mm |
| 210 mm (short side of A4) | 74 x 74 x 37 mm |
| 250 mm | 88 x 88 x 44 mm |
| 300 mm | 106 x 106 x 53 mm |
| 305 mm (12 inch scrapbook sheet) | 108 x 108 x 54 mm |
One thing to know before you cut: leaving the gap on the lid costs you nothing in paper. A five millimetre gap does the same job as cutting the lid square seven millimetres bigger, so you get the growth for free and both your squares stay the same size. That is one measurement to make instead of two, and two identical squares to cut instead of a matched pair you have to keep straight.
Folding the base
Work on a hard flat surface. A bone folder helps every crease and a thumbnail does the job if you do not have one.
- Put the square face down, so the side you want showing is against the table. Fold it corner to corner both ways to mark the centre, then open it flat again.
- Fold all four corners in to meet at that centre point. You now have a smaller square turned on the diagonal. Press every crease hard, because these four carry the shape of the whole box.
- Fold the top and bottom edges of that turned square in to its centre line. Open both back out.
- Turn the paper a quarter turn and do the same with the other two edges, then open those out too. You have ruled a four by four grid without measuring anything.
- Open out two opposite corners so they point away from you. Lift the two side walls up along the creases you just made.
- Bring the two pointed ends up and over into the box, folding the walls square as they come, and press the points flat along the floor. That is the box.
If the walls lean outward, your first four corner folds did not quite meet at the centre. Nothing to do but note it and be tighter on the next one.
Folding the lid
Same six steps, with one change at the second one.
After you crease the diagonals, mark the gap. Measure out from the centre point along each diagonal by half your gap and put a light pencil dot there, so four dots. Fold each corner in to its own dot rather than to the centre. The four corners now sit apart from each other by the full gap, and the rest of the fold carries on exactly as before.
The lid comes out deeper as well as wider, which is what you want. It sits down over the base and covers most of it, which is the look a masu box is supposed to have.
Test the fit before you sharpen the final creases. If it is snug rather than sliding, open the lid’s corner folds and take another half millimetre outward on each dot. If it is sloppy, you have lost nothing, because a loose masu lid still sits square.
What actually fits in one
Here is the honest limit, and I would rather tell you before you fold than after. A masu box is shallow. The depth is under a fifth of your paper square, so even a twelve inch scrapbook sheet, which is the biggest paper most of us own, tops out at 54 mm deep. A hundred millimetre candle does not fit in a masu box, and no amount of clever folding changes that.
What it is very good at is flat and small. A fifteen centimetre sheet gives a 53 mm box that suits earrings, a folded bracelet, a few chocolates, or a keyring. A gift card is 85.6 mm long and will not lie flat in that, so cut a 260 mm square if a gift card is the job.
My favourite use is a soap bar. A 70 mm handmade bar with a little slack all round needs a 212 mm square, which gives a box 75 mm across and 37 mm deep, comfortable for a 25 mm bar. If you have been making melt and pour soap bars, that is your gift wrapped, in nine minutes, with no tape.
On yield: two squares make one lidded box, so a hundred sheet pack of fifteen centimetre paper is fifty boxes. One twelve inch sheet cuts four 150 mm squares, or exactly one 215 mm square with offcuts.
What you need
Some of the links below are affiliate links. If you buy through one, Crafting With Donna may earn a small commission at no extra cost to you.
- A double-sided cardstock or scrapbook pad. Double-sided matters more than you would think, because the corner tucks and the inside of the walls show the reverse of the sheet. A plain white back turns up inside a patterned box.
- Fifteen centimetre origami paper. Cheap, already square, and the right thing for practising the folds before you cut into the good cardstock. Use the 2.5 mm gap with it.
- A bone folder. The one tool that changes the result. Cardstock creases fight back and a bone folder flattens them flat, which is the difference between crisp walls and soft rounded ones.
- A guillotine trimmer. Your squares have to be square. A box folded from a rectangle that is two millimetres out will not sit flat, and that error is much harder to spot than a bad crease.
- A self-healing cutting mat. The printed grid is what makes cutting a true square quick, and it saves your table.
- A cork-backed steel ruler. For measuring the folded scrap and marking the gap dots. The cork stops it sliding on the paper.
You do not need callipers or a micrometer. That is what the folded scrap is for.
Get the size chart
I put the whole thing on one printable page: the paper-square table, the gap table by paper weight, a printed-at-actual-size gap gauge you can hold your folded scrap against, and the fold order for both the base and the lid. Print it at one hundred percent and keep it with your paper.
Download the free Masu Box Size Chart and keep it by your cutting mat.
Fold one for something small this week. Once the lid fits the first time, you will not go back to buying boxes.