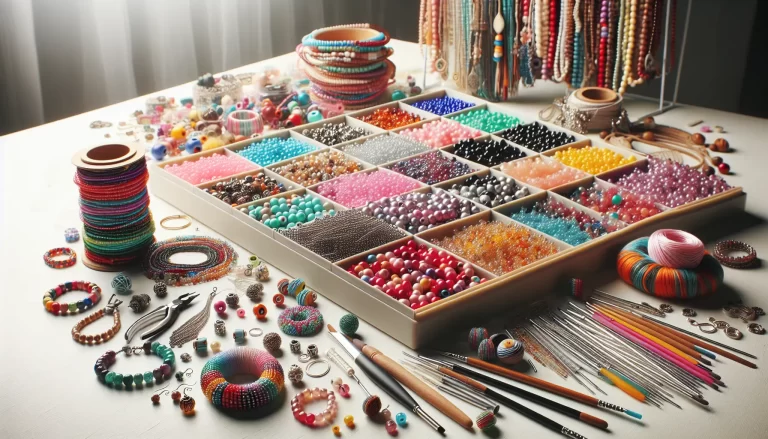
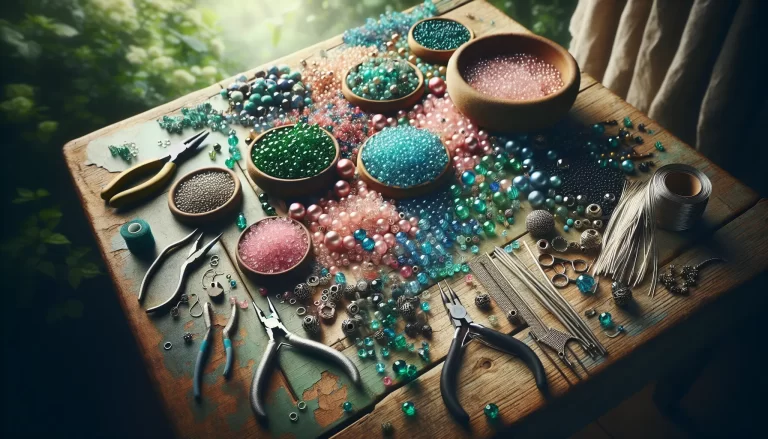
10-Minute Rolled Paper Bead Earrings: The Paper-Thickness Rule That Makes Them Fat Instead of Skinny
Rolled paper beads photograph like little glass barrels and come out of a first batch looking like cut drinking straws. Thin, pale, ridged, and no two the same width. The usual response is to roll the next one tighter, then to cut a longer strip, then to give up and decide that the good ones in the photos must be resin. All three moves are aimed at the wrong thing.
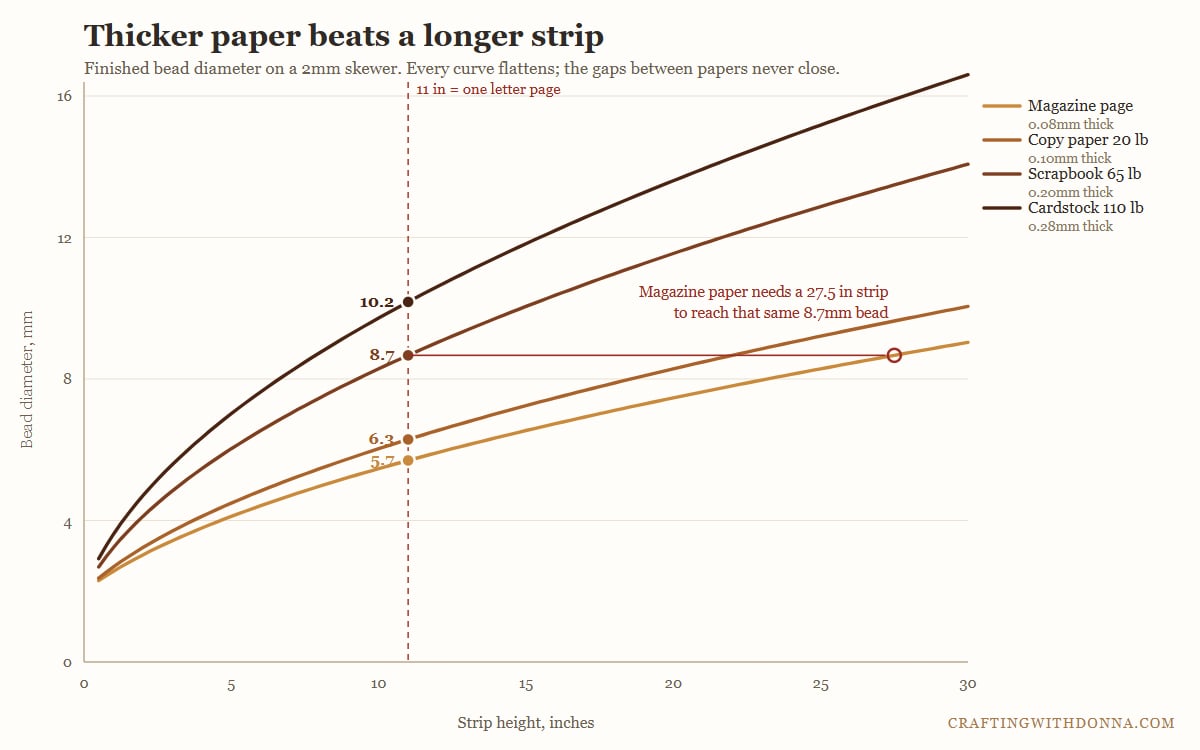
The paper you rolled decides how fat the bead gets. Not the rolling. A strip of magazine page and a strip of scrapbook cardstock, cut to identical size and rolled with identical effort, come off the skewer at 5.7mm and 8.7mm. That is not a subtle difference in the hand. One is a bead and one is a straw.
Once you know that, a matched pair of earrings takes about ten minutes and the beads come out the size you meant them to be. The rest of this is the two measurements that control everything, and the order of operations that keeps the hole open.
What we are making
A pair of drop earrings on paper beads, rolled from a page that was headed for the recycling, sealed until they look like lacquer. One bead a side, a headpin through the hole, a loop at the top, an ear wire. The bead sits about an inch long and a third of an inch fat, which is the size that reads as jewelry rather than as a school project.
Two beads is a ten-minute make including the sealing. A bracelet is seven beads and a rainy afternoon, mostly waiting for coats to dry. The technique does not change between them, so start with the earrings and find out whether you like the process before you cut thirty strips.
Paper beads take a lot of grief for being a kids’ craft, and a lot of that is earned by beads rolled from newspaper on a toothpick with white school glue. Roll the same shape from a good patterned page, seal it, and hang it off a real ear wire and nobody guesses what it is made of. The giveaway is never the paper. It is the skinniness and the fuzzy ends.
The two measurements
Everything about a rolled bead comes from the shape of the strip you cut, and the strip has two dimensions that do two different jobs.
The base width sets the bead’s length. This one is straightforward: whatever width you cut the wide end of the triangle, that is how long the finished bead comes out. Cut a one-inch base, get a one-inch bead. There is no conversion and no shrinkage, because the base edge stays put against the skewer the whole time you roll. Pick the bead length you want, cut that width, done.
The strip height sets the bead’s fatness. This one is where people go wrong, because it does not behave the way it looks like it should. Rolled paper stacks into a ring around the skewer, and the area of a ring grows with the square of its diameter. Doubling the bead’s width means quadrupling the paper inside it. So a longer strip buys you fatness slowly, and it charges you for it.
Paper thickness sits in the same relationship, but it multiplies every single turn. Each wrap of thick paper adds more to the stack than each wrap of thin paper. That is the whole reason the magazine page and the cardstock come out so differently from the same size strip.
What the numbers come out at
Here is every combination on a 2mm bamboo skewer, which is what most of us have. The strip height runs down the side and the paper runs across the top. All the figures are finished bead diameter at the fat point, in millimeters.
| Strip height | Magazine page | Copy paper 20 lb | Scrapbook 65 lb | Cardstock 110 lb |
|---|---|---|---|---|
| 5.5 in | 4.3 | 4.7 | 6.3 | 7.3 |
| 8.5 in | 5.1 | 5.6 | 7.7 | 9.0 |
| 11 in | 5.7 | 6.3 | 8.7 | 10.2 |
| 17 in | 6.9 | 7.7 | 10.7 | 12.6 |
| 22 in | 7.8 | 8.7 | 12.1 | 14.3 |
Read across the 11-inch row, which is one letter page cut the tall way and the strip most tutorials tell you to cut. Magazine gives 5.7mm. Scrapbook cardstock gives 8.7mm from the identical strip.
Now read the other way, because this is the part worth the price of admission. To get an 8.7mm bead out of magazine paper you need a strip 27.5 inches long. That is two and a half letter pages taped end to end, for a bead you could have had by reaching for a different sheet. Want to go further and actually double that first magazine bead, from 5.7mm to 11.4mm? The strip has to be 48.6 inches. Four and a half pages, taped, rolled without the joins showing.
Nobody does that, which is why so many paper beads are skinny. The effort goes into the rolling, and the rolling was never the variable.
What you’ll need
Disclosure: The product links in this supply list are paid affiliate links. Crafting With Donna may earn a commission at no extra cost to you.
Paper you like the look of, thicker than you think. This is the decision that matters, so spend the money here and nowhere else. A pad of patterned 65 lb scrapbook cardstock gives you the 8.7mm bead off a plain 11-inch strip and rolls without cracking. Old magazines and catalogues are free and fine for practicing, and they will always give you a slim bead. Gift wrap is thinner still. (patterned scrapbook cardstock pad)
A paper trimmer. Scissors will cut a strip, but they will not cut forty strips the same, and a pair of earrings needs two beads that match. A small guillotine or rotary trimmer with a printed grid on the bed lets you line up the base width by eye and cut the whole batch in a couple of minutes. This is the tool that turns paper beads from fiddly into fast. (rotary paper trimmer)
Bamboo skewers. The 2mm kitchen sort, and they are the reason all the numbers above work out. A toothpick is thinner and tapered, so the hole comes out uneven and too tight for most headpins. A knitting needle is too fat. Skewers cost almost nothing and you can throw one away when the glue wins. (bamboo skewers)
An acid-free glue stick. Not white school glue, which soaks in and buckles the paper before you have finished rolling. A glue stick goes on dry enough to keep the strip flat and tacky enough to hold the last turn down. Acid-free matters if you want the colors to still be the colors in five years. (acid-free glue stick)
A clear sealer. This is the step that separates a piece of jewelry from a rolled-up piece of paper. Two or three thin coats of gloss decoupage medium or clear acrylic sealer fill the ridges, harden the whole thing, and give it the depth that makes people pick one up. Skip it and you have a paper tube that dents under a thumbnail. (gloss sealer)
Earring findings. A mixed kit of hypoallergenic ear wires, headpins and jump rings costs a few dollars and does twenty pairs. Get the kit with a pair of bent-nose pliers in it if you do not own pliers already, because a loop turned with fingernails always looks turned with fingernails. (earring findings kit)
Find out what your paper actually is
Paper weights on a packet describe mass, not thickness, and two 65 lb pads from different mills can differ enough to matter. There is a quick way around this that costs one bead.
Cut one strip 11 inches tall, roll it on a 2mm skewer, and measure the finished bead across its fattest part. Whatever it measures, find that number in the 11-inch row of the table. That column is your paper, whatever the packet claimed, and every other row in that column will now come true for you. One test bead and the whole chart is calibrated to the paper on your desk.
A ruler will do this if you are careful, though millimeters on a bead are hard to read against a straight edge. The free printable at the bottom has the same measurement as a set of printed circles at actual size, which is a great deal easier: you sit the bead on the circles and find the one it just covers.
Rolling a bead
Cut the strip. Base width equal to the bead length you want, height taken off the table for the fatness you want, tapering to a point at the far end. A long skinny triangle. The point is what ends up on the outside, so cut it clean.
Lay the strip patterned side down, wide end toward you. Whatever is face down is what you will see on the finished bead, which catches everybody once.
Put the skewer across the wide end and roll it up once, keeping the base edge square to the skewer. That first turn sets the alignment for the whole bead. Get it crooked and the bead comes out as a spiral instead of a barrel, and no amount of correcting further up will pull it back.
Roll the rest with steady tension, no glue at all, until you have about two inches of point left. Then run the glue stick over that last two inches only and roll it down.
Glue underneath the whole strip is the single most common mistake here. It makes the paper slip against itself while you roll, so the turns slide out of line and the bead goes cone-shaped. It also swells the paper, and swollen paper dries wavy. The rolled paper holds itself in place by friction. It only needs glue at the very end, to stop the tail lifting.
Slide the bead off the skewer straight away, while the glue is still tacky. Leave it and the glue that squeezed toward the middle sets, and the bead is welded to the skewer permanently. There is no rescuing that one.
Sealing without gluing the hole shut
Brush a thin coat of sealer over the bead, then thread it back onto a clean skewer and rest the skewer across two mugs so the bead hangs in the air. Do the next coat when the first is dry to the touch, and the next after that. Three thin coats beat one thick one every time, because a thick coat runs down to the underside and dries as a drip you can feel.
Threading it back on is the step that keeps the hole open. Sealer wicks into the hole by capillary action and narrows it a little on every coat. With the skewer in place there is nothing for it to close around, and the bead comes off at the end with a hole that still takes a headpin. Dry it lying on newspaper instead and you will spend the evening reaming beads out with a pin.
Give the last coat overnight before you handle it properly. Decoupage medium goes touch-dry in twenty minutes and stays soft for hours, and a fingerprint pressed in at hour two is in there for good.
Turning them into earrings
Thread a headpin up through the bead. Bend the wire over at a right angle just above the bead, trim it to about a third of an inch, and roll that stub into a loop with round-nose pliers, working away from yourself. Open a jump ring by twisting the ends sideways past each other rather than pulling them apart, hook it through your loop and through the ear wire, and twist it closed the same way. Pulling a jump ring open leaves a gap that never quite shuts again.
If the pair looks off when you hold them up, check the bead lengths against each other before you blame the loops. Two strips cut a hair different at the base give two beads a hair different in length, and the eye picks that up on a dangling pair long before it notices a difference in fatness.
How many beads for the other projects
Because bead length equals base width, working out how many beads a project needs is division and nothing else. These counts assume the beads sit end to end with no spacers.
| Project | 1/2 in base | 3/4 in base | 1 in base | 1 1/2 in base |
|---|---|---|---|---|
| Earring pair (2 in) | 4 | 3 | 2 | 2 |
| Bracelet (7 in) | 14 | 10 | 7 | 5 |
| Necklace, short (18 in) | 36 | 24 | 18 | 12 |
| Necklace, long (30 in) | 60 | 40 | 30 | 20 |
Put a seed bead between each paper bead and you need fewer of them, the string drapes better, and the whole piece stops looking like a row of identical objects. For a first necklace, cut every strip from a different page of the same magazine. The colors stay in family and the variation does the work that perfect matching cannot.
Where it goes wrong
Beads come out cone-shaped rather than symmetrical. The first turn went on crooked, or there was glue under the whole strip. Both make the paper track sideways as it rolls.
The bead is stuck on the skewer. It sat too long before you slid it off. Roll and remove, then seal as a separate pass.
Ends look chewed and fuzzy. The base edge was cut with scissors at a slight angle, so the layers do not stack flush. A trimmer fixes this for good.
The pair does not match. Almost always the base widths, rarely the rolling. Cut both strips in the same pass without moving the trimmer guide.
Colours look muddy after sealing. Some inkjet and newsprint inks lift under a wet medium. Test one bead before you seal a batch, and use a spray acrylic sealer instead of a brushed medium on anything printed at home.
Making a batch for craft night
This one is built for a table of people, which is exactly what it gets used for. Cut all the strips ahead on the trimmer, sort them into envelopes by base width, and put a jar of skewers and a couple of glue sticks in the middle of the table. There is nothing sharp, nothing hot, nothing that stains, and someone who has never made anything can produce a decent bead inside two minutes.
Set out one bowl of magazine strips and one of cardstock strips and let people roll one of each. The difference in the two finished beads makes the point faster than any explanation, and from then on everybody at the table picks their paper on purpose.
Get the free strip guide
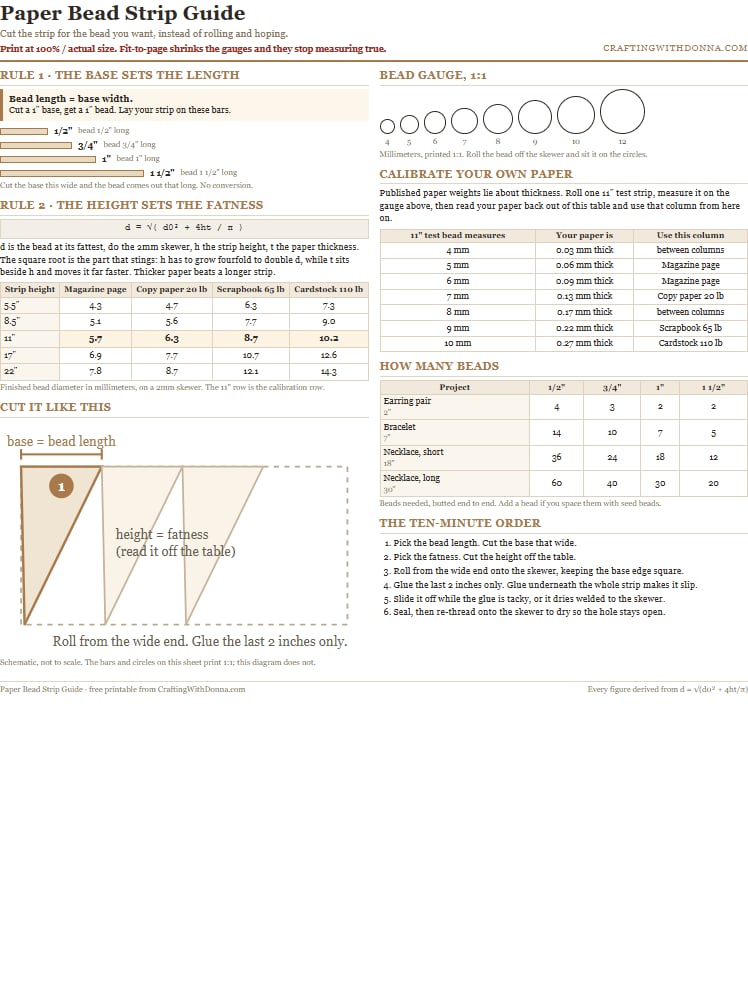
There is a one-page printable to go with this, because the strip sizes are the whole game and you cannot work them out standing at the trimmer with a page in your hand.
It has the full table above, a set of bead-size circles printed at actual size so you can measure a finished bead without squinting at a ruler, a 1:1 ruler for the base widths, the calibration table that tells you what your own paper really is from one test bead, and the bead counts for the common projects. Print it at 100% with no page scaling, because the circles and the ruler only measure true at actual size, and the sheet says so across the top so you do not forget.
Pop your email in the box below and it comes straight to your inbox. Then go and look at the recycling, because there is a catalogue in there with a page good enough to wear.