
knitting-patterns
Knitting Patterns: Complete Guide to Stitches, Techniques, and Projects
There’s something deeply satisfying about the rhythm of knitting needles clicking together while a piece of fabric grows row by row in your hands. I started knitting over twenty years ago with a lopsided garter stitch scarf, and I’ve been hooked ever since. Whether you’re picking up needles for the very first time or you’ve been knitting for decades, there’s always a new stitch to learn, a fresh pattern to try, and another project calling your name from the yarn basket.
Knitting is one of those crafts that rewards you at every level. As a beginner, you can make a beautiful scarf in a weekend. With a bit more practice, you’ll be turning out hats, mittens, and blankets. And once you’ve built confidence with the basics, the world of cables, lace, colorwork, and sweater construction opens up in ways that never stop being exciting. I still get a thrill every time I finish a pair of socks or block a lace shawl for the first time.
This guide is everything I wish someone had handed me when I first learned to knit. I’ve packed it with practical advice on stitches, techniques, tools, and project ideas — organized so you can jump to whatever’s most useful for where you are right now. Think of it as your knitting home base, a place to come back to whenever you need direction or a spark of inspiration.
What You’ll Find in This Guide
- Beginner-friendly patterns and stitches to get you started with confidence
- Common project types — scarves, hats, blankets, sweaters, socks, and more
- Essential tools and materials including needles, yarn weights, and accessories
- Techniques and stitch patterns from garter stitch to cables, lace, and colorwork
- Tips for avoiding common mistakes that trip up new (and experienced) knitters
- Seasonal and gift project ideas for holidays, home decor, and special occasions
- Featured project suggestions with specific details to get you casting on
- Answers to frequently asked questions from real knitters
Getting Started: Knitting Patterns for Beginners
If you’ve never held a pair of knitting needles before, take a deep breath — this is going to be fun. The best knitting patterns for beginners focus on just two stitches: the knit stitch and the purl stitch. Every single knitting pattern in existence is built from combinations of these two basic moves. Master them, and you have the foundation for everything else.
I always tell new knitters to start with a dishcloth or a simple scarf. These are flat, rectangular projects that let you practice your tension and get comfortable with the feel of yarn moving through your fingers. Knitting patterns for scarves using garter stitch (knitting every row) are the simplest place to begin. You don’t need to worry about shaping, counting complicated stitch repeats, or switching between knit and purl. Just cast on, knit, and keep going.
Once your garter stitch feels even and consistent, try stockinette stitch — that’s alternating one row of knit stitches with one row of purl stitches. This creates the classic smooth “V” fabric you see in most store-bought knits. From there, knitting patterns easy for beginners open up quickly: ribbed hat bands, seed stitch washcloths, and simple striped projects that introduce color changes without any complicated techniques.
A few beginner tips that saved me a lot of frustration early on:
- Use light-colored, smooth yarn so you can see your stitches clearly
- Choose medium-weight yarn (worsted or aran weight) and size US 7–9 needles
- Count your stitches at the end of every row until it becomes second nature
- Don’t knit too tightly — most beginners squeeze the yarn, which makes stitches hard to work
- Practice casting on and binding off separately before starting your first real project
Common Knitting Project Types
One of the best things about knitting is the sheer range of projects you can make. Here’s a rundown of the most popular categories and what makes each one worth trying.
Scarves and Cowls
Knitting patterns for scarves remain the most popular starting point, and for good reason. A scarf is forgiving, portable, and satisfying to finish. Once you’re comfortable with basic scarves, cowls (tube-shaped neck warmers knit in the round) are a natural next step. Knitting patterns for hooded scarves combine warmth with style — they’re one of my favorite gifts to make.
Hats and Headbands
Hats are the gateway to knitting in the round. Using circular needles or double-pointed needles, you can knit a basic beanie in an evening. Knitting patterns for beanies and knitting patterns for headbands are great confidence builders because they’re small, quick, and immediately wearable. They also introduce you to decreasing (shaping the crown of a hat) without a huge time commitment.
Blankets and Throws
There’s nothing like wrapping up in a blanket you made yourself. Knitting patterns for blankets range from simple garter stitch squares sewn together to elaborate cable and colorwork designs. Knitting patterns for easy blankets often use chunky or super chunky yarn on large needles, so the fabric grows fast. If you want a quicker finish, knitting patterns using bulky yarn are your best friend.
Sweaters and Cardigans
Making your first sweater is a milestone. Knitting patterns for sweaters range from simple top-down raglans to intricate cabled pullovers. Knitting patterns for cardigans — including knitting patterns for chunky cardigans and knitting patterns for long cardigans — are incredibly popular because they’re versatile to wear and forgiving on fit. Many modern knitting patterns use top-down construction, which lets you try the sweater on as you go.
Socks and Mittens
Sock knitting is almost a craft within a craft — once you start, you may never stop. Knitting patterns for socks teach you about working with fine yarn, turning heels, and picking up stitches. Knitting patterns for mittens and knitting patterns for gloves are equally rewarding small projects, perfect for using up special hand-dyed yarn that’s too precious for larger projects.
Toys, Home Decor, and Gifts
Knitting patterns for teddy bears and knitting patterns for dolls make heartfelt gifts for children. Knitting patterns for animals — cats, rabbits, dogs — are charming to display or give away. On the practical side, knitting patterns for dishcloths and knitting patterns for tea cosies are quick projects that also make wonderful housewarming gifts.
Essential Knitting Stitches and Techniques
Understanding knitting stitches and patterns is what transforms you from someone who can follow instructions into a knitter who understands why the fabric behaves the way it does. Here are the core techniques worth learning, roughly in order of complexity.
Foundation Stitches
Garter stitch — Knit every row. Creates a squishy, reversible fabric with horizontal ridges. Knitting patterns using garter stitch are ideal for beginners and produce fabric that lies flat without curling. Stockinette stitch — Knit one row, purl one row. The smooth side shows the classic “V” pattern. Most garments use stockinette as their base fabric. Seed stitch — Alternate knit and purl across each row, offsetting them on the next row. Creates a beautiful textured fabric that’s great for borders and standalone projects.
Intermediate Techniques
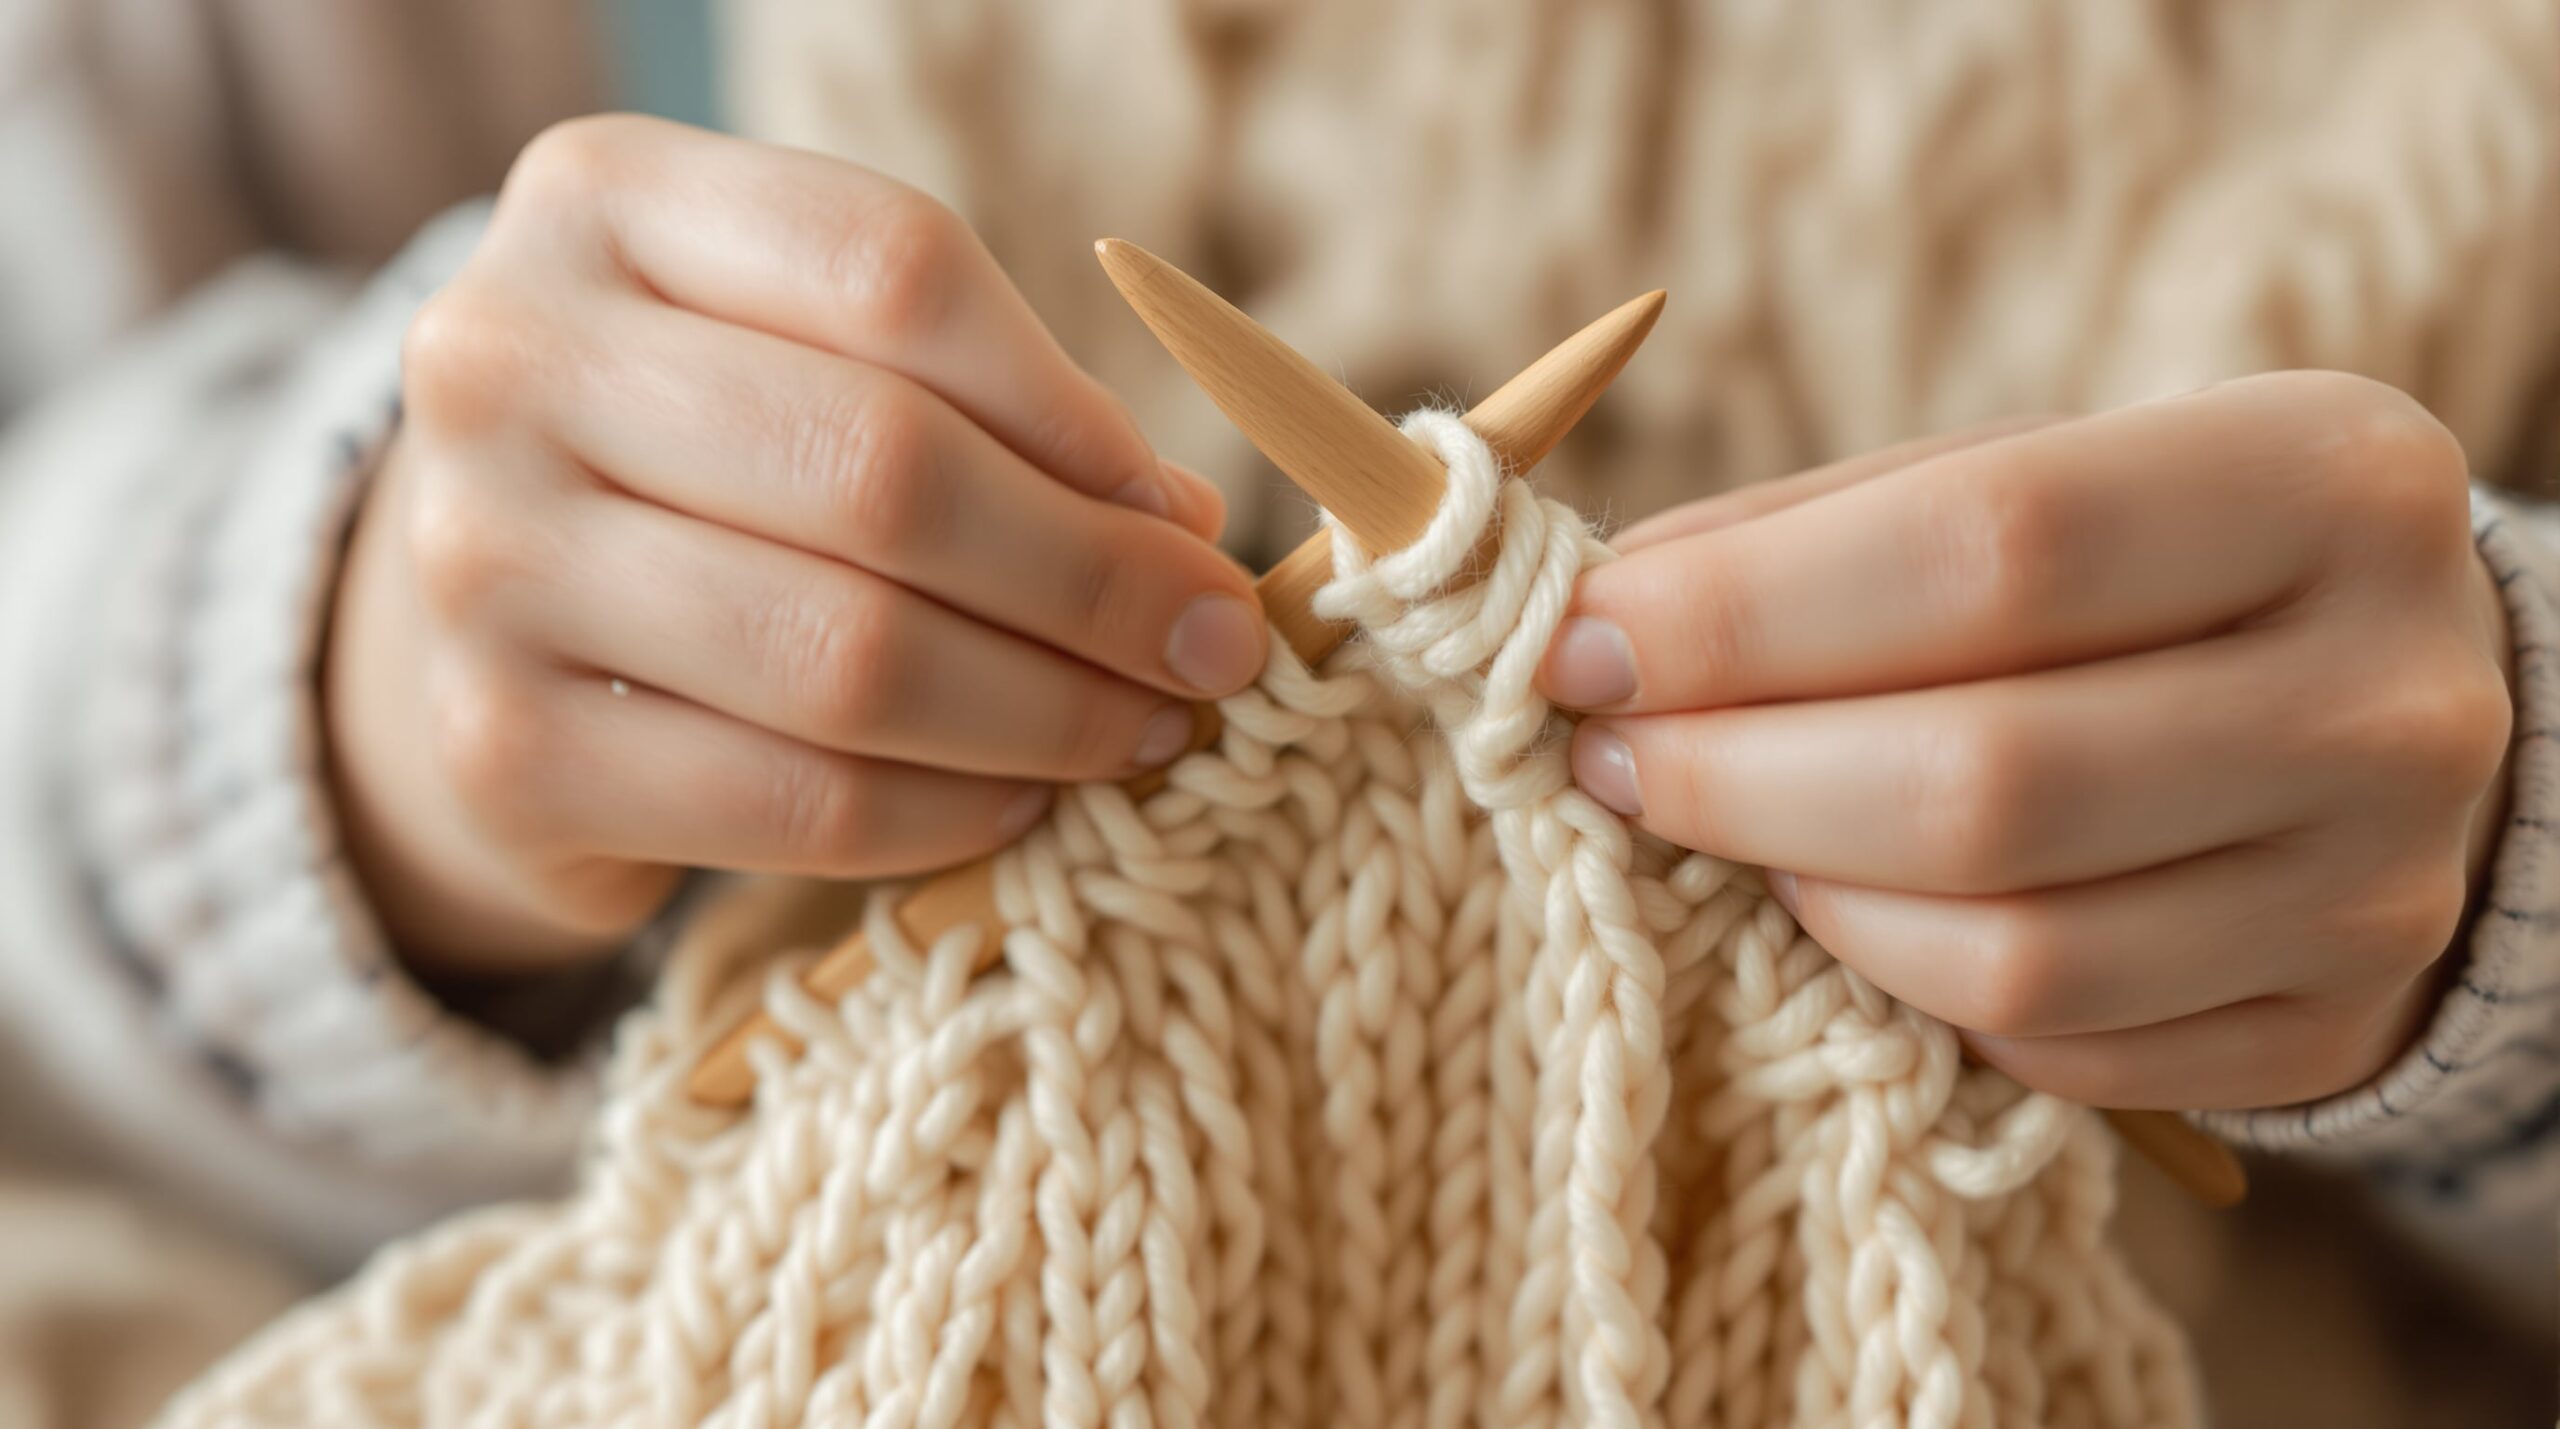
Ribbing — Alternating columns of knit and purl (like K2, P2) creates stretchy fabric used for hat brims, cuffs, and necklines. Cable knitting — Crossing groups of stitches over each other creates those gorgeous rope-like patterns. Knitting patterns with cables look complex but use a simple cable needle to hold stitches temporarily. Once you try one cable panel, you’ll want to cable everything. Knitting in the round — Using circular needles or double-pointed needles to knit tubes for hats, socks, and seamless sweaters. Knitting patterns in the round eliminate most seaming.
Advanced Techniques
Lace knitting — Yarn overs and decreases create open, decorative fabric. Knitting patterns for lace produce stunning shawls, scarves, and garment details. Knitting patterns for lace weight yarn demand patience but reward you with heirloom-quality pieces. Colorwork — Knitting with multiple colors in a single row. Stranded colorwork (Fair Isle), intarsia, and mosaic techniques each produce different effects. Knitting patterns for colorwork let you create pictorial designs, geometric motifs, and richly patterned garments. Top-down construction — Starting at the neckline and working down. Knitting patterns top down are popular for sweaters because you can try on the garment as you go and adjust length easily.
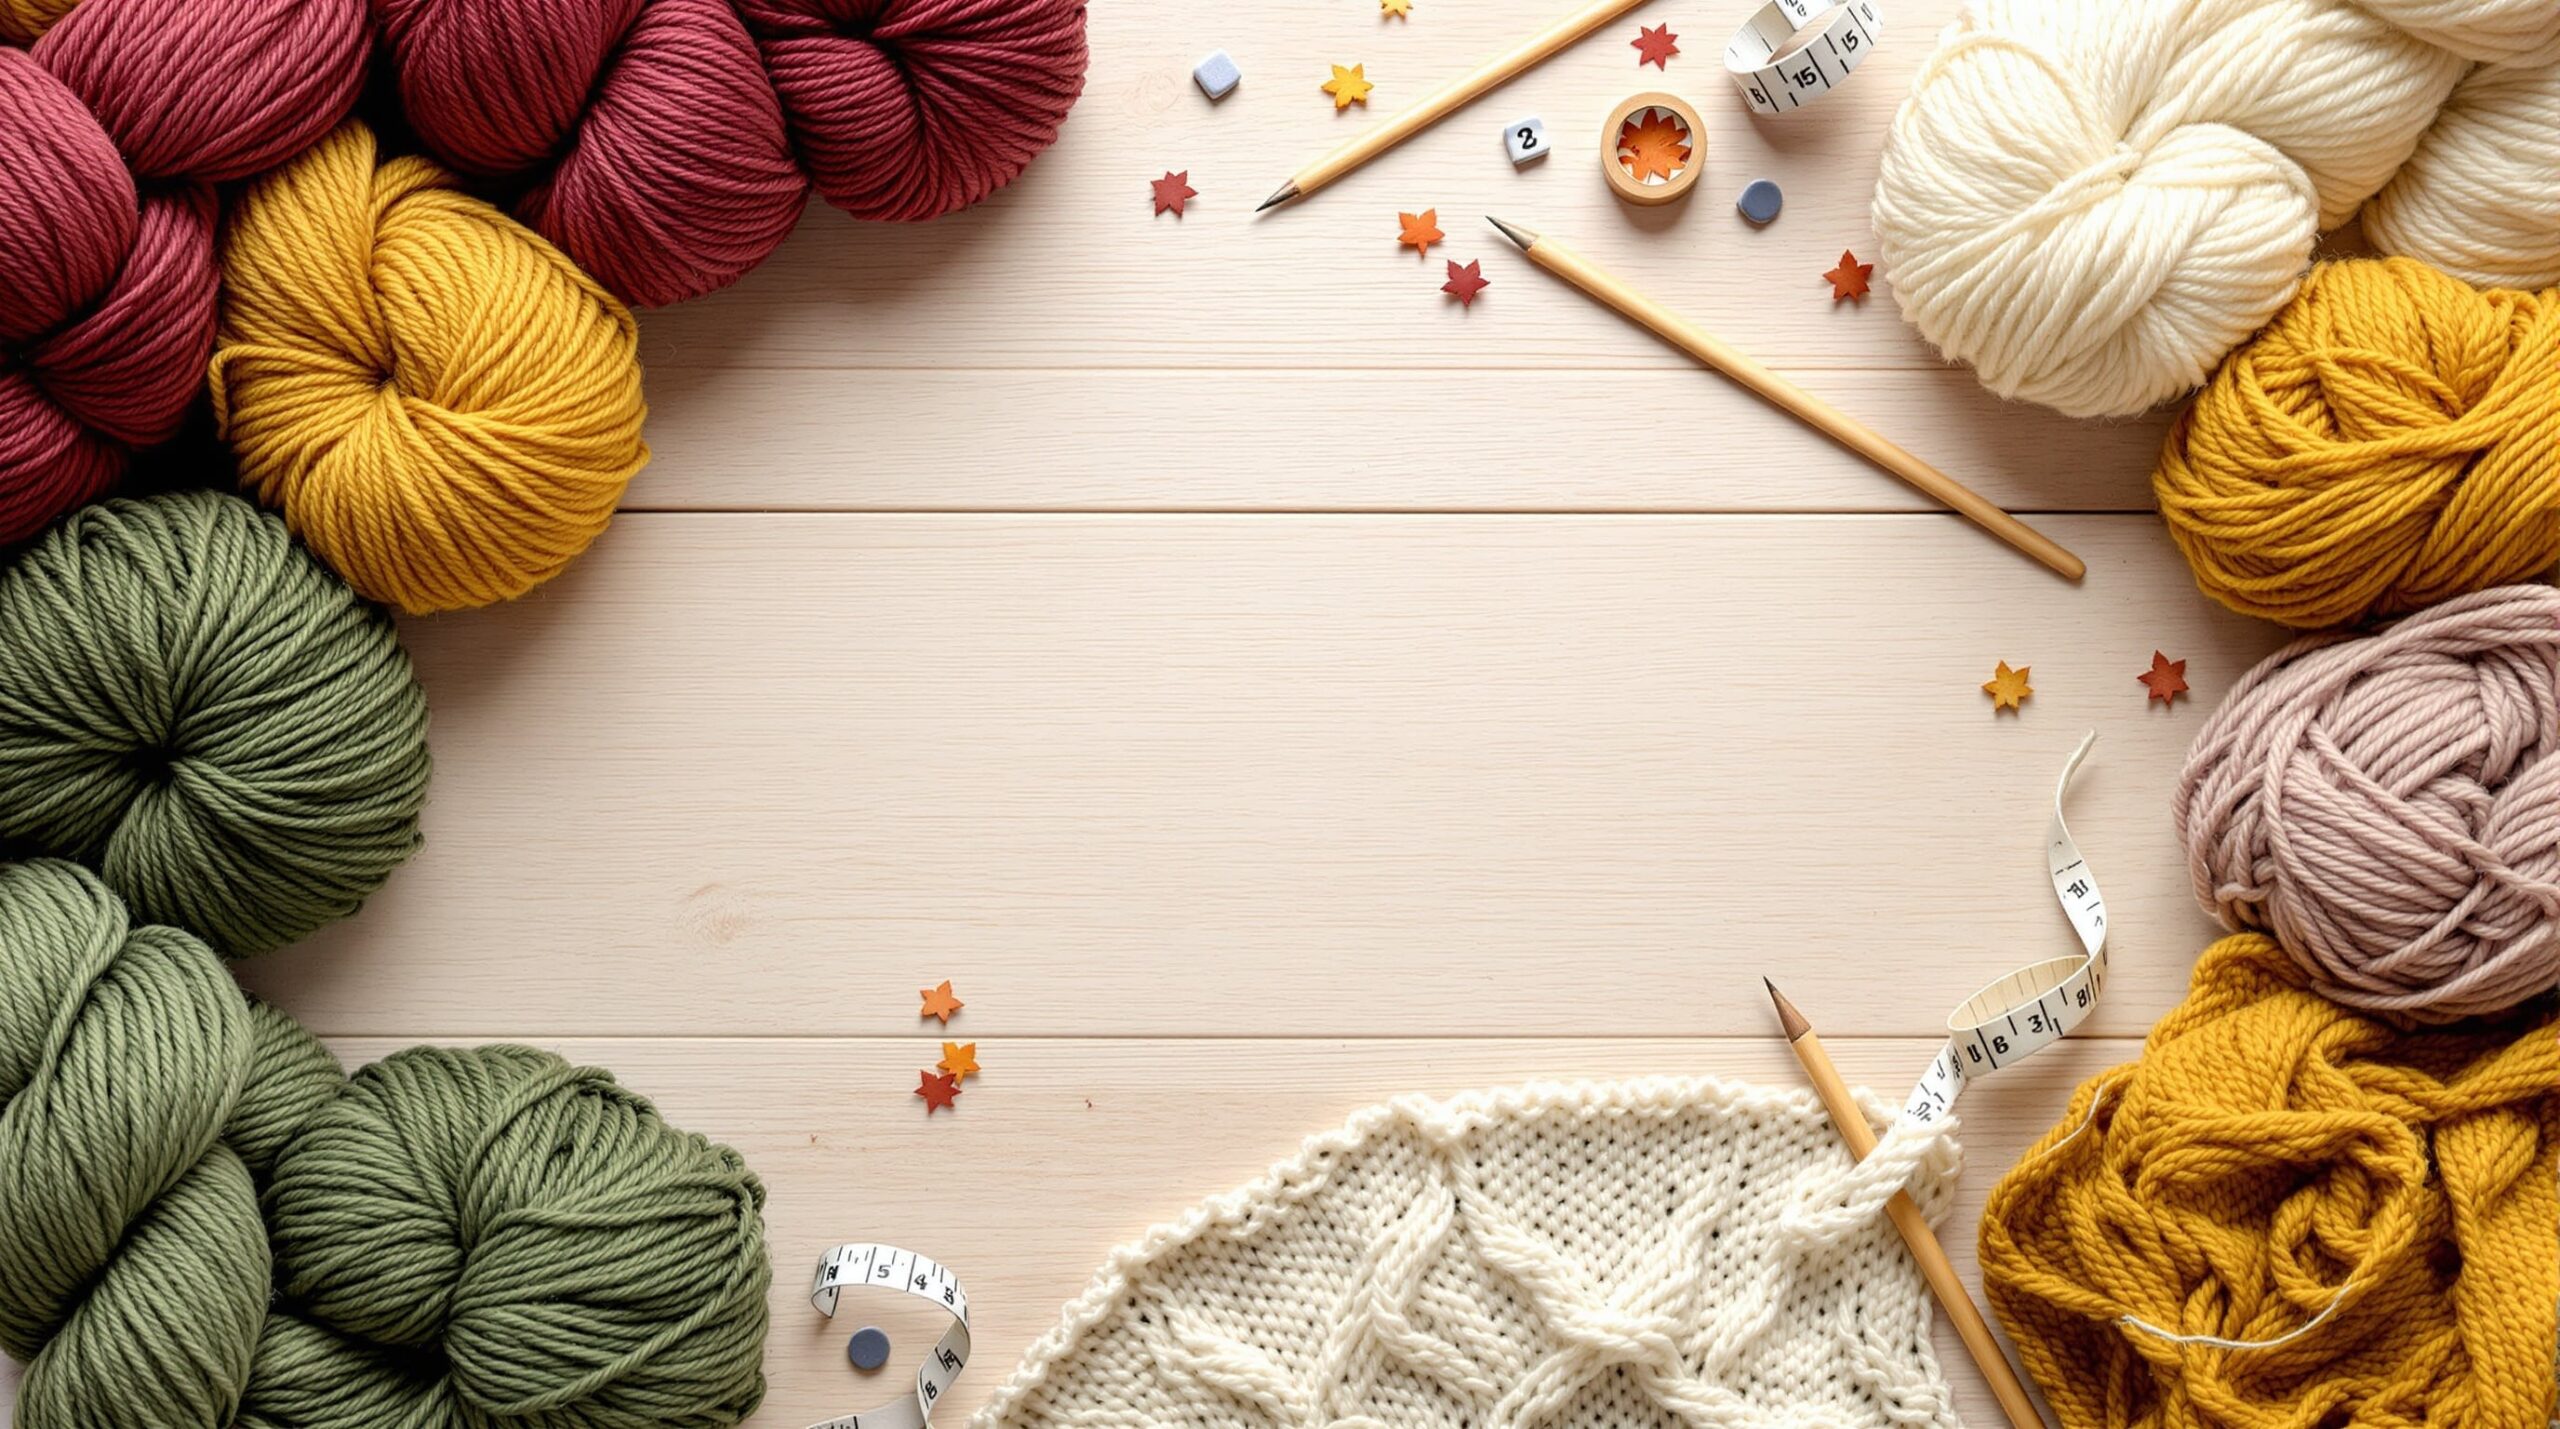
Tools and Supplies Every Knitter Needs
You don’t need much to start knitting, but having the right tools makes a real difference in your experience. Here’s what I recommend based on where you are in your knitting practice. If you’re building a broader crafting toolkit, check out my guides on essential craft supplies and essential craft tools for more recommendations.
Needles
Straight needles — The classic pair of long, single-pointed needles. Good for flat projects like scarves and dishcloths. Knitting patterns with straight needles are the most beginner-friendly format. Circular needles — Two short needle tips connected by a flexible cable. Essential for knitting in the round and comfortable for large flat projects too. Double-pointed needles (DPNs) — Sets of four or five short needles used for small circumference knitting like socks, mittens, and hat crowns. Interchangeable needle sets — A worthwhile investment once you’re committed. They let you swap needle tips onto different cable lengths, covering nearly every project situation.
Yarn
Yarn weight matters more than brand. Here’s a quick reference:
- Lace/Fingering — Fine yarn for socks, shawls, and delicate garments. Knitting patterns using sock yarn typically call for this weight.
- DK/Worsted — Medium weight, the most versatile. Works for almost everything from hats to sweaters.
- Aran — Slightly heavier than worsted. Knitting patterns aran weight produce warm, structured fabric ideal for cables.
- Chunky/Super Chunky — Thick yarn that knits up fast. Knitting patterns for chunky wool and knitting patterns for super chunky yarn are perfect for quick blankets and cozy cardigans.
- Cotton — Great for warm-weather projects, dishcloths, and summer tops. Knitting patterns in cotton produce crisp, breathable fabric.
Accessories
A few small tools make a big difference: stitch markers for keeping track of pattern repeats, a tapestry needle for weaving in ends, a row counter, scissors, and a knitting pattern holder to keep your instructions visible while you work. A good project bag keeps everything organized — if you’re anything like me, you’ll end up with several for different works in progress. For more ideas on keeping your craft space tidy, my craft organization tips can help.
Tips, Techniques, and Best Practices
After years of knitting, these are the habits and techniques that have made the biggest difference in my finished projects.
Always Swatch
I know, I know — nobody wants to hear this. But knitting a gauge swatch before starting a garment will save you from heartbreak. A sweater knit at the wrong gauge can end up several sizes too big or too small. Swatch, wash and block the swatch, then measure. It takes thirty minutes and prevents days of wasted effort.
Learn to Read Your Knitting
This is a game-changer. Once you can look at your fabric and identify knit stitches, purl stitches, yarn overs, and decreases, you can catch mistakes immediately instead of discovering them ten rows later. Spend time studying your work — notice how a knit stitch makes a V, how a purl stitch creates a bump, and how a dropped stitch looks different from the surrounding fabric.
Block Everything
Blocking — wetting or steaming your finished knitting and pinning it to shape — transforms lumpy, uneven fabric into something polished and professional. Lace especially needs blocking to open up the stitch patterns. Even a simple stockinette hat looks better after a quick soak and lay-flat dry.
Keep Notes
Write down modifications you make to patterns — needle size changes, extra length added, yarn substitutions. Future you will be grateful. I keep a small notebook in my project bag, and it’s one of the most useful tools I own.
Common Knitting Mistakes and How to Fix Them
Every knitter makes mistakes. The difference between a frustrated knitter and a confident one is knowing how to fix them.
- Dropped stitches — Use a crochet hook to pick them back up through each row’s ladder. Practice this on a swatch before you need it in a project.
- Uneven tension — Usually improves with practice. Try to hold the yarn consistently and avoid pulling it too tight after each stitch. Continental style knitting (holding yarn in the left hand) can help some people achieve more even tension.
- Twisted stitches — Happen when you wrap yarn the wrong direction or place stitches back on the needle incorrectly. Learn to identify the leading leg of each stitch.
- Accidental increases — Usually caused by picking up the bar between stitches or bringing the yarn to the front at the wrong time. Count stitches regularly.
- Tight cast-on or bind-off — Use a needle one or two sizes larger for casting on and binding off. This prevents puckered edges.
- Curling stockinette — This is normal, not a mistake. Blocking helps, and adding borders of garter stitch, seed stitch, or ribbing eliminates the curl entirely.
Seasonal and Gift Knitting Projects
Knitting and the seasons go hand in hand. Some of my favorite projects are tied to specific times of year — and knitting handmade gifts adds something store-bought presents simply can’t match.
Fall and Winter
This is peak knitting season. Knitting patterns for Christmas stockings, knitting patterns for Christmas decorations, and free knitting patterns for xmas decorations keep my needles busy from September onward. Warm accessories — hats, mittens, neck warmers, and leg warmers — make perfect gifts. Knitting patterns for chunky cardigans and cable-knit throws are ideal for cozy evenings. If you enjoy holiday crafting across multiple disciplines, you’ll find more seasonal inspiration in my holiday craft ideas guide.
Spring and Summer
Warmer months are perfect for lightweight projects. Knitting patterns for summer tops, knitting patterns for tank tops, and knitting patterns for vest tops in cotton or linen yarn are breezy and wearable. Knitting patterns for cotton yarn produce crisp market bags and spa cloths. Lace-weight shawls work beautifully as light layers for cool summer evenings.
Holiday and Special Occasion Gifts
Handknit gifts show real thoughtfulness. Knitting patterns for gifts include quick projects like dishcloths, headbands, and coffee cup cozies as well as bigger commitments like sweaters and blankets. Knitting patterns for Easter produce adorable baskets and egg cozies. Knitting patterns for Halloween can include spooky dishcloths and costume accessories. For more gift-worthy craft ideas, check out the guides on sewing projects and embroidery patterns — handmade gifts in any fiber art are always appreciated.
Featured Knitting Project Ideas
Here are specific projects I recommend for different skill levels. Each one teaches useful techniques while producing something you’ll actually want to use or give away.
Beginner: Garter Stitch Dishcloth Set
Cast on 40 stitches with worsted-weight cotton yarn and size US 7 needles. Knit every row until you have a square. Bind off. Make three or four in coordinating colors, tie them with ribbon, and you’ve got a thoughtful housewarming gift. This project teaches casting on, the knit stitch, binding off, and weaving in ends — every fundamental skill in one small package.
Beginner-Intermediate: Ribbed Beanie
Using worsted-weight yarn and size US 8 circular needles (16-inch), cast on 80 stitches and join for knitting in the round. Work in K2, P2 ribbing for about 7 inches, then decrease for the crown. This hat introduces circular knitting, ribbing, and basic shaping. You’ll finish it in a couple of evenings and have a warm, stretchy hat that fits almost everyone.
Intermediate: Cable Scarf
A six-stitch cable panel flanked by reverse stockinette creates a classic, timeless scarf. Use aran-weight yarn and size US 9 needles. The cable crossing happens every sixth row, giving you plenty of plain knitting between the action. This project builds cable confidence and produces a scarf that looks far more complicated than it actually is.
Intermediate: One-Skein Mittens
Knitting patterns for one-skein projects are great for using up single skeins of special yarn. A pair of basic mittens uses about 200 yards of worsted-weight yarn on double-pointed needles. You’ll learn thumb gusset construction, Kitchener stitch for a seamless tip, and the satisfaction of knitting patterns for mittens that actually keep your hands warm.
Advanced: Top-Down Raglan Sweater
A top-down raglan is the most accessible sweater construction for a first garment. Starting at the neckline, you increase at four points to create the yoke, then separate sleeves and body. Knitting patterns top down let you try the sweater on as you work, adjusting length and fit. Use a smooth DK or worsted-weight yarn so you can clearly see your stitches and count your increases.
Advanced: Colorwork Hat
Stranded colorwork (Fair Isle) produces stunning patterned knitting. Start with a hat — it’s small enough to be manageable while you learn to carry two colors across a row. Knitting patterns for colorwork using just two colors per row are the easiest entry point. Choose high-contrast colors so the pattern pops, and don’t worry about your floats being perfect on the first try. Colorwork gets smoother with every project.
How Knitting Connects to Other Crafts
One of the things I love about knitting is how naturally it connects to other fiber and handwork disciplines. If you enjoy the meditative rhythm of knitting, you’ll likely love crochet tutorials — many knitters pick up crochet for edgings, borders, and projects that work up differently. The combination of knitting and crochet skills makes you incredibly versatile.
Macramé patterns share knitting’s love of working with yarn and cord to create textured fabric and home decor. Embroidery patterns offer a way to add decorative details to knitted garments — duplicate stitch on knitting is essentially embroidery on a knit grid. And if you enjoy making wearable items, sewing projects complement knitting perfectly, from adding fabric linings to knit bags to constructing garments that combine knit and woven fabrics.
For knitters who love working with beads, beading projects can be integrated directly into knitting with beaded knitting techniques — knitting patterns with beads add sparkle to shawls and accessories. And no matter what crafts you practice, having a well-organized workspace makes everything more enjoyable. My craft organization tips guide covers yarn storage, needle organization, and pattern management.
Frequently Asked Questions About Knitting
What’s the easiest knitting project for a complete beginner?
A garter stitch dishcloth or scarf. You only need to know one stitch (the knit stitch), and the project is flat and rectangular — no shaping required. Use medium-weight cotton yarn and size US 8 needles. You’ll have a finished, usable project in just a few hours.
What’s the difference between knitting and crocheting?
Knitting uses two needles and creates fabric by interlocking loops in rows. Crochet uses one hook and builds fabric one stitch at a time. Knitted fabric tends to be thinner and more drapey, while crocheted fabric is thicker and sturdier. Many crafters enjoy both — they produce different textures and are suited to different types of projects.
How much yarn do I need for a scarf?
For a standard adult scarf about 6 inches wide and 60 inches long in worsted-weight yarn, plan on roughly 300–400 yards. A chunky yarn scarf uses less yardage (about 150–200 yards) because the stitches are larger. Check your pattern for specific requirements, and always buy an extra skein if you’re unsure — you can always use leftovers for other projects.
What are the best knitting needles for beginners?
Bamboo or wooden needles in size US 7–9 are ideal for beginners. They have a slight grip that prevents stitches from sliding off, unlike slippery metal needles. Start with straight needles for flat projects, then add a set of circular needles when you’re ready to knit hats or work on larger projects.
Can I knit a sweater as a beginner?
Yes, but I’d recommend completing a few smaller projects first — a scarf, a hat, and a pair of mittens or a dishcloth. These build the skills you need for sweater construction: knitting in the round, basic shaping, and maintaining even tension over many stitches. An experienced-beginner-friendly top-down raglan sweater is a realistic first garment after a few months of practice.
Where can I find free knitting patterns online?
Ravelry is the largest database of knitting patterns, with thousands of free options. Yarn company websites also publish free patterns to showcase their products. Knitting patterns online free are widely available for every project type and skill level. Many independent designers offer at least one or two free patterns on their personal websites or through pattern platforms.
How do I fix a dropped stitch without unraveling my whole project?
Grab a crochet hook in a size close to your knitting needles. Insert it through the dropped stitch from front to back, catch the horizontal ladder bar above it, and pull it through. Repeat for each row the stitch has dropped. Work carefully to make sure you’re pulling the bars through in the right order. This is one of the most useful skills in knitting, and it’s worth practicing on a swatch before you need it in a real project.
What’s the best way to store yarn?
Keep yarn in a cool, dry place away from direct sunlight. Clear plastic bins or cotton bags work well for storage — avoid airtight containers where moisture can get trapped. Cedar blocks or lavender sachets help deter moths, which are the biggest threat to natural fiber yarn. Organize by weight or color for easy project planning. For more storage ideas, see my craft organization tips.
Final Thoughts: Why Knitting Is Worth Every Stitch
Knitting gives you something few other hobbies can match: a productive, meditative practice that results in beautiful, useful objects you can wear, gift, and treasure. Whether you’re working through your first scarf or designing your own colorwork sweater, every row is a small accomplishment that adds up to something real.
I’ve been knitting for over two decades, and I still learn something new with almost every project. That’s part of what keeps it exciting. There’s always a technique to refine, a stitch pattern to explore, or a yarn fiber to experiment with. If you’re just getting started, be patient with yourself. Those first few inches of knitting might look a little wobbly, but I promise — your hands will find their rhythm, your tension will even out, and before you know it, you’ll be casting on your next project before you’ve even bound off the current one.
Grab your needles, pick a pattern that excites you, and start stitching. I’ll be here with more project ideas, technique guides, and inspiration whenever you need it. Happy knitting!
How To Knit A Fruit Salad Vest

This eyecatching garment, the Fruit Salad Vest from Vanessa Ewing, beautifully merges textile art with playful fashion, perfect for knitters who adore vivid fruit motifs and sophisticated techniques. This intricate knitting pattern showcases remarkable colorwork complexity, featuring delightful charted designs of strawberries, grapes, peaches, blueberries, and kiwi.
Crafted using sock yarn, the vest promises exceptional comfort and a lightweight feel, making it ideal for warm weather clothing and effortless layering.
Dive into a rewarding knitting project, creating a truly unique piece with up to 13 colors, smartly utilizing mini skeins or scrap yarn for each delightful motif.
Prepare for charming cap sleeves, a stylish split hem, and neat ribbed armholes as you begin this engaging intermediate to advanced knitting project.
Let’s now explore how to select the perfect yarn for your Fruit Salad Vest creation.
Choosing Your Fruit Salad Vest Yarn
Selecting the correct yarn forms the foundation for your Fruit Salad Vest, ensuring your vibrant fruit motifs and summery style truly shine. Opting for sock yarn or other fingering weight fibers guarantees your finished vest will be wonderfully breathable and lightweight, an excellent choice for seasonal apparel or comfortable summer layering.
Prioritize yarns that offer superior stitch definition; this allows your detailed charted designs, such as realistic grapes and peaches, to display with absolute clarity and visual appeal.
Consider natural fiber blends like cotton or linen for added breathability and cool comfort.
As the pattern specifies using up to 13 colors to achieve accurate fruit shading, employing mini skeins or scrap yarn not only guarantees authentic fruit depiction but also keeps your knitting project economical and creatively satisfying. This approach to yarn selection is key for defining the knitting techniques required.
Yarn Weight and Fiber
Knitting pattern success often hinges on the right yarn choice; therefore, select sock yarn for your Fruit Salad Vest to achieve that sought-after lightweight summer feel. Think about yarns with excellent stitch definition, which is absolutely essential for making your beautiful fruit motifs and intricate charted designs appear crisp and clear.
Exploring natural fibers such as cotton or linen blends can provide exceptional breathability, enhancing the comfort of this summer vest.
Color Palette Considerations
The Fruit Salad Vest pattern calls for 13 colors, offering a fantastic opportunity to experiment with your stash.
Experimenting with mini skeins or leftover scraps is a wonderful strategy for acquiring the diverse palette needed for accurate fruit depiction, making this knitting project both economical and a testament to your creative crafting skills. You can even customize the background colors while maintaining realistic fruit colors for the vibrant motifs.
Gauge and Swatching
Before starting your Fruit Salad Vest, always knit a gauge swatch. This step is fundamental for accurate garment construction and ensures your piece matches the specified chest measurements and desired positive ease.
Proper color blending and managing floats are also essential; ensure floats are kept loose to prevent puckering, a common issue in complex colorwork projects.
This attention to detail in your knitting techniques will result in a beautifully finished piece of wearable art.

Understanding Vanessa Ewing’s Knitting Pattern
Fruit Salad Vest construction begins with selecting vibrant sock yarn, the initial step for recreating Vanessa Ewing’s acclaimed knitting pattern. This yarn craft emphasizes bottom up knitting, ensuring seamless round knitting from the split hem upwards.
Deciphering the charted designs for each fruit motif is key; accurate fruit depiction for grapes, peaches, blueberries, strawberries, and kiwi requires careful attention to these intricate colorwork charts, stitch by stitch.
Knitters must follow instructions for the split hem and cap sleeves for relaxed sleeve shaping, a result of minimal armhole shaping and the inclusion of ribbed armholes.
Proficiency in steeking—reinforcing and cutting the fabric for armhole creation—unlocks advanced garment construction for this summery, cheerful wearable art.
Mastering Colorwork Fruit Motifs
Colorwork complexity truly elevates the Fruit Salad Vest, enabling vibrant motifs across each summer vest. Practice your stranded knitting techniques using several mini skeins, organizing your 13 colors for efficient motif transitions and simplified yarn organization.
Consciously manage your yarn floats to prevent puckering, maintaining loose tension for smooth fiber arts. This careful management aids in color blending for realistic fruit colors, enhancing grapes, peaches, blueberries, strawberries, and kiwi naturally.
The pattern designer, Vanessa Ewing, encourages intermediate knitters and advanced knitters alike to create a gauge swatch and experiment, ensuring your creation boasts excellent stitch definition and the eyecatching garment appeal perfect for warm weather clothing and playful designs.
- The Fruit Salad Vest pattern utilizes bottom-up knitting, incorporating round knitting from a split hem.
- The design features specific fruit motifs: grapes, peaches, blueberries, strawberries, and kiwi, requiring attention to charted designs.
- Creating the vest involves techniques like steeking for armhole construction and includes ribbed armholes and cap sleeves for shaping.
- The pattern calls for the use of 13 different colors, emphasizing stranded knitting techniques and careful yarn management for colorwork complexity.
How To Knit A Striped Vest For Kids Pattern

Crafting a playful striped vest brings immense joy to children’s knitwear. This beginner-friendly kids’ vest knitting pattern guides you in creating a vibrant, personalized layer with simple, accessible techniques, perfect for those venturing into DIY children’s clothing or seeking engaging craft projects for kids.
Following step-by-step instructions, from selecting ideal worsted weight yarn to easy colorwork and assembly, you will master essential garment construction.
This colorful vest serves as a cherished handmade gift or a cozy addition to a child’s everyday ensembles.
Next, discover how choosing colorful yarn significantly enhances the visual appeal and overall durability of your finished piece.
Choosing Colorful Yarn for Kids
Selecting the right yarn profoundly influences the mood and resilience of any kids’ sweater making endeavor. Exploring color psychology aids in picking hues that can energize and captivate children, transforming each vest into a unique piece of wearable art.
For practical DIY children’s clothing, consider yarns like acrylic blends, superwash wool, or soft cotton; these fibers provide the strength and softness needed for frequent washing and active play.
Colorful yarn selection shapes the mood and durability of any kids’ sweater making adventure. Children’s knitwear becomes more engaging when vibrant hues are chosen wisely.
Explore how color psychology impacts children’s engagement with handmade items, helping you pick energizing hues for every vest.
This thoughtful yarn selection for kids ensures your custom knit vests remain bright, cozy, and long-lasting.
For practical DIY children’s clothing, opt for yarns such as acrylic blends, superwash wool, or soft cotton; these fibers offer resilience and softness perfect for repeated washes and constant movement during play.
This thoughtfully chosen yarn ensures your striped vest remains bright, cozy, and long-lasting, keeping your custom knit vests ready for everyday wear or special outings.
Striped vests are excellent layering pieces for children, providing warmth during cooler weather and adding a pop of color to outfits. Many knitting patterns offer various sizes to accommodate growing children, ensuring a perfect fit for ages 6, 8, and 10, with chest measurements typically ranging from 30 to 33 inches.
Bright, contrasting stripes make these vests visually appealing and fun for kids. Using worsted weight yarn or a similar weight is recommended for optimal warmth and durability.
Basic techniques like casting on, knitting with stockinette or garter stitch, shaping armholes, and seaming the sides are fundamental skills learned through this project.
Patterns often suggest using either circular or straight needles, depending on personal preference for construction methods.
Opting for washable, hypoallergenic yarns guarantees the vest is both child-friendly and easy to care for. Customization is simple; allow for creativity by selecting favorite colors or adjusting the width of the stripes to your preference.
These vests knit up quickly, making them ideal for last-minute handmade gifts. The finished garments are versatile, suitable for many occasions, from casual everyday play to more special outings.

How to Knit a Striped Vest
Knitting needles and colorful yarn unlock creative possibilities when crafting a striped vest for children, merging custom knit vests with joyful colorwork techniques, a prime example of easy knitting projects. Begin by selecting soft, washable yarn in worsted weight for vibrant, durable stripes that suit practical kids’ apparel needs, a key aspect of good yarn selection for kids’ wear[5][3].
Childrens knitwear benefits from yarn sourced from reputable yarn stores or craft stores, ensuring quality for your craft projects for kids.
Carrying multiple yarn strands is easier with a gentle hand; work one yarn at a time and twist the unused strand loosely across the back, preventing gaps and ensuring a tidy finish for your DIY childrens clothing.
Kids’ vest knitting patterns often guide your color changes row by row, simplifying sweater making. To maintain consistent knitting tension as colors shift, gently tug the working yarn after each color switch, yielding smooth stitches and clean stripes, an essential in garment construction.
These creative projects offer a wonderful avenue for artistic endeavors, creating wearable art. This crafting guide seamlessly sets up your next beginner knitting project, a testament to the joy of apparel design.
Beginner Knitting Projects Made Easy
Beginner knitting projects stand out because they simplify garment creation, focusing on straightforward patterns such as stockinette stitch or garter stitch for early success in children’s knitwear, making them ideal for knitting for beginners.
Skillful casting on and binding off lays the foundation for a homemade children’s garment that’s rewarding and easy to master, a fundamental skill for any beginner knitting projects[5][1].
Choosing lighter, smooth yarn makes stitches visible as you follow a crafting guide for your DIY childrens clothing, while a clear knit vest tutorial provides step-by-step confidence for your craft projects for kids.
With every new project, assembling garments and practicing essential techniques nurture both skill and inspiration, encouraging creative projects that open doors to children’s fashion DIY experiences and meaningful handmade gifts, perfect for holiday crafts or birthday gifts.
- Worsted weight, soft, and washable yarn is recommended for durable and vibrant stripes in children’s knitwear.
- Carrying multiple yarn strands effectively involves working one strand at a time and loosely twisting the unused strand across the back to prevent gaps.
- Maintaining consistent knitting tension after color changes is achieved by gently tugging the working yarn, ensuring smooth stitches and clean stripes.
- Beginner knitting projects often utilize simple stitches like stockinette or garter stitch for ease of learning and success in creating children’s garments.
Essential Garment Construction Steps
Transforming yarn into a wearable piece of childrens knitwear involves more than just knitting stitches; it requires careful garment construction. Before assembly, pre-assembly preparation is key to a professional finish, especially for projects like a custom knit vest.
Accurately blocking knitting each piece before seaming ensures they are the same size and lie flat, which is essential for a good fit on the child.
This attention to detail during swatch checking and piece preparation prevents distortions when you begin assembling garments.
When joining pieces, use precise alignment, perhaps with tailors chalk or by matching stitch markers, for seamless edges. Employing advanced seaming techniques, such as the mattress stitch for vertical seams or a neat sewn bind-off for horizontal ones, not only creates strong, lasting joins but also enhances durability and the overall aesthetic, making even a simple beginner knitting project look expertly made.
For armhole and neckline finishing, picking up stitches carefully—perhaps in a contrasting or complementary, colorful yarn—reinforces these high-stress areas and adds a refined touch, elevating the final garment into a piece of true wearable art. These meticulous steps in apparel design contribute significantly to the polished outcome of your DIY childrens clothing.
What is Knitting Tension
Achieving the correct knitting tension is fundamental to the success of any sweater making project, including a popular striped vest for children.
Consistent tension directly influences your knitting gauge, which dictates the finished size and fit of your creation; for instance, a specific kids’ vest knitting pattern relies on this accuracy for proper sizing adjustments.
Mastering consistent tension requires holding the yarn with an even, light pressure as it passes through your fingers.
Checking and Adjusting Tension
To ensure accuracy, regularly check your swatch using a measuring tape against the pattern’s gauge.
You can also use a gauge ruler for precise measurements of stitch count and row count.
- Examine your fabric for even stitch definition.
- If stitches appear too loose, try using smaller knitting needles; for tighter stitches, opt for slightly larger needles.
- Adjusting your hand position and how the yarn feeds can also help regulate tension.
- Holding the yarn with more fingers or changing the angle of your hands can subtly alter the yarn’s tension.
Regular fabric inspection and tracking your stitch count throughout your knitting process helps catch inconsistencies early. This proactive approach ensures your handmade vest remains both comfortable and visually appealing, reflecting the care put into this crafting guide. This consistent approach is key for all craft projects for kids.
- Blocking knitting each piece before seaming ensures they are the same size and lie flat, which is essential for a good fit.
- Precise alignment and advanced seaming techniques, such as the mattress stitch, create strong, lasting joins and enhance durability.
- Picking up stitches carefully for armholes and necklines reinforces high-stress areas and adds a refined touch.
- Consistent knitting tension directly influences knitting gauge, which dictates the finished size and fit of a creation.
Finishing Techniques for Wearable Art
Blocking knitting projects represents a transformative step in garment construction, playing an essential role in achieving the ideal drape and precise shape for your wearable art creations. Wet blocking and steam blocking both effectively relax fibers, ensuring an even stitch count and setting the garment to its intended dimensions, thereby resulting in beautifully fluid movement and a truly professional finish.
Beyond basic shaping, finishing techniques such as intricate embroidery, detailed beadwork, and fabric appliqué add significant depth and personality, transforming a simple vest into a distinct statement of creative expression.
Each carefully considered decorative element elevates the vest, aligning the final piece with the vision of personalized childrens knitwear that aims to inspire and delight young wearers, effectively bridging everyday function with artistic flair.
Custom Knit Vests for Children
Beginner knitting projects offer a rewarding pathway into creating unique garments. Kids’ vest knitting patterns often showcase simple colorwork techniques for vibrant stripes.
For a perfect fit in custom knit vests, start by taking accurate measurements, then adjust the row count or length to ensure optimal comfort during all outdoor activities. Knitting gauge is paramount; use a trusty measuring tape to match your yarn’s tension for an exact result, ensuring the finished garment is just right.
Personalizing Your Design
Colorful yarn selections and optional design details, such as stripe variations or unique buttons, can transform a knit vest into a treasured handmade gift.
This process powerfully illustrates how DIY childrens clothing provides unparalleled unique value—every stitch and color choice personalizes a garment that is practical, expressive, and vibrant.
These personalized items stand distinctly apart from mass-produced children’s apparel, offering a special connection.
Adapting common knitting patterns for a custom fit based on child measurements is a key aspect of creating unique pieces.
Suggesting design elements that personalize vests for individual children links this to the broader discussion on why DIY childrens clothing offers unique value.
— Crafting Guide
Key Customization Elements
- Yarn Selection: Choose soft, washable yarns for comfort and durability, offering a cozy feel.
- Colorwork Techniques: Simple colorwork allows for bold, playful stripes, adding visual interest.
- Sizing Flexibility: Patterns commonly offer multiple sizes to fit growing kids, ensuring longevity.
These aspects contribute to creating special garments. For example, considering childrens fashion trends allows for modern interpretations of classic designs. Using worsted weight yarn ensures warmth and durability for everyday wear. Basic techniques like casting on, using stockinette stitch or garter stitch, shaping armholes, and seaming sides are fundamental. Patterns often recommend either circular needles or straight needles, depending on construction preference. Washable, hypoallergenic yarns ensure the vest is child-friendly and practical for frequent use. Customization is easy—simply choose favorite colors or adjust the stripe width for a unique look. Vests knit quickly, making them popular for last-minute handmade gifts. Finished garments suit many occasions, from everyday play to special outings, providing versatile warmth and style for any child.
- Finishing techniques like blocking, embroidery, beadwork, and appliqué enhance the drape, shape, and artistic expression of wearable art, especially for children’s knitwear.
- Custom knit vests for children require accurate measurements and adjustments to row count or length for optimal comfort during outdoor activities, with knitting gauge being paramount for an exact result.
- Personalizing knit vests through colorful yarn selections and unique design details, such as stripe variations or buttons, transforms them into treasured handmade gifts and highlights the unique value of DIY children’s clothing.
- Fundamental knitting techniques include casting on, using stockinette or garter stitch, shaping armholes, and seaming sides, often utilizing either circular or straight needles with worsted weight yarn for warmth and durability.
Is DIY Children’s Clothing Worth It
DIY childrens clothing presents an avenue for parents seeking a harmonious blend of economic prudence, creative expression, and conscientious material choices when outfitting their children. By investing in craft supplies and acquiring fundamental sewing skills, homemade garments can often represent a more economical alternative to their commercially produced counterparts, particularly when opting for premium fabrics or repurposing existing textiles [1][3].
The significant advantage of selecting natural fibers or organic yarn for these projects ensures that the resulting garments are not only supremely comfortable but also hypoallergenic and environmentally sound, embodying an eco-friendly philosophy in apparel design [3].
Unlike the uniformity of mass-produced items, the DIY approach grants individuals complete command over every material used and every stitch made, facilitating personalized apparel customization and a transparent supply chain.
Practical considerations also play a role; the use of easily washable yarns and robust construction techniques enhances the longevity of handmade pieces, ensuring that a child’s wardrobe gains both aesthetic appeal and inherent durability. Ultimately, the creation of DIY childrens clothing effectively merges cost-effectiveness with ethical sourcing principles, affording families greater agency over the care, lifespan, and creative articulation of their children’s attire [3].
Crafting a Cozy Striped Vest for Kids
Embarking on craft projects for kids, like knitting a sweet striped vest, offers an approachable and rewarding experience for many parents and crafters.
This project, designed for simplicity, allows for personalization and serves as a wonderful handmade gift [5][3][2]. The process begins with selecting the right yarn; choosing soft, washable yarns ensures comfort and durability for children’s wear [3].
For this particular crafting guide, consider using worsted weight yarn, a popular choice for its warmth and ease of handling, often worked with appropriately sized knitting needles, whether they are circular needles or straight needles [5].
Understanding the Pattern and Techniques
The beauty of this vest lies in its straightforwardness, making it one of the beginner knitting projects.
The pattern typically includes instructions for multiple sizes, catering to children aged approximately 6, 8, and 10, with corresponding chest measurements around 30, 5, and 33 respectively [5][2].
You’ll learn simple colorwork techniques to create vibrant, playful stripes that add a cheerful element to the garment [5]. Essential knitting skills like the knit stitch and purl stitch, often forming stockinette stitch or garter stitch patterns, are fundamental.
You will learn how to cast on stitches, work the body of the vest, and then manage the armhole shaping and neckline finishing. The project involves knitting individual pieces – the front and back panels – and then joining them using various seaming techniques [1].
Proper tension, often checked via knitting gauge with a measuring tape and attention to stitch count and row count, is key to achieving a good fit [1].
Finishing Touches and Customization
Once the main pieces are knitted, focus shifts to finishing techniques.
This includes joining the seams, often through mattress stitch or other seaming techniques, and finally, blocking knitting to ensure the garment lays evenly and achieves its intended dimensions.
For a classic vest, you might consider a button placket with well-made buttonholes, requiring careful attention to needle size and yarn labels for best results [1]. The charm of childrens apparel, especially handmade, is the potential for customization.
You can easily adjust the width of the stripes, experiment with different color combinations to match a child’s personality, or even add small embellishments. This makes each vest a unique piece of wearable art.
Whether intended as handmade gifts or a special addition to a child’s wardrobe for holidays or birthdays, this project embodies the
DIY Children’s Clothing
- DIY children’s clothing can be more economical than commercially produced items, especially when using premium fabrics or repurposing existing textiles.
- Choosing natural fibers or organic yarn for DIY projects ensures garments are comfortable, hypoallergenic, and environmentally sound.
- The DIY approach allows for complete control over materials and design, facilitating personalized apparel customization and a transparent supply chain.
- Knitting a striped vest is a beginner-friendly project that can be personalized and serves as a thoughtful handmade gift.
Modular Sun King Shawl Knitting Pattern With Collar Design

Modular knitting presents a world of creative avenues, and the Sun King shawl from Ursa Major Knits exemplifies this perfectly. This pattern masterfully combines the impact of a statement accessory with a functional collar design suitable for everyday wear.
Both advanced beginner knitting enthusiasts and intermediate knitting pattern fans will appreciate its distinct structure.
Shaped through intuitive modular assembly and innovative joinery, it features short rows and innovative shaping that allow for ample customization and vibrant color inspiration.
The modular shawl construction ensures a unique drape, ideal for those embracing a modern knitting challenge. Discover how this wearable collar achieves its striking, dramatic silhouette while remaining exceptionally comfortable.
Embarking on the Sun King Shawl Journey
This Sun King shawl offers a modular knitting adventure, guiding crafters through waxing phase and waning phase sections to create a stunning, asymmetrical silhouette with exceptional drape.
The result of modular knitting is a truly unique texture, where each join and transition highlights the interplay of yarns, yielding a luxurious, tactile fabric. For those interested in historical reenactment, this wearable collar shawl can be beautifully adapted by selecting a period-appropriate color palette, perhaps deep jewel-toned wools for a regal appearance.
Gentle hand washing and careful blocking are key finishing tips to preserve the shape and sumptuous feel, ensuring your statement accessory retains its vibrancy.
Consider the shawl’s innovative shaping as a visual centerpiece for any ensemble, opening up endless styling options.
Crafting Your Sun King Shawl
Modular shawl construction involves knitting distinct knit sections that are then joined sequentially, creating a seamless wearable collar and a truly unique garment.
The Ursa Major Knits pattern is celebrated for its creative assembly, allowing for experimental knitting and custom shaping. This intermediate knitting pattern is perfect for developing modern skills and inventive approaches to garment construction.
- Modular Design Elements: The shawl is divided into two primary phases: the waxing phase and the waning phase.
- Collar Feature: A distinctive collar design adds a practical yet stylish element to this statement accessory.
- Skill Progression: Ideal for knitters moving beyond advanced beginner knitting into intermediate techniques.
- Technique Highlights: Incorporates short rows and innovative shaping for a dynamic result.
Modular joins are integral to achieving the seamless collar effect, a testament to the innovative shaping inherent in the pattern’s design. You can find extensive color inspiration and project photos on Ravelry and Instagram, offering a wealth of ideas for personalization and customization.
Styling and Care for Your Statement Accessory
The Sun King shawl serves as both a practical wrap and a bold fashion statement, embodying textile art and fiber arts. Its dramatic silhouette and unique texture make it a standout piece, perfect for those embracing a modern knitting challenge. For styling, its dramatic cowl potential offers versatile looks, from a casual drape to an elegant wrap. Experiment with bold color changes to highlight the structural features and block edges for a crisp finish.
To incorporate this striking shawl into a historical reenactment costume, select a period-appropriate yarn or color palette. Emphasize the shawl’s unique texture, created by its modular nature, and follow care instructions diligently to maintain its luxurious feel and shape.
Crafting tips for this unique garment include using mediumweight yarn and circular needles. A tapestry needle is essential for weaving in ends during the finishing process. The pattern details and yarn choice significantly influence the final look, making yarn manipulation a key aspect of its creation. This knit design is a wonderful example of wearable art, showcasing modern skills and inventive approaches.
Knitting enthusiasts will find this pattern a rewarding craft project, a piece of DIY fashion and accessory design. The crafting community often shares insights on pattern modification and yarn skills, fostering a collaborative environment for knitting inspiration. Explore various styling options to achieve versatile looks, transforming the shawl into a focal point for any occasion.

Why Choose Modular Knitting? Simplify Complex Garments with Ease
Modular knitting techniques offer an accessible pathway for advanced beginner knitting by simplifying intricate garment construction into smaller, manageable units, making ambitious designs less intimidating. Unlike traditional methods that often involve creating an entire sweater body in one piece or assembling large, rigid sections, modular knitting promotes custom shaping and easy pattern modification.
Knitters can construct garments from building-block panels or modules, allowing for a flexible and personalized creative assembly.
For example, a modern sweater pattern might utilize geometric panels that can be resized, recolored, or rearranged, giving knitters the freedom to experiment with fit and style without affecting the integrity of the entire project.
This approach empowers knitters to easily add width, adjust sleeve lengths, or incorporate bold color changes for a truly personalized touch, benefitting every advanced beginner knitting project with seamless joins.
Structured tops, blankets, and accessories become adaptable to unique preferences and body shapes through these modular construction methods. The Sun King shawl by Ursa Major Knits exemplifies this, blending a dramatic silhouette with a practical, wearable collar design, offering knitters an innovative approach to shawl construction that is ideal for advanced beginners and intermediate makers seeking a statement accessory.
The Sun King Shawl: A Modular Masterpiece
The Sun King shawl by Ursa Major Knits presents itself as a stunning example of modular knitting, perfectly bridging a dramatic silhouette with a practical, wearable collar design.
This expertly crafted piece is elegantly divided into two distinct sections, referred to as the *waxing* and *waning* phases, granting knitters an innovative approach to shawl construction. This pattern is particularly well-suited for advanced beginners and intermediate knitters eager to explore new techniques and create a distinctive statement accessory.
The design allows for experimentation with structure, color, and assembly, all while mastering modular techniques for custom shaping.
Key Features and Benefits of Modular Knitting
- Modular construction: Divided into ‘waxing’ and ‘waning’ sections for creative assembly and easier management of complex designs. This method allows for a more forgiving approach to garment construction.
- Collar-inspired edge: A unique shape ensures standout style and comfortable wear, offering a practical element to this fashionable piece. This is a prime example of innovative shaping in knit design.
- Skill level: Suitable for advanced beginners and intermediate knitters wanting to expand their repertoire of knitting techniques and explore modern skills. It’s a great introduction to intermediate knitting patterns.
- Materials: Typically requires medium-weight yarn, circular or straight needles, and a tapestry needle for finishing. Choosing the right yarn choice is key for this type of project.
- Assembly notes: Knit sections sequentially, with modular joins creating a seamless collar effect, making the assembly process more intuitive. These are important construction methods to learn.
- Finishing tips: Blocking helps achieve crisp edges, and bold color changes can effectively accent structural features, adding visual interest and customization. These finishing tips enhance the overall aesthetic.
- Styling options: Wearable as a shawl, wrap, or dramatic cowl, ensuring versatile looks that cater to different occasions and personal styles. The styling options offer great flexibility for the end user.
- Inspiration: Designed as a statement piece that showcases modern modular skills and provides abundant color inspiration through project photos. This serves as excellent knitting inspiration.
- Technique highlights: Incorporates short rows, modular joinery, and innovative shaping, providing knitters with valuable insights into advanced knitting. Mastering these knitting techniques is highly rewarding.
- Community advice: Consulting project photos and notes from Ravelry and Instagram can offer valuable assembly ideas and further color inspiration for your own unique garment. Engaging with the crafting community is beneficial.
The Sun King shawl is designed for knitters who enjoy modular and inventive approaches, encouraging customization and experimentation in every stitch. This pattern
- Modular knitting simplifies complex garment construction into smaller, manageable units, making ambitious designs less intimidating for advanced beginners.
- This approach allows for custom shaping and easy pattern modification, enabling knitters to experiment with fit and style without compromising the entire project.
- The Sun King shawl by Ursa Major Knits is presented as an example of modular knitting, blending a dramatic silhouette with a practical collar, ideal for advanced beginners and intermediate makers.
- Key benefits of modular knitting include ease of adding width, adjusting sleeve lengths, and incorporating bold color changes for personalized projects.
Best Summer Shirt Knitting Patterns For Warm Weather

Discover the best summer shirt knitting patterns for crafting light and stylish tees perfect for warm days, utilizing breathable fibers and modern design details. Ravelry knitting patterns currently showcase an expansive array of choices—think airy silhouettes, linen yarn, and relaxed fits that feel as good as they look.
Find inspiration from the newest 2025 releases, including the “Perfect Summer Tee,” “All Summer Tee,” and “Luminous Summer Top,” for an effortless approach to warm weather apparel.
Dive into this curated selection and let chic, handknitted shirts elevate your seasonal wardrobe.
Enjoy a smooth transition to selecting your perfect summer knit.
Finding Your Perfect Summer Knit
Yarn selection forms the core of a successful summer wardrobe, transforming a simple knit summer tee project into a breezy, essential piece for hot days. Opt for lightweight knits crafted from linen, cotton, silk blends, or bamboo fibers; these materials offer the superior drape and breathability that summer weather demands.
Explore simple silhouettes such as boxy shapes, A-line styles, or drop shoulders for maximum airflow and comfort, all while exuding casual elegance. These patterns often feature minimal seams and utilize seamless or top-down techniques to reduce bulk and maintain that fresh, comfortable feel.
For enhanced ventilation, incorporate textured details like eyelet patterns, stripe designs, or delicate lace panels; these styling touches keep you cool as temperatures rise.
Fiber Choices for Breathable Comfort
When considering fiber choices for your next project, selecting the right yarn is paramount for creating comfortable, breathable knit shirts.
Linen yarn offers excellent moisture-wicking properties and a crisp drape, making it ideal for hot climates.
Cotton knits provide a cool, soft feel that is perfect for sensitive skin, ensuring comfort throughout the day. Additionally, bamboo fibers contribute a beautiful sheen, lightness, and an overall airy construction to your garments.
These natural fibers are fundamental for achieving the desired cool and airy feel in your garment knitting projects.
Stylish Silhouettes and Construction Techniques
Embrace simple silhouettes for maximum comfort and style in your summer knitting. Patterns featuring a relaxed fit, including popular boxy shapes, flattering A-line styles, and comfortable drop shoulders, promote excellent airflow.
For a polished yet casual look, consider designs that incorporate minimal seams, often achieved through topdown techniques or seamless construction.
These methods not only reduce bulk but also create a smooth, comfortable finish against the skin.
Adding textured details like eyelet patterns, subtle stripe designs, or intricate lace panels can further enhance breathability and add visual interest, contributing to the overall beauty of your stylish knitwear.
Effortless Elegance for Every Occasion
Achieving effortless elegance in your handmade wardrobe is simple with the right summer knit patterns. Many designs focus on a relaxed fit, offering versatile styling options that can transition seamlessly from daytime casual wear to more polished outfits for evening events.
These fashion knitting projects are perfect for creating layering pieces that add a touch of sophistication. Explore beginner knit patterns that offer guidance for creating beautiful, comfortable knits, ensuring crafter satisfaction.
The appeal of these unique knits lies in their blend of modern aesthetics and timeless appeal, making them cherished additions to any handmade wardrobe.

Lightweight Knits for Warm Weather
Embracing summer shirt knitting patterns begins with selecting the right materials for comfort. Linen yarn and cotton knits provide the foundation for airy, comfortable tops, expertly handling the hottest days through their inherent breathability and moisture-wicking qualities.
These natural properties seamlessly connect to earlier discussions on fiber choices, ensuring that your knitting projects offer superior wearability.
Many summer shirt knitting patterns prominently feature relaxed, boxy shapes or contemporary A-line silhouettes that drape loosely, significantly increasing comfort and promoting airflow.
Explore knit structures like mesh knits and openwork stitch patterns, such as delicate lace panels or intricate eyelet patterns, to create lightweight fabrics with maximum breathability. Knitting these at a loose gauge further enhances ventilation, making them ideal for warm weather apparel.
Consider beginner knit patterns like the “Perfect Summer Tee” or other simple oversized knit summer tee designs, often crafted in a linen-cotton blend, demonstrating how these materials and techniques result in practical, wearable stylish knitwear for the season.
Breathable Knit Shirts for Comfort
Breathable knit shirts achieve their comfort not solely through careful yarn selection but also via thoughtfully engineered construction. Moving beyond general lightweight knits, this section highlights specific design details that allow air to circulate naturally, ensuring maximum comfort.
Minimal seams, the prevalence of top-down techniques, and the creation of seamless knit tops all contribute to reducing bulk and enhancing wearability, as frequently seen in popular Ravelry knitting patterns for summer shirts.
Weave patterns are particularly important; mesh stitches or loose-gauge stockinette allow air to flow freely, while intricate lace panels and subtle eyelet patterns can further improve airflow within your stylish knitwear.
For easily identifying truly airy options when browsing summer shirt knitting patterns, look for descriptive terms like “lightweight,” “breathable,” or the mention of moisturewicking yarns. Trust designer guidance, such as the effortless elegance found in Sari Nordlund’s creations, to help you choose the most comfortable knits for your handmade wardrobe.
Key Takeaways for Warm Weather Knits
- Linen and cotton yarns are ideal for summer knits due to their breathability and moisture-wicking properties.
- Design elements like relaxed, boxy or A-line shapes, mesh knits, and eyelet patterns enhance airflow and comfort.
- Seamless construction techniques, such as top-down knitting, reduce bulk and improve wearability in summer shirts.
- Look for descriptive terms like lightweight, breathable, or mentions of moisture-wicking yarns when selecting summer shirt knitting patterns.
Ravelry Knitting Patterns Exploration
Exploring the vast collection of Ravelry knitting patterns feels much more manageable with effective filtering, helping you discover ideal summer shirt knitting patterns with ease. With filtering capabilities, you can specifically locate patterns for summer yarns, like lightweight knits.
The platform allows targeting garments like Tops, Short Sleeve, or Sleeveless options for breathable knit shirts.
To find patterns specifically designed for summer yarns, utilize the yarn weight filters, such as “Fingering,” “Lace,” and “Sport” and select natural fibers.
Linen yarn, cotton, and bamboo fibers ensure excellent breathability for warm weather apparel. A strategy for discovering less common but excellent knitting projects involves sorting by “Most Favorited” or “Most Queued,” which highlights unique, high-quality designs often featuring elegant designs.
Experiment with advanced filters like “minimal seams” or “topdown techniques” to uncover further creative projects. Reviewing finished project pages offers invaluable knitting inspiration and ideas for easy modifications for your next knit summer tee.
Best Yarn Selection for Summer
Choosing the right yarn significantly impacts the feel and drape of your summer shirt knitting patterns, building upon earlier material choices.
Natural fibers, such as linen yarn, cotton, silk blends, and bamboo fibers, are paramount for breathable knit shirts designed for warm climates.
Cotton knits provide a reliable softness and are straightforward to care for, making them a great choice for beginner knit patterns.
Conversely, linen’s airy construction lends stylish garments a breezy drape that truly improves with subsequent washing, offering effortless elegance. Silk, while delivering polish and a cool touch, requires more delicate handling during both knitting and care.
Combining these fibers in blends can maximize your fiber choices, creating unique knits with enhanced texture for modern aesthetics and body type customization. Each yarn selection shapes how your handknitted shirts ultimately feel, move, and contribute to your comfort in the heat, ensuring exceptional crafter satisfaction with every seasonal knitting project.
Key Takeaways for Knitting Summer Shirts
- Ravelry’s filtering system allows users to specifically find summer shirt knitting patterns by targeting garment types like Tops, Short Sleeve, or Sleeveless, and by yarn weight filters such as Fingering, Lace, and Sport.
- Natural fibers like linen yarn, cotton, silk blends, and bamboo are recommended for breathable knit shirts suitable for warm weather due to their excellent breathability and comfort.
- Sorting patterns by Most Favorited or Most Queued on Ravelry is a strategy to discover unique, high-quality designs, often featuring elegant aesthetics.
- Experimenting with advanced filters like minimal seams or topdown techniques can help uncover more creative knitting projects, and reviewing finished project pages provides inspiration and modification ideas.
Simple Silhouettes Easy Knitting
Embracing simple silhouettes in garment knitting makes projects accessible. Easy shapes like boxy shapes or A-line styles eliminate complex steps, letting you enjoy the creative process.
Summer shirt knitting patterns with straightforward construction, such as seamless knit tops or top-down techniques, allow new knitters to showcase beautiful yarn textures with minimal distractions.
When choosing a pattern, select one that minimizes finishing work, like a seamless raglan or a classic knit summer tee.
This approach ensures more time enjoying your project and less time on assembly.
Beginner knit patterns often highlight the beauty of yarn selection, focusing on how basic shapes can effectively showcase yarn texture. For example, a simple tee knitted with a luxurious linen yarn or soft cotton knits can create stunning visual appeal without intricate stitchwork.
Key tips for beginners:
- Relaxed Fit: Opt for patterns with a relaxed fit, often found in boxy or A-line styles.
- Minimal Seams: Look for top-down techniques or patterns specifically designed with minimal seams.
- Yarn Choice: Consider linen yarn or blends for excellent drape and breathability in your knit summer tee.
For best results with Ravelry knitting patterns, always check pattern notes for guidance on minimal seams or knitting-in-the-round options to enhance the ease of your summer shirt knitting patterns.
Stylish Knitwear Warm Climate
Fashion knitting for hot weather seamlessly blends comfort with modern aesthetics, drawing inspiration from sources like Scandinavian minimalism and current fashion trends. Stylish knitwear designed for warmer environments prioritizes breathability, making items like breathable knit shirts a perfect addition to your wardrobe.
Adapting classic knitwear designs for hotter weather involves choosing the right materials and construction methods. Consider linen yarn, bamboo fibers, and cotton knits as excellent fiber choices; these ensure each tee or summer top remains soft, lightweight, and comfortable. Look for patterns that feature airy construction and open stitch patterns to encourage airflow, creating truly lightweight knits.
Styling tips for warm weather apparel:
Styling your knit summer tee can be done in various ways.
Layering pieces like a simple handmade t-shirt over a dress or pairing it with shorts creates versatile outfits.
This approach ensures your warm weather apparel transitions easily from daytime activities to evening gatherings.
Enhance your personal flair through unique color combinations or subtle textured details. Explore eyelet patterns or delicate lace panels for a touch of elegance in your garment knitting projects. The current trend leans towards contemporary style, incorporating modern aesthetics with timeless appeal.
When selecting from available Ravelry knitting patterns or specific designs like the Perfect Summer Tee or All Summer Tee, many offer customization for body type customization and include positive ease for comfort. Sari Nordlund’s Summer Knits collection, inspired by Roman goddesses, offers effortless elegance perfect for updating your handmade wardrobe with stylish summer wear.
| Yarn Fiber Recommendations | Construction Techniques for Ease | Styling for Warm Weather |
|---|---|---|
| Linen Yarn, Bamboo Fibers, Cotton Knits | Seamless Knit Tops, Top-Down Techniques, Minimal Seams | Layering with Dresses, Pairing with Shorts |
| Showcases Yarn Texture Effectively | Relaxed Fit, Boxy or A-Line Styles | Incorporating Eyelet Patterns or Lace Panels |
Effortless Elegance Knit Tops
Summer shirt knitting patterns truly shine when it comes to combining comfort with elevated design, making knit tops the season’s go-to for sophisticated style. Effortless elegance is achieved by embracing simple silhouettes such as boat-necks, drop shoulders, and relaxed fits; this approach ensures a polished appearance without sacrificing comfort or versatility.
From Ravelry knitting patterns, we find that lightweight knits, often featuring seamless or top-down techniques, keep bulk at bay.
This creates incredibly breathable knit shirts that are ideal for warm weather apparel and offer a breezy style.
Adding subtle touches like eyelet patterns, fine ribbing, or delicate lace panels transforms even the most basic silhouette into a piece of genuinely stylish knitwear boasting timeless appeal. For a truly refined finish, always pay special attention to edge treatments; consider a rolled hem or an impeccable bind-off, as exemplified in the “Perfect Summer Tee” pattern, to elevate your knit summer tee with a touch of understated luxury and personal flair.
Transition smoothly between projects in your handmade wardrobe with these essential design insights.
Discovering Your Perfect Summer Knit
A curated collection of the latest summer shirt knitting patterns emphasizes lightweight, breathable designs perfect for staying cool and fashionable in warmer temperatures. Sourced from Ravelry’s newest releases for 2025, these patterns showcase a variety of simple and elegant t-shirt styles suitable for knitters of all skill levels, offering guidance on the best yarns and construction tips for creating effective summer knits.
Fibrous Foundations for Summer Comfort
Soft, drapey fibers like linen, cotton, silk blends, and bamboo yarns ensure superior breathability and comfort, making them ideal for the summer heat.
These linen yarn and cotton knits are essential for creating garments that feel good against the skin, especially in warm climates.
When selecting your materials, consider moisture-wicking yarns and airy construction for maximum comfort. Bamboo fibers, for example, offer excellent drape and a cool feel, contributing to the overall comfort of your garment knitting projects.
Silhouettes and Construction for Airy Designs
Easy silhouettes, such as relaxed fits like boxy or A-line styles, boat-necks, and drop shoulders, are popular for their ventilation and effortless layering capabilities.
Minimal seams are a hallmark of many modern patterns, with top-down or seamless in-the-round construction techniques reducing bulk and increasing wearability, especially for seamless knit tops. These techniques are often featured in beginner knit patterns, making stylish garment knitting more accessible.
Many designs offer positive ease, allowing for body type customization and ensuring crafter satisfaction.
Elevating Knits with Modern Details
Textured details add a touch of modern sophistication to knitwear.
Subtle eyelets, attractive stripe designs, classic ribbing stitches, or delicate lace panels make each piece unique and engaging without being overly complicated.
These elements contribute to the contemporary style of these fashion-forward knits. Experimenting with different yarn textures and color combinations can further enhance the visual appeal and create truly unique knits, reflecting a personal flair.
Consider inspiration from sources like Scandinavian minimalism for clean, elegant designs.
Versatile Styling and Personal Flair
Versatile styling is key for contemporary summer wear; these designs seamlessly transition from casual daytime looks to more polished evening outfits. They are perfect for layering over dresses and tanks, adding a touch of handmade charm to any ensemble.
Each pattern encourages personal flair, allowing you to choose unique color combinations, experiment with stripe placements, or incorporate different yarn textures for a one-of-a-kind creation.
These creative projects offer a satisfying way to update your seasonal wardrobe update with comfortable, stylish garments.
Inspiration from Leading Designers and Collections
Explore collections like Sari Nordlund’s “Summer Knits,” featuring 23 fresh patterns inspired by Roman goddesses, each offering effortless elegance and attention to detail for lasting appeal.
Other notable patterns include the.
| Key Design Elements | Benefits for Summer Knits | Construction Techniques |
|---|---|---|
| Simple Silhouettes (Boat-necks, Drop Shoulders) | Effortless Elegance, Relaxed Fit, Versatility | Seamless, Top-Down |
| Lightweight Fibers (Linen, Cotton, Bamboo) | Breathability, Comfort in Warm Weather | Minimal Seams |
| Subtle Textured Details (Eyelets, Ribbing, Lace) | Modern Sophistication, Unique Appeal | Easy Construction for Beginners |
How To Knit Super Fun Colorwork Socks For Beginners

Vibrant hues and bold patterns spark creativity when you transform simple yarn into playful colorwork socks—the perfect project for any craft-loving beginner. Colorwork socks use easy approaches like stripes and geometric motifs, ideal for building fiber arts skills and crafting personalized designs.
Beginner knitting projects shine when you master two-color knitting or stranded knitting, using knitting tips such as holding one yarn in each hand for smooth transitions.
Place stitch markers as you knit in the round to track pattern repeats, and follow chart reading basics for flawless motif placement.
Enjoy exploring fun yarn color combinations and unlock your creative knitting potential as each round reveals another splash of wearable art.
Choosing the Perfect Sock Yarn
Sock yarn selection forms the essential foundation for knitting socks that are both comfortable and resilient. Fiber composition matters—look for blends with merino wool and nylon for elasticity and long-lasting colorwork socks.
Yarn weight also impacts stitch definition; fingering weight works best for clear patterns and manageable needle size. Washability is key, so seek machine-washable or superwash-treated yarns for practical everyday wear.
Check fiber percentages on each label to balance beauty and durability—75% wool and 25% nylon is a solid starting point.
Begin your beginner knitting journey with high-quality sock yarn for confident, successful results.
Fiber Composition for Durability
Yarn selection for your colorwork socks should prioritize durability, ensuring your handmade items withstand regular wear.
Merino wool provides softness and warmth, while nylon adds essential elasticity and strength. This blend is ideal for knitting socks that keep their shape and resist wear.
Consider yarn crafted from natural fibers like merino wool for a luxurious feel; these often come from sustainable yarns or ecofriendly yarns. For beginner knitting, a good mix of wool and nylon creates a forgiving yet sturdy fabric.
Understanding Yarn Weight and Stitch Definition
Yarn weight significantly influences the appearance of your colorwork socks and the ease of chart reading.
Fingering weight yarn, often used for knitting socks, provides excellent stitch definition, allowing intricate geometric motifs and repeating patterns to stand out clearly.
This weight also works well with smaller needle sizes, creating a denser fabric that prevents dreaded floats from showing too much and aids in maintaining even tension.
When selecting sock yarn, check the label for recommended needle sizes to achieve the best results for your
colorwork techniques.
Washability: A Practical Consideration
Sock yarn that is easy to care for makes your DIY socks a joy to wear and maintain. Washability is a significant factor when choosing yarn for knitting socks, especially for beginners who want their creations to last.
Look for yarns labeled superwash or those explicitly stating they are machine washable. This ensures your beautiful personalized socks can be enjoyed frequently without the hassle of handwashing.
Choosing practical sock yarn supports your creative hobbies and makes your craft projects more sustainable.
Checking Fiber Blend Percentages
Sock yarn selection involves paying attention to the fiber blend percentages on the label to balance aesthetic appeal with practical wearability for your colorwork socks.
A common and highly recommended blend for knitting socks is 75% wool (often merino wool) and 25% nylon.
This combination offers the warmth and softness of wool with the added resilience and elasticity of nylon, making these knit charts easier to follow and the resulting socks more durable. This blend is a fantastic starting point for anyone new to beginner knitting.

Mastering Beginner Knitting Techniques
Beginner knitting involves building upon basic cast-on and knit stitches, making each stitch even and consistent. Achieving even tension is key for crafting fabric that feels smooth and professional, especially when working with sock yarn for your colorwork socks.
Practice holding your yarn in a way that feels natural and allows for uniform stitches to prevent puckering across the fabric.
Using stitch markers helps immensely by marking the beginning of rounds and separating pattern sections, ensuring you keep your place when you knit in the round, whether using circular needles or double-pointed needles.
For those ready to tackle a simple beginner project, a ribbed cuff sock is an excellent starting point, offering the flexibility to incorporate a few colorwork rounds as your confidence grows. This solid foundation prepares you for more advanced sock patterns and techniques, enhancing your overall knitting journey.
Exploring Easy Colorwork Sock Patterns
Colorwork socks open up a world of creative knitting, allowing you to introduce playful designs and bold patterns through approachable techniques like stranded knitting.
Effective yarn management is essential when you’re dealing with multiple yarns; try holding one yarn in each hand or alternating fingers to keep both strands tangle-free and facilitate smooth color changes. Knit charts provide a roadmap for pattern interpretation—read them from right to left, always referencing the symbol key for each color repeat as you knit in the round.
To begin, select beginner sock patterns that feature just two contrasting colors, perfect for creating playful designs such as simple stripe patterns or easy geometric motifs.
To preserve the elasticity of your knitted socks, it’s important to catch floats, which are the sections of yarn carried on the inside of your work, by twisting the yarn every 2–3 stitches as you progress across rounds.
This prevents the fabric from becoming too tight or snagging. The goal is to achieve vibrant hues and comfortable, personalized socks for every creative hobbyist.
- Achieving even tension is crucial for creating smooth, professional-feeling knitted fabric, especially when using sock yarn for colorwork.
- Stitch markers are helpful for marking the beginning of rounds and separating pattern sections when knitting in the round.
- Stranded knitting is an approachable technique for introducing playful designs and bold patterns in colorwork socks.
- Catching floats by twisting yarn every 2-3 stitches helps preserve the elasticity of knitted socks and prevents snagging.
Mastering Stranded Knitting for Socks
Colorwork socks open up a world of creative designs, and mastering stranded knitting is your key to unlocking them. Begin by selecting contrasting sock yarn for those vibrant hues that make your projects pop.
For beginner knitting success, a reliable gauge is paramount—always check your gauge with multiple yarns by swatching before you start your chosen sock pattern.
Improving yarn management is made easier by weaving in ends as you go; each new color section presents an opportunity to refine those tails for a neater, more professional finish.
To effectively control float length, which is the yarn carried on the inside of your work, you can intentionally twist the yarns together every few stitches. This practice helps keep floats relaxed, preventing snagging or undue tightness, and consequently ensures a comfortable, stretchy fit for your finished socks.
Knitting tips for managing multiplecolor knitting include learning to manage two yarns at once, perhaps by using one in each hand or alternating fingers for smoother color changes.
This helps with even tension and stitch consistency. Consider knitting socks inside-out for neater floats and a smoother interior surface.
Using stitch markers is also helpful to track round beginnings and pattern repeats, adding to your crafting advice.
Try out jogless joins techniques to minimize visible gaps where new rounds commence, especially with stripe patterns.
Experimenting with bold or unexpected color combinations can result in uniquely personal socks, fostering creative knitting.
Reading Knit Charts Made Simple
Knit charts are your visual roadmap, essential for understanding pattern interpretation in colorwork socks.
These charts associate specific symbols with stitches and colors, providing a clear visual representation of your design. To maintain accuracy, it’s helpful to track your progress directly on the chart, highlighting completed rows as you go.
This methodical approach ensures you stay aligned with the intricate design, making even complex sock patterns feel more approachable techniques.
This straightforward method helps beginners with chart reading and ensures you stay on pattern while enjoying vibrant multiplecolor knitting.
Knitting tutorials often suggest that reading charts from right to left, following each symbol, is key to keeping patterns accurate.
This is a fundamental aspect of chart reading for stranded knitting and fair isle knitting. Don’t pull the carried yarn too tight—loose floats are better for the overall fit and comfort of your knit socks.
Blocking finished socks will even out stitches and help set the pattern, enhancing the beauty of your bold patterns and playful designs. Knitting inspiration can come from anywhere; experiment and have fun! Colorwork allows for endless creative options, leading to beautifully personalized socks.
- Checking your gauge with multiple yarns before starting a sock pattern is paramount for beginner knitting success.
- Intentionally twisting yarns together every few stitches helps control float length, preventing snagging and ensuring a comfortable fit.
- Reading knit charts from right to left, following each symbol, is a key technique for maintaining accuracy in stranded and Fair Isle knitting.
- Blocking finished socks helps even out stitches and set the pattern, enhancing the overall look of bold and playful designs.
Managing Multiple Yarns Effectively
Colorwork socks bring dynamic energy to your knitting, but handling more than one yarn need not lead to chaos. Yarn management techniques help you create vibrant hues and bold patterns with ease.
Fortwocolor knitting, holding one yarn in each hand is a popular method for efficient color changes, greatly reducing tangles as each strand stays on its own side of your work.
Stranded knitting calls for close attention to tension; try the drop-and-pick-up method or use yarn bobbins to keep strands organized and prevent knotting.
Knitting socks seamlessly is easier when you rotate your working yarns in the same direction consistently. When you need to add a new yarn ball, simply overlap the ends with a few stitches to minimize bulk, allowing for a smooth transition.
Colorwork techniques such as catching floats regularly not only secure your fabric but also keep the inside smooth and wearable, a key aspect of fair isle knitting.
Tips for Yarn Tension Control
Achieving even fabric is the secret ingredient for beautifully balanced colorwork socks that both fit well and showcase bold designs. Yarn tension plays a direct role in achieving flat, non-puckering fabric; be mindful of your knitting speed and relax your grip if stitches get tight.
Beginner knitting often benefits from consciously adjusting hand placement as you work through a project; don’t hesitate to pause and test your grip.
Experiment with different sock yarn types to understand how each fiber responds—wool, cotton, and blends vary in stretch and how they handle floats.
Practice with various yarn weights and aim for a smooth, continuous flow to master the art of stranded knitting tension, enhancing the beauty of geometric motifs and repeating patterns.
- Holding one yarn in each hand is a popular method for efficient color changes in two-color knitting, reducing tangles by keeping strands on their own sides.
- Techniques like the drop-and-pick-up method or using yarn bobbins are recommended for stranded knitting to keep strands organized and prevent knotting.
- Rotating working yarns in the same direction consistently and overlapping new yarn ends with a few stitches helps in knitting socks seamlessly and minimizing bulk.
- Consciously adjusting hand placement and relaxing your grip are beneficial for beginner knitting to achieve even fabric and control yarn tension, preventing puckering.
Creating Vibrant Hues in Knitting
Knitters exploring the world of colorwork socks often delve into the fascinating realm of yarn dye processes, such as immersion dyeing, kettle dyeing, or hand painting, each offering distinct avenues to achieve vivid, enduring shades. Sock yarn that is expertly dyed provides not only visual brilliance but also ensures colorfastness and a pleasing texture for your handmade creations, making every stitch count.
Knitting socks using high-contrast colors will readily produce standout patterns and playful effects in every stitch, ensuring your project is truly one-of-a-kind and a testament to your craft skills.
Experimenting with gradient yarns introduces effortless color transitions and intriguing visual movement, readily adding depth to your socks without requiring complicated techniques and enhancing your creative knitting.
For beginner knitting, incorporating strategic color blocking—that is, using generous swaths of complementary or bold hues—can simplify pattern reading while delivering modern, graphic impact that is both eye-catching and approachable. Creative knitters are strongly encouraged to explore hand-dyed and variegated yarns for boundless inspiration, transforming each pair into a wearable statement of individual style and a representation of textile design.
Stranded knitting, a popular method, allows for intricate designs by carrying two or more colors across the wrong side of your work. Fair isle knitting, a specific type of stranded knitting, is renowned for its traditional motifs and vibrant color palettes that are both beautiful and culturally rich.
Knit charts are essential tools for following complex colorwork designs, ensuring accuracy and neatness in your stitches.
Yarn management techniques are key for success, preventing tangles and ensuring even tension throughout your project, which contributes to the overall quality of your handmade items.
Sock patterns often feature unique stitch combinations that enhance the visual appeal and texture of the finished product. Twocolor knitting is an excellent starting point for those new to colorwork, offering a simpler way to introduce contrasting colors.
Multiplecolor knitting expands the possibilities further, allowing for more complex and layered designs, perfect for showcasing artistic knitting. Yarn tension must be kept consistent when working with multiple colors to avoid puckering or overly tight stitches, a common pitfall for beginners.
Float catching, the practice of periodically securing the carried yarn on the back of your work, is a vital skill to maintain the fabric’s stretch and prevent snags.
Chart reading skills are paramount for accurately interpreting the symbols and color changes indicated on a knitting chart.
Pattern interpretation is essential to understand the stitch counts and sequences required for a successful outcome. Color contrast is important for making your designs pop, so choose hues that stand out against each other for maximum impact.
Vibrant hues add life and energy to any knitting project, making your creations truly eye-catching. Bold patterns, such as geometric motifs or animal designs, can make a strong statement and showcase your personal flair.
Playful designs inject fun and personality into your knitting, encouraging creativity and experimentation with different motifs.
Geometric motifs offer a clean and modern aesthetic, easily adaptable to various color combinations and repeating patterns.
Stripe patterns are a classic choice for colorwork, providing a simple yet effective way to introduce multiple colors into your knitting. Repeating patterns create a mesmerizing effect and can be adapted to fit the size of your project with ease.
Custom motifs allow you to express your unique style and create truly personalized socks that reflect your interests and personality. Yarn selection is a foundational step, with merino wool being a popular choice for its softness and warmth, ideal for comfortable everyday wear.
Needle size plays a significant role in achieving the correct gauge and fabric density, typically smaller needles are used for sock knitting to create a firm fabric.
Circular needles are commonly used for knitting socks in the round, offering a flexible and convenient way to work.
Double-pointed needles are another option for sock knitting, providing more control for smaller circumferences. Magic loop is a technique that uses a long circular needle to knit small circumference items, offering a seamless knitting experience.
Knit in the round creates a seamless tube, eliminating the need
| Yarn Properties | Knitting Techniques | Design Elements |
|---|---|---|
| Vivid, enduring shades from immersion or kettle dyeing | Stranded knitting for intricate designs | High-contrast colors for standout patterns |
| Colorfastness and pleasing texture | Fair Isle knitting for traditional motifs | Gradient yarns for effortless color transitions |
| Merino wool for softness and warmth | Twocolor knitting for beginners | Color blocking for modern, graphic impact |
How To Embellish Your Knit Dishcloth With Flowers

Knit dishcloths are instantly elevated from everyday household items to memorable handmade gifts when you learn how to embellish your knit dishcloth with flowers using creative craft techniques and colorful yarn. Flower embellishments offer an opportunity for craft project personalization, enabling you to explore different knitting skills and embroidery stitches to create stunning floral designs.
By adding flowers to knitted dishcloths—either as embroidered motifs with a lazy daisy stitch or as separately crafted knitted flowers—you transform plain patterns into decorative knitting masterpieces.
Dishcloth knitting becomes a canvas for expressing your style, making each piece a unique, practical craft ideal for home decor or thoughtful gift ideas.
Transitioning into the next step, let’s gather the yarn crafts essentials you’ll need to get started.
Gathering Your Craft Supplies
Cotton yarn is the top choice for dishcloth knitting, offering absorbency and durability ideal for decorative knit dishcloth ideas or knit flower patterns for dishcloths.
Knitting needles in sizes like US 8 (0 mm) work for worsted weight bases, while smaller needles can be used for creating more intricate, delicate floral motifs. For crafting embroidered flowers, gather essential craft supplies such as:
Essential Embroidery Tools
- Embroidery needles with a large eye and blunt tip
- Sharp embroidery scissors
- Tapestry needle for sewing embellishments
Optional Decorative Additions
Optional decorative elements that add dimension to your floral motifs include:
- Buttons or beads for flower centers
- Contrasting yarn for visual interest and variety
Practical crafts like these benefit from both basic and creative notions—ensuring your dishcloth patterns stand out with vibrant, personalized flair as you move on to creative embellishments.

Simple Knit Dishcloth Patterns
Transforming a knit dishcloth into a unique household item begins with selecting simple textures, which offers endless opportunities for practicing core knitting techniques and preparing for future flower embellishment. Many beginner knitting dishcloth patterns, such as garter stitch or seed stitch, provide both ease and durability, making them perfect for mastering basic stitches and creating a beautiful base for your next craft project.
- Beginner Stitch Patterns: Begin with the classic garter stitch, knitting every row with cotton yarn and US 8 knitting needles for an easy, textured result that lays flat. This foundational knitting basic is perfect for any new craft project.
- Texture Variations: Explore variations like a bordered stockinette or incorporating seed stitch for visual and tactile interest. Utilize yarn scraps to optimize your craft supplies and create beautiful patterned dishcloths.
- Garter Stitch Example: Cast on 28–30 stitches, and knit every row until your knit dishcloth reaches approximately 7 inches. Then, bind off loosely to complete this simple yet functional craft project.
- Gauge Advice: While precise stitch gauge is less critical for dishcloths, swatch a few rows and columns. This allows you to preview your yarn weight and ensure your desired size before commencing your final knitting projects, a key step in dishcloth knitting.
Choosing Your Floral Motifs
Enhancing a dishcloth knitting project with well-chosen floral motifs instantly elevates your handmade decor, infusing the piece with personality and charm. Roses and daisies offer striking or cheerful touches, respectively, while poppies and tulips add bold color or sleek lines. These designs beautifully complement textured backgrounds like garter or moss stitch, adding visual appeal to your decorative knitting.
- Motifs for Texture: Employ embroidery stitches, such as the lazy daisy stitch, for delicate petals. Alternately, attach separately knitted flowers using a tapestry needle and contrasting yarn for playful, creative embellishments to your knitted flowers.
- Palette Selection: Consider harmonious yarn colors inspired by nature, such as green stems with bright blooms. Alternatively, create visual impact with complementary or seasonal designs for your floral designs, adding a unique touch to your gift ideas.
- Visual Appeal: Build upon your knit foundation by scattering or clustering embroidered flowers for balanced composition. This approach links your floral motifs directly to the overall decorative knitting theme, enhancing the aesthetic of your household items.
| Knitting Technique | Yarn Type | Recommended Needles | Floral Embellishment Example |
|---|---|---|---|
| Garter Stitch | Cotton Yarn | US 8 Knitting Needles | Lazy Daisy Stitch |
| Seed Stitch | Yarn Scraps | US 8 Knitting Needles | Separately Knitted Flowers |
| Stockinette Stitch (Bordered) | Contrasting Yarn | US 8 Knitting Needles | Embroidered Flowers |
How to Knit Flowers
Knit dishcloth projects transform into eye-catching household items with delightful flower embellishments, expertly crafted using simple yet effective knitting techniques. Cotton yarn in a spectrum of vibrant hues provides the ideal foundation for creating soft, colorful petals—begin by casting on the necessary stitches and employ basic techniques like yarn overs and decreases to skillfully shape each element.
Crafting petals individually facilitates effortless assembly: utilize a tapestry needle to carefully stitch your petals together through their concluding loops, gently pulling tight to form a full, dimensional bloom.
Contrasting yarn proves exceptionally beautiful for realistic flower centers, while utilizing leftover yarn scraps offers both variety and sustainability for your charming design.
Layering petals or experimenting with different yarn weight introduces captivating dimension, and finishing with small buttons or beads for the centers brings creative embellishments to your craft project, resulting in thoughtful handmade gifts.
Creating Petals with Basic Knitting
Knitting patterns for petals often begin with a few stitches cast onto your knitting needles. Shape each petal using simple increases and decreases to achieve a rounded or pointed form.
Yarn overs and careful decreases are key to creating the natural curves of a bloom, forming the basis for your decorative knitting. This technique is accessible even for beginner knitting enthusiasts looking to add unique touches.
Assembling Multi-Part Flowers
Once your individual petals are knitted, you’ll need a tapestry needle to bring them together.
For easy assembly of knitted flowers, carefully sew your petals through their final loops, pulling the yarn to cinch them neatly.
This creates a full, dimensional bloom, ready for placement on your dishcloth knitting projects.
This method allows for great customization within your knitting projects.
Adding Dimensional Blooms
To create dimensional blooms, consider layering petals strategically. Experimenting with different yarn weight and textures can add further depth to your floral designs.
Small buttons or beads sewn securely to the center of your knitted flower add a polished finish, enhancing the overall visual appeal of your creative embellishments.
Attaching Knitted Flowers Securely
Tapestry needle techniques are fundamental when transferring delicate knitted flowers onto your finished knit dishcloth base, ensuring long-lasting durability and a professional finish. For the most secure attachment, meticulously sew the flower through its base and into the underlying dishcloth stitches, anchoring each motif firmly so it withstands frequent washing and everyday use.
Placement significantly contributes to achieving balanced floral motifs: experiment by scattering blooms artistically or clustering them at the corners for appealing creative embellishments tailored to your specific home decor.
Consider employing the duplicate stitch or various embroidery methods—like the elegant lazy daisy stitch—to seamlessly integrate embroidered flowers alongside your sewn designs.
This approach aligns perfectly with overall craft project goals focused on personalization, guaranteeing your dishcloths are as functional as they are aesthetically pleasing, making them wonderful gift ideas.
Secure Attachment Methods
When attaching your beautiful knitted flowers, using a tapestry needle to sew through the base of the flower and into the existing stitches of the dishcloth knitting ensures a robust connection. This anchors the motif effectively, making it resilient against washing and wear, a key aspect for practical crafts.
Always ensure you are working with suitable sewing needles for a clean finish.
Advising on Placement for Visual Balance
The deliberate placement of your floral designs is key for aesthetic appeal in your knitting projects. Whether you choose to scatter blooms across the surface or create a focal point by clustering them, thoughtful arrangement enhances the visual balance.
Consider how the patterned dishcloths will be utilized and where the embellishments will best showcase your knitting skills.
Suggesting Duplicate Stitch or Sewing
For integrating floral motifs, both the duplicate stitch and careful sewing with a tapestry needle are excellent methods.
The duplicate stitch offers a way to create solid, colorful imagery directly onto the fabric, akin to intarsia knitting.
Sewing separately knitted flowers provides a more tactile, three-dimensional effect. Both techniques contribute distinct charm to your yarn crafts.
Connecting to Embroidery Detail
To enhance your embroidery stitches and add further detail, consider incorporating elements like the lazy daisy stitch.
This works wonderfully for creating leaves or smaller petal accents, complementing your main knitted flowers. Such decorative stitches can add a beautiful layer to your craft customization, bridging the gap between knitting and embroidery for truly unique handmade decor.
Key Techniques and Materials for Knitted Flowers
- Simple knitting techniques such as yarn overs and decreases are used to shape petals, with contrasting yarn ideal for realistic flower centers.
- A tapestry needle is essential for assembling knitted flowers by stitching petals through their concluding loops and for securely attaching them to knit dishcloths.
- Layering petals, experimenting with different yarn weights, and adding embellishments like buttons or beads enhance the dimension and visual appeal of floral designs.
- Secure attachment methods involve sewing through the base of the flower and into the dishcloth stitches, with placement and techniques like the duplicate stitch or lazy daisy stitch contributing to aesthetic balance and integration.
Adding Embroidered Flowers Details
French knots and lazy daisy stitch instantly elevate any knit dishcloth, fusing color, texture, and dimension for a truly vibrant flower embellishment effect. Utilizing embroidery stitches like satin stitch to fill petals or experimenting with fly and fishbone stitches for varied leaves, letting contrasting yarn hues add lifelike interest to each motif.
Pay special attention to stamen—French knots, especially when clustered tightly in the center, create a captivating focal point for embroidered flowers[1][4].
For extra realism, layer stitches with different yarn colors or choose variegated embroidery floss to mimic natural shading.
Before stitching on your dishcloth, practice on a knit swatch to perfect your craft project and ensure your finished design blends seamlessly with existing knitted flower techniques. Creative embellishments, additional decorative possibilities await to complement these stunning floral details.
Creative Embellishments for Dishcloths
Beads and novelty buttons can turn the center of a knit dishcloth blossom into a tactile, visual highlight, while thread painting with embroidery floss invites a painterly touch to both floral and abstract designs.
Incorporate surface design by blending multiple strands of colorful yarn in different thread shades, creating a stunning sense of depth across your dishcloth patterns. For added whimsy, embroider small motifs like ladybugs or butterflies, or try geometric shapes for a contemporary twist.
Expand your craft inspiration by combining several creative embellishments: pair knitted flowers with embroidered centers, or cluster fabric leaves and button flowers for a lush garden scene.
These embellishments ensure your handmade gifts are as unique and expressive as your creativity allows.
Supporting Embellishment Techniques for Knit Dishcloths
- French knots and lazy daisy stitch can add color, texture, and dimension to knit dishcloths for a vibrant flower embellishment effect.
- Satin stitch is recommended for filling petals, while fly and fishbone stitches can be used for varied leaf designs.
- Clustered French knots in the center of embroidered flowers create a captivating focal point.
- Beads, novelty buttons, and thread painting with embroidery floss are suggested for adding tactile and visual highlights or a painterly touch to dishcloth designs.
Why Decorate Your Dishcloths
Starting with the essential role of a knit dishcloth in kitchen routines, this humble household item becomes much more when it receives creative flower embellishments. Cotton yarn patterns not only help tackle spills and chores with practical cotton yarn, but decorative knitting also brings personality and style to your daily tasks.
Adding a flower embellishment with techniques like the lazy daisy stitch instantly upgrades a utilitarian object into a piece of home decor, brightening the kitchen and providing a sense of accomplishment as a small craft project.
Handmade gifts gain special meaning when you embellish a dishcloth, as recipients appreciate the time, creativity, and unique touch involved—perfect for housewarmings or birthdays.
Whether experimenting with new craft techniques or using up yarn scraps, enhancing dishcloths with floral motifs offers a satisfying creative outlet, allowing crafters to personalize, beautify, and gift thoughtful, functional crafts, and cherished items.
Elevating Everyday Items
Exploring various knitting patterns, a simple knit dishcloth becomes a canvas for artistic expression.
The beauty of adding embroidered flowers or separately knit blossoms transforms a basic necessity into a charming piece of functional art. Using a tapestry needle, you can securely attach these creations, ensuring they withstand regular use.
This approach allows for great craft customization, turning a utilitarian object into something truly special.
The Joy of Handmade Gifting
Presenting a decorated dishcloth as DIY gifts imbues them with personal sentiment.
Recipients cherish the effort and artistry poured into these practical crafts, making them ideal personalized gifts. The combination of a useful item and unique decoration makes for memorable gift ideas.
Experimenting with yarn colors and dishcloth patterns allows for a wide range of beautiful floral designs, perfect for any occasion.
A Creative Outlet for All Skill Levels
This craft offers a fantastic way to develop knitting skills and explore new craft techniques.
From beginner knitting to more advanced methods like intarsia knitting, there’s always something new to learn.
Utilizing leftover yarn variety and practicing embroidery stitches like the lazy daisy stitch or duplicate stitch are excellent ways to refine your abilities.
The process of creating patterned dishcloths or adding knitted flowers is a rewarding craft inspiration, especially when working with different yarn weight and knitting needles.
Practicality Meets Aesthetics
The primary function of a knit dishcloth is, of course, utility.
By incorporating creative embellishments, these household items become aesthetically pleasing. Using contrasting yarn for flower centers adds visual depth, while careful attention to stitch gauge ensures a polished finish.
These knitting projects are not only beautiful additions to your own home but also contribute to a more enjoyable daily routine.
- Decorating dishcloths transforms a utilitarian item into a piece of home decor, adding personality and style to daily tasks.
- Embellishing dishcloths with floral motifs provides a satisfying creative outlet and makes for thoughtful, functional handmade gifts.
- This craft allows for customization, enabling crafters to personalize items and experiment with various knitting and embroidery techniques.
- The addition of creative embellishments enhances the aesthetic appeal of dishcloths, making them beautiful additions to a home and contributing to a more enjoyable routine.
Textured Baby Blanket Knitting Patterns Single Color

Textured baby blanket knitting patterns provide a modern approach, transforming single color yarn into wonderfully tactile fabric. Knitting with raised stitch designs allows your craftsmanship’s intricate details to stand out, casting subtle shadows and creating depth across the surface for a visually captivating effect.
Beginner knitting projects can easily incorporate garter stitch accessories and seed stitch swaddles, while knitters with more experience might gravitate towards basketweave baby throws or cable knit blankets.
Every monochromatic baby wrap offers an opportunity for personalization—experiment with yarn weight variations to achieve your ideal single shade coziness.
When crafting classic baby blankets or modern baby quilts, these handmade baby essentials remain consistently timeless and imbued with affection.
Next, discover why knit stitch depth is essential for achieving striking texture in your baby blanket.
Discover Knit Stitch Depth
Knit stitch depth and the way fabric drapes begin with maintaining consistent tension, which stands as a requirement for flawless, professional-looking outcomes. Textured baby blankets truly come alive when the correct stitch size is selected—larger stitches enhance the visual relief, while tighter stitches provide subtle refinement.
Basketweave patterns are a favored choice for knitters exploring intermediate stitch techniques, introducing sensational depth to a single color blanket. The raised effect of cables or relief pattern creations visually and physically elevates your project, catching light from every angle.
With each subsequent row, you’ll observe how texture shapes both the project’s style and its inherent softness, making your baby blanket knitting project a treasured item within any DIY nursery decor.

How to Create Single Shade Coziness
Textured baby blanket knitting in a single shade transforms a basic item into a modern heirloom, using light and shadow to give depth. Single shade coziness emerges by choosing textured stitches—like garter, seed stitch swaddles, or subtle cables—that layer warmth visually and tactilely, echoing the appeal of monochromatic baby wraps.
Merino wool softness and wool blends offer slight heathering and clear stitch definition, ideal for displaying nuanced texture.
Intermediate stitch techniques benefit from a simple tip: maintain even, gentle tension throughout to ensure an ultra-luxurious, flawless finish, even with one color.
Raised stitch designs can build advanced knitting skills and pattern reading confidence.
What are Raised Stitch Designs
Raised stitch designs add sculptural interest by lifting sections of your blanket, transforming flat fabric into tactile baby garments. Aran sweater traditions inspire these patterns—classic cables and relief pattern creations—which are especially dramatic when paired with yarn weight variations.
DK or bulky yarn makes raised stitches, such as the cable stitch (C4F or C4B), particularly prominent, offering both beginner knitting projects and bold cable knit blankets. Knitting cables across rows of stockinette forms raised ropes, while repeated panels and defined borders deliver signature texture to modern baby quilts and classic baby blankets alike.
Textured Knitting
- Textured knitting in a single shade creates depth through light and shadow, making a simple item a modern heirloom.
- Textured stitches like garter, seed stitch, or subtle cables visually and tactilely layer warmth, similar to monochromatic wraps.
- Merino wool and wool blends are ideal for displaying nuanced texture due to their slight heathering and clear stitch definition.
- Raised stitch designs, inspired by Aran sweater traditions, add sculptural interest and tactile appeal to baby garments.
Best Basketweave Baby Throws
Few textured stitches offer as much sensory comfort for newborns as the classic basketweave, making it a standout choice among basketweave baby throws and classic baby blankets for tactile baby garments. With a beautiful raised stitch designs effect, a single shade coziness blanket highlights the interplay of light and shadow across each block, adding knit stitch depth that enhances visual and tactile interest for monochromatic baby wraps.
To balance durability and softness, select yarns that offer both; merino wool softness is exceptionally soft, while cotton breathability is ideal for warm climates.
For busy households, acrylic durability ensures ease of care for your DIY nursery decor.
Avoid scratchy yarns to ensure sensitive skin is never irritated by your handmade baby essentials.
Yarn Fiber Content for Durability and Softness
- Merino Wool: Exceptional softness and gentle touch—the premium option for baby essentials and baby shower presents.
- Cotton Blends: Soft, breathable, and hypoallergenic, ideal for single shade coziness in warm climates.
- Acrylic/Acrylic Blends: Machine-washable, colorfast, and excellent for busy households seeking acrylic durability in DIY nursery decor.
Tip for Resizing This Pattern
Tuning your throw or modern baby quilts is simple. Always adjust stitch counts in pattern multiples (such as six or eight stitches) across the width—preserving the relief pattern creations and balanced edges of your knit project.
Simple Seed Stitch Swaddles
Cradling a newborn in a seed stitch swaddle promises gentle breathability, subtle single shade coziness, and a non-constricting comfort perfect for tactile baby garments and genderneutral baby gifts. The signature textured stitches of the seed stitch pattern create a fabric that lies flat, resists curling, and maintains a plush bumpy feel—making it an excellent beginner knitting project for those new to knit. For swaddles in every season, yarn weight variations make adapting easy, from airy monochromatic baby wraps to dense textures.
Alternative Yarn Weights
- Lightweight (Fingering/Sport): Ideal for airy, warm-weather swaddles or monochromatic baby wraps.
- Medium Weight (DK/Worsted): Versatile for year-round comfort and classic baby blankets.
- Heavyweight (Bulky/Chunky): Best for extra warmth and single shade coziness in colder climates.
Practical Tip for Edge Finishing
To keep edges tidy and prevent rolling, finish with a few rows of garter stitch accessories or seed stitch, framing your relief pattern creations with a polished touch. This also helps manage any potential curling in your knit projects.
- The basketweave stitch offers significant sensory comfort for newborns due to its textured nature, making it a popular choice for baby blankets and tactile garments.
- Yarn selection is crucial for balancing durability and softness; merino wool provides exceptional softness, while cotton offers breathability, and acrylic ensures durability and ease of care.
- The seed stitch is a beginner-friendly knitting project because it lies flat, resists curling, and maintains a plush, bumpy texture, suitable for swaddles and gender-neutral gifts.
- Adjusting yarn weight is an effective method for adapting seed stitch swaddles for different seasons, ranging from lightweight for warm weather to heavyweight for colder climates.
Choosing Garter Stitch Accessories
Garter stitch accessories showcase remarkable elasticity, making them perfect for items like cozy scarves and monochromatic baby wraps, where comfort and a great fit are key. The reversible nature of garter stitch ensures both sides of your accessory look equally polished, ideal for items such as scarves that are viewed from all angles.
Merino wool softness, cotton breathability, and acrylic durability yarns beautifully accentuate the garter texture while providing warmth and resilience.
For scarf projects, selecting yarns in a single shade allows the raised stitch designs to truly stand out, a strategy that enhances the knit stitch depth and the appeal of a single shade coziness.
To seamlessly integrate color changes, a helpful tip involves weaving in new yarn ends as you knit; this practice maintains a neat appearance, ensuring a refined finish for your garter stitch accessories.
Easy Beginner Knitting Projects
Beginner knitting projects frequently begin with mastering the garter stitch, enabling crafters to build foundational skills before venturing into more complex patterns like basketweave baby throws or other intricate stitches. Patterns for baby blanket knitting in a single shade highlight a comforting texture and rich knit stitch depth, offering new knitters a deeply satisfying introduction to relief pattern creations.
Starting with simpler items, such as coasters or dishcloths, helps reinforce essential techniques, while progressing to easy textured baby blanket patterns, including seed stitch swaddles, provides gradual skill development. A good finishing tip involves always using a yarn needle to carefully weave in any loose ends on the wrong side of your work—this process creates neat edges, adding polish to DIY nursery decor or treasured baby shower presents.
Knitters who have mastered these basics can then confidently explore intermediate stitch techniques and beyond.
Garter Stitch and Beginner Knitting
- Garter stitch’s elasticity makes it ideal for accessories like scarves and baby wraps where comfort and fit are important.
- The reversible nature of garter stitch means both sides of an accessory look polished, which is beneficial for items like scarves.
- Mastering garter stitch is a common starting point for beginner knitters, building foundational skills before moving to more complex patterns.
- Beginner projects like coasters and dishcloths help reinforce essential knitting techniques, preparing crafters for more advanced projects.
What are Relief Pattern Creations
Relief pattern creations transform baby blanket knitting into a richly tactile and visually dynamic experience by manipulating knit and purl stitches to form raised or recessed areas within the fabric. The tactile baby garments created by these techniques play a critical role in adding both knit stitch depth and dimension, making even monochromatic baby wraps engaging to the touch and eye.
Knitting a simple relief pattern—like alternating panels of ribbing and stockinette—creates a subtle 3D effect that works beautifully for borders, all-over designs, or as a central feature for DIY nursery decor.
Relief pattern creations are not only attractive; they are also practical, as the added structure makes blankets cozy and durable for everyday use, offering single shade coziness.
Exploring Relief Pattern Creations
Relief pattern creations, often seen in cables knitting or delicate seed stitch swaddles, enhance the beauty of single color blanket designs.
These textured stitches play a vital role in developing advanced knitting skills, offering a sophisticated look for genderneutral baby gifts. The interplay of light and shadow across raised stitches adds dimension without the complexity of colorwork.
For example, a simple basketweave baby throws pattern, worked by alternating blocks of knit and purl stitches, provides a wonderfully tactile surface perfect for snuggling. This technique is also excellent for garter stitch accessories, providing a subtle yet engaging texture that elevates a project from simple to stunning.
Many of these designs are suitable for beginner knitting projects, with gradual introductions to intermediate stitch techniques.
Choosing the right yarn, such as merino wool softness or cotton breathability, further enhances the final product, ensuring comfort and durability for these cherished handmade baby essentials.
- Example: An easy beginner’s motif is a mock cable worked by alternating knit and purl stitches in short sections—ideal for beginner knitting projects or accent trims on classic baby blankets. These raised stitch designs add a wonderful dimension to any knit.
Stitch manipulation in relief patterns highlights the appeal of single shade coziness, turning simple yarn into a unique, handmade baby essential. These relief pattern creations are perfect for baby shower presents, offering a timeless and cherished item. Consider incorporating various yarn weight variations to achieve different levels of density and warmth, making items like modern baby quilts or simple knit baby booties. The beauty of these patterns lies in their ability to showcase the yarn’s natural texture and drape, providing a delightful sensory experience for both the knitter and the recipient, whether it’s a soft merino wool softness scarf or a durable acrylic durability toy.
- Relief pattern creations enhance the tactile and visual experience of baby blankets by using knit and purl stitches to create raised or recessed areas.
- These textured stitches, seen in techniques like cables and seed stitch, add dimension and depth, making monochromatic designs more engaging.
- Relief patterns are practical, contributing to the coziness and durability of handmade baby items, and can be suitable for both beginner and intermediate knitters.
- By manipulating stitches, relief patterns showcase the natural texture and drape of yarns like merino wool or cotton, creating cherished handmade baby essentials.
How To Knit A Linen Stitch Hot Pad

Creating a linen stitch hot pad results in a double thick, beautiful woven effect, offering both satisfying craftsmanship and practical function for protecting your hands and kitchen surfaces. Every few rows of this potholder pattern, a distinctly textured fabric emerges as you alternate knit and slip stitch techniques, transforming sturdy cotton yarn into a dense square with remarkable visual depth.
This project is exceptionally beginner friendly, sidestepping advanced techniques while providing ample opportunity to customize size or color.
Mastering the unique woven effect of linen stitch knitting allows you to create a long-lasting, unique kitchen accessory that withstands daily use and showcases your creative flair.
Gathering Your Knitting Supplies
Before embarking on the linen stitch knitting journey, assembling the correct supplies is essential for effective crafting.
Start by selecting approximately 150 yards of worsted weight cotton yarn; its natural fibers guarantee superior heat protection and durability for your durable kitchen accessory. You will require a pair of US size 9 (5 mm knitting needles) to achieve a firm fabric with a pleasingly dense texture.
Procure a yarn needle and scissors, indispensable tools for tidily sewing edges and weaving in loose yarn ends. For added insulation and a finish with minimal sewing, consider a cotton liner, perhaps cut from a repurposed towel or similar material.
These carefully chosen tools empower you to craft a truly useful accessory aligned with your kitchen’s specific requirements.
Necessary Materials for Your Project
Cotton yarn in a worsted weight selection serves as an excellent foundation for this project, offering both durability and excellent heat resistance, making it ideal for a potholder pattern.
You’ll need around 150 yards of this material.
Ensure you have a pair of US size 9 (5 mm knitting needles), which are perfect for achieving the characteristic firm fabric and dense texture of the linen stitch. A yarn needle is vital for weaving in ends neatly, and scissors are necessary for cutting the yarn.
For enhanced heat protection and a truly double thick finished product, an optional cotton liner provides an extra layer of insulation, contributing to a more robust and protective kitchen item.
Preparing Your Workspace and Tools
Gauge swatch creation is an important first step to ensure your finished hot pad achieves the desired dimensions, aiming for a fabric that is both firm and dense. The recommended finished size for this kitchen accessory is approximately a 10 inch square.
Proper preparation prevents frustration down the line, making the overall crafting experience more enjoyable and leading to a superior end product.
These preparatory steps help guarantee a successful outcome for your creative crafting endeavor.
The Initial Cast On
Casting on your stitches is the foundational step for creating your two thick creation.
Whether you choose to knit in the round for a truly seamless construction or opt for flat knitting to be sewn closed later, the initial cast on sets the stage. A crochet caston can provide a bit more stretch, or a standard cast on works just as well.
For knitting in the round, you’ll cast on approximately 100 stitches to create a seamless tube that can be folded to form the double thickness. If working flat, cast on the desired width, keeping in mind that you will later fold and sew the edges to achieve the same result, ensuring a neat finish for your handmade item.
Executing the Linen Stitch Pattern
The distinctive look of the linen stitch knitting is achieved through a simple yet elegant sequence of knit and slip stitches, creating a beautiful faux-linen or woven look.
On the right side, the pattern involves knitting one stitch, then slipping the next with the yarn held in front (wyif), repeating this sequence across the row.
For the subsequent row, you’ll purl one stitch, then slip the next with the yarn held in back (wyib), again repeating this across the row.
Consistently carrying the working yarn snugly across the front or back when slipping stitches is key to maintaining the fabric’s integrity and that desirable textured fabric appearance. This methodical approach ensures snuggled stitches and a visually appealing result.
Knitting Your Hot Pad to Completion
Continue working rows following the established linen stitch pattern until your piece reaches the desired dimensions for a perfect square, approximately a 10 inch square.
If you are knitting in the round, a yarn marker becomes invaluable for keeping track of your progress and ensuring you maintain an even fabric. For those knitting flat knitting, simply continue until the length matches the width of your cast-on edge.
This stage also presents a wonderful opportunity for incorporating stripes or using up those delightful scrap yarn colors, adding a personal touch to your kitchen decor.
The continuous knitting in this stitch creates a wonderfully dense fabric ideal for its purpose.
Finishing Touches for Your Kitchen Accessory
The finishing the pad stage involves several options depending on your chosen construction method, ensuring a polished look for your creation.
If you’ve decided on incorporating a cotton liner for enhanced heat resistance and table protection, now is the time to insert it securely before closing the piece. For those who knitted in the round, you can either use the ingenious kitchener stitch for grafting stitches and a nearly invisible seam, or you can simply bind off and use your yarn needle to meticulously sew edges closed.
If you worked your project knitting flat, fold the piece and use a similar method to sew edges, ensuring no gaps remain. Finally, weaving

Mastering the Linen Stitch Technique
Linen stitch knitting creates a delightfully dense, woven-like surface by alternating simple knit and slip stitches, bestowing this hot pad with exceptional texture and impressive durability. This potholder pattern is key to the hot pad’s durability.
By following each row meticulously—working a “knit one, slip stitch with yarn in front” sequence, then alternating with a “purl one, slip stitch with yarn in back” on the subsequent row—you effectively shape a firm fabric that remains resilient against even the highest kitchen temperatures.
Keeping the working yarn snug and secure when slipping stitches is absolutely essential for achieving the beautiful woven effect and ensuring seamless construction.
Consistent tension throughout your knitting process leads to a cohesive, double thick hot pad that is perfectly ideal for superior heat protection and provides long-lasting, dependable use. Transitioning next, a foundational understanding of the slip stitch technique is paramount for truly mastering this uniquely textured fabric’s distinctive, attractive pattern.
Learn to create a dense, woven-like fabric by alternating knit and slip stitches across rows.
This pattern is key to the hot pads texture and durability.
Linen stitch knitting forms a dense, woven-like surface by alternating simple knit and slip stitches, giving this hot pad exceptional texture and durability. By following each row—working a “knit one, slip stitch with yarn in front” sequence, then alternating with a “purl one, slip stitch with yarn in back” on the next—you shape a firm fabric that’s resilient against high kitchen temperatures.
Keeping the working yarn snuggled when slipping stitches is crucial for the beautiful woven effect and seamless construction.
Consistent tension leads to a cohesive, double-thick hot pad ideal for heat protection and long-lasting use.
Transitioning next, understanding the slip stitch is key for mastering this textured fabric’s unique pattern. knit 1, slip 1 with yarn in front, knit 1, repeat. The next row involves: slip 1 with yarn in back, purl 1, repeat.
This creates a firm fabric and a woven look. This is a beginner friendly process.
You can also try incorporating stripes using scrap yarn colors for a unique design.
The working yarn should be kept snug.
This method also offers enhanced heat resistance. This is a great gift idea and one of the best leftover yarn projects.
Understanding the Slip Stitch
The slip stitch technique is foundational in the creation of the linen stitch pattern, requiring careful and precise attention to the exact placement of your cotton yarn as you diligently work each row of your project.
When you perform a “slip 1 yarn in front” motion on the right side of your work and then execute a “slip 1 yarn in back” movement on the wrong side, you are effectively building the signature “woven look” columns that inherently strengthen the overall structure of your knitted piece. Mastering this particular motion, irrespective of whether you are skillfully using straight knitting needles or versatile circular needles, ensures the creation of a wonderfully firm fabric that possesses truly enhanced heat resistance—an absolute must-have feature for any well-made hot pad or other indispensable durable kitchen accessory.
As you consistently practice these essential movements, you will undoubtedly notice your stitches forming increasingly neat, continuous lines, which significantly contributes to the beautifully dense texture that so effectively defines the authentic linen stitch pattern.
Practice slipping stitches with the yarn held in front or back to achieve the distinctive linen stitch pattern.
This technique creates a firm, attractive fabric.
The slip stitch technique is fundamental to achieving the distinct look of linen stitch knitting.
By carefully slipping stitches, you build a resilient and attractive texture, perfect for dishcloths and hot pads. A firm fabric is the direct result of mastering this essential motion.
Whether you are using knitting needles or circular ones, the goal remains consistent: a dense, usable item. This process contributes to a beautiful woven effect, ensuring your creation is both functional and aesthetically pleasing.
Consider this a gateway to creating a highly useful accessory.
The working yarn plays an important role in how the slip stitch is executed, determining the final appearance of the textured fabric.
This technique is a core element in knitting a hot pad that offers genuine protection.
Cotton yarn is perfect for this project, offering excellent absorbency and heat resistance. The dye lots for your yarn are important for color consistency.
When you slip 1 yarn in front, it creates a different visual effect than slipping with the yarn in back. For the right side pattern, this alternation is key.
Practicing this ensures a seamless construction.
This is a excellent potholder pattern.
The method allows for knitting flat easily, or even knitting in the round for a true seamless finish. The working yarn should be managed carefully with each slip.
This creates a very firm fabric. This customizable size project is great for using up scrap yarn colors.
The dense texture is very appealing, and the woven look is distinctive.
Mastering this stitch is a form of creative crafting.
A hanging loop can be made by not binding off the last stitch, but pulling the yarn through to create a loop, then knotting securely. This is a very practical crafting endeavor.
The minimal sewing required makes it even more appealing. The beautiful woven effect is highly sought after.
This technique offers enhanced heat resistance.
The table protection and countertop saver qualities are significant benefits.
This is also excellent for hand protection. It’s an easy to adapt pattern for various uses.
This will become a useful accessory in any kitchen. The double thick nature
Key Benefits of the Linen Stitch Technique
- The linen stitch creates a dense, woven-like fabric that offers exceptional texture and impressive durability, ideal for kitchen accessories.
- This knitting technique is beginner-friendly and involves alternating knit and slip stitches, resulting in a firm fabric with enhanced heat resistance.
- Consistent tension is crucial for achieving a cohesive, double-thick fabric, making it perfect for superior heat protection and long-lasting use.
- The linen stitch is versatile, allowing for the incorporation of stripes using scrap yarn colors and can be adapted for knitting flat or in the round.
Creating a Durable Kitchen Accessory: Select 100% Cotton Yarn for Heat Resistance and Absorbency
Kitchen accessories, such as hot pads, must reliably withstand high temperatures and frequent washing, positioning 100% cotton yarn as an excellent selection for this endeavor. The linen stitch knitting technique particularly benefits from cotton’s distinct characteristics; this material will not melt under heat, unlike synthetic alternatives, guaranteeing both safety and longevity within the kitchen setting.
Beyond offering superior heat protection, cotton yarn possesses significant absorbency, adeptly managing spills and moisture, thereby enhancing its functionality as a truly durable kitchen accessory.
Worsted weight cotton is instrumental in developing a firm, dense texture and a resilient, wearable woven effect when employing slip stitch patterns.
For individuals engaged in knitting a hot pad, cotton’s minimal stretch and strong stitch definition culminate in a finished product that is simple to clean, retains its shape, and provides enhanced protection for both countertops and hands.
Beginner friendly potholder patterns emphasize that selecting appropriate materials, like cotton yarn, directly contributes to practical outcomes and professional results.
Linen Stitch Hot Pad Knitting: A Step-by-Step Guide
The linen stitch expertly crafts a thick, textured fabric that mimics a woven effect, perfect for hot pads, delivering both durability and aesthetic appeal through straightforward slip stitch techniques. This method remains accessible for beginners, yielding a practical handcrafted kitchen accessory.
Overview of the Linen Stitch Hot Pad
This linen stitch utilizes slip stitch techniques to produce a dense, attractive, and slightly flexible fabric, which is ideal for creating a durable kitchen accessory.
The resulting hot pad is double thick, offering robust heat protection for tables and hands. Construction can be achieved through seamless construction (knitting in the round with two needles) or by sewing closed after flat knitting.
Typically, it’s knit with 100% cotton yarn for optimal heat resistance and easy care; an optional inner liner of cotton fabric can provide additional insulation, further enhancing its protective qualities.
Materials Needed for Your Project
Gather approximately 150 yards of medium/worsted weight 4 cotton yarn.
You will require size 9 US (5 mm) circular needles, at least 16” long, or two sets if working in the round.
A yarn needle and scissors are essential. Consider an optional 100% cotton liner, perhaps from an old towel, for enhanced insulation within your durable kitchen accessory.
Preparation and Gauge
Aim for a firm fabric with a dense texture, targeting around 20 stitches and 32 rounds per 4 inches in the linen stitch knitting.
A recommended finished size for this durable kitchen accessory is a 10 inch square, ensuring ample coverage for effective heat protection.
Casting On for Your Hot Pad
For knitting in the round, begin by casting on 100 stitches. A crochet caston or a standard casting on technique will allow you to join in the round, creating the double thick structure.
If opting for knitting flat, cast on the desired width, for instance, 50 stitches, then knit until the length matches the width for a square shape.
Afterward, fold and sew the edges together to achieve the double thick effect for superior heat protection.
Mastering the Linen Stitch Pattern
The right side pattern involves alternating knit and slip stitches.
Specifically,
| Key Material Property | Benefit for Kitchen Accessories | Knitting Technique Suitability |
|---|---|---|
| 100% Cotton Yarn | Heat Resistance, Absorbency, Durability | Linen Stitch, Slip Stitch Patterns |
| Worsted Weight Cotton | Firm, Dense Texture, Resilient Woven Effect | Slip Stitch Patterns |
| Minimal Stretch & Strong Stitch Definition (Cotton) | Retains Shape, Easy to Clean, Enhanced Protection | Linen Stitch Knitting |
Sabai Top Knitting Pattern Review By Paulastrickt Explained

Modern knitters seeking a versatile wardrobe addition will appreciate the paulastrickt design of the Sabai Top. This sleeveless knit seamlessly blends minimalist garment construction with beginner-friendly techniques for summer knitwear.
As knitting communities buzz about this stylish garment, its accessible pattern and clever use of DK weight yarn make it a standout project for a quick knit or customizable spring wear staple.
Whether you’re a beginner knitter eager to try seamless construction or looking to refine transferable skills with simple shaping and ribbed cuffs, the Sabai Top prioritizes contemporary tastes and satisfying knit experiences, ensuring every cast on moves you closer to a light, airy finish.
Paulastrickt’s Sabai Top captivates modern knitters with its signature use of stockinette variation and the option for elegant 1×1 ribbing.
This topdown knit leverages seamless construction, allowing makers to try on during knitting and achieve an adjustable fit. For optimal results, achieving the pattern’s targeted gauge with US 6 (0 mm) needles and DK weight yarn ensures a light airy drape—essential for summer wear.
Advanced beginners will enjoy learning left leaning increase and right leaning increase for professional shoulder shaping, while exploring alternative yarns like fingering or worsted adapts the pattern for year-round, satisfying knit experiences that suit any skill level.
The Sabai Top is a lightweight, sleeveless knit garment with a boat neckline, celebrated for its minimalist style and accessibility to modern knitters. The paulastrickt design is approachable, requiring only foundational techniques, making it ideal for a beginner knitter or those seeking a quick, satisfying project.
This topdown knit showcases seamless construction for a modern, adjustable fit, with customizable length and simple shaping utilizing slanting increases for shoulders and armhole shaping.
It offers two finish options: ribbed cuffs or all stockinette for stylistic variety, ensuring it is perfect for spring wear and summer wear.
Sabai Top fans will find the paulastrickt design to be an accessible pattern, perfect for summer knitwear.
This sleeveless knit emphasizes a minimalist garment approach with its straightforward structure and quick project potential. The use of DK weight yarn and US 6 (0 mm) needles contributes to its light airy feel, making it a satisfying knit for seasonal transitions.
For beginner knitters, the seamless construction and simple shaping, including left leaning increase and right leaning increase, offer a great introduction to garment construction. The pattern also provides opportunities for color experimentation and is suitable for intermediate knitters looking to refine their skills.
Sabai Top knitwear is a popular pattern within knitting communities, praised for its stylish design and suitability for knitters of various skill levels.
The paulastrickt design, a Susanne Muller creation, offers foundational techniques and straightforward structure for a quick knit.
This downloadable pattern, available in English version, German version, and French version, focuses on minimal finishing and includes essential skills for future projects.
For beginner intermediate approach, practicing a gauge swatch is recommended, alongside learning or reviewing increases for shaping through pattern tutorials. Choosing smooth, lightweight yarn in a solid color yarn or tonal color yarn is advised for best stitch definition and comfort during spring wear and summer wear.
Sabai Top Knitting Pattern Explained
This pattern identifies the core stitch patterns used in the Sabai Top, primarily the knit stitch and purl stitch, along with its signature stockinette variation.
The rationale behind specific gauge recommendations for this accessible pattern, particularly using US 6 needles and DK weight yarn, centers on achieving the intended light airy drape essential for summer wear. Suggesting alternative yarn weights suitable for different climates, such as lighter fingering weight for warmer environments or slightly heavier worsted weight for cooler spring wear, expands the garment’s versatility.
Describing the typical skill level required as beginner friendly, this paulastrickt design also offers rewarding engagement for intermediate knitters by incorporating simple shaping and optional 1×1 ribbing for cuffs.
Core Stitch Patterns and Construction
The Sabai Top utilizes foundational techniques, with the knit stitch and purl stitch forming the basis of its stockinette variation.
The seamless construction, a hallmark of the paulastrickt design, contributes to a modern, adjustable fit and minimizes finishing work.
This topdown knit, incorporating methods for armhole shaping and shoulder shaping through slanting increases, is a testament to straightforward structure. The pattern also offers two finish options, including elegant 1×1 ribbing for the cuffs, which adds a touch of professional polish.
Gauge and Yarn Selection Insights
Achieving the correct gauge is paramount for the success of this sleeveless knit, with the recommended US 6 (0 mm) needles and DK weight yarn ensuring the garment drapes beautifully for spring wear and summer wear.
This yarn selection provides the light airy quality that makes the Sabai Top a perfect seasonal transition piece. For different climates, exploring alternative yarn weights like fingering or even a lighter worsted weight can adapt the pattern, offering a satisfying knit year-round.
The material discussion emphasizes smooth yarn and lightweight yarn for excellent stitch definition.
Skill Level Guidance and Approach
This pattern is celebrated for its beginner friendly nature, making it an excellent choice for those new to garment construction.
It provides essential skills such as casting on, binding off, and working in the round, alongside learning left leaning increase and right leaning increase techniques.
Intermediate knitters can enjoy the ease of this quick project while perhaps focusing on easy customization of length or experimenting with color experimentation. The straightforward structure and minimal finishing make it a satisfying knit, allowing knitters to build confidence and transferable skills for future projects.

paulastrickt Design Features
The paulastrickt Sabai Top embodies a minimalist garment aesthetic, drawing inspiration from understated lines that resonate with modern knitters. This sleeveless knit silhouette offers significant functional benefits, providing exceptional breathability perfect for summer knitwear or light spring wear.
The topdown knit construction allows for an adjustable fit; attempting on your Sabai Top during knitting ensures a personalized, flattering outcome.
Color experimentation is encouraged, whether you choose bold, vibrant hues or classic, subtle neutrals, your paulastrickt design will reflect your style.
Unique construction elements include the choice between two finish options: contrasting ribbed cuffs for added definition or an all-over stockinette for a seamless look, making this a versatile wardrobe addition.
What Yarn for Summer Knitwear
Selecting the right yarn for your summer apparel is key, and for a light airy piece like the Sabai Top, DK weight yarn is an excellent choice, offering comfort and a satisfying knit for both beginner knitters and intermediate knitters.
Cotton and linen blends are particularly well-suited for summer knitwear, providing superior breathability and a lovely drape that enhances the garment’s flow. Plant-based fibers such as bamboo or rayon can further elevate the drape and introduce a subtle sheen, perfect for a modern Sabai Top.
For optimal care of these summer garments, hand washing with mild detergent and drying flat is recommended to maintain shape and the garment’s adjustable fit.
The pattern features are designed for ease, making it an accessible pattern for many.
| Design Feature | Construction Benefit | Yarn Recommendation |
|---|---|---|
| Sleeveless knit silhouette | Exceptional breathability for summer/spring wear | DK weight yarn |
| Topdown knit construction | Allows for an adjustable and personalized fit | Cotton and linen blends for breathability and drape |
| Choice of two finish options | Versatile wardrobe addition with definition or seamless look | Plant-based fibers (bamboo, rayon) for enhanced drape and sheen |
Is this a Beginner Knitter Project?
For a beginner knitter, the Sabai Top by paulastrickt offers an accessible entry into garment construction, focusing on foundational techniques. Mastering increases, specifically the left and right-slanting varieties, forms the core of shaping the minimalist garment‘s shoulders and armholes, providing a satisfying knit.
Before embarking on this topdown knit, practicing the knit stitch and purl stitch diligently with gauge swatch practice is highly recommended, ensuring even tension and precise sizing for this sleeveless knit.
Selecting a smooth DK weight yarn in a light or tonal color enhances stitch visibility, making it easier to identify and correct any errors in the stockinette variation.
Should the 1×1 ribbing for the cuffs feel daunting, employing stitch markers strategically can delineate sections, making the Sabai Top a truly beginner friendly endeavor for modern knitters. This quick project is designed with ease in mind, offering a straightforward structure for a delightful knitting experience.
Seamless Construction Techniques
Embracing seamless construction is a hallmark of the widely adored Sabai Top, appealing to modern knitters who desire a polished finish and an adjustable fit. The topdown knit methodology allows for continuous try-ons during the knitting process, facilitating precise fit customization as you execute the simple shaping of shoulders and armholes using only slanting increases.
This paulastrickt design eliminates the need for joining separate pieces, significantly reducing finishing time for a truly minimal finishing approach.
To achieve neat edging around the boat neckline and armholes, carefully pick up stitches along the edge of your chosen solid color yarn, perhaps using a smaller needle size for added definition.
Effortlessly manage yarn tails by securing them with a tapestry needle as you progress, ensuring a flawless final look on your sleeveless knit project with minimal fuss. This method creates a smooth, integrated garment, perfect for summer wear or as a layer during seasonal transitions.
Key Features of the Sabai Top Knitting Project
- The Sabai Top is designed as an accessible project for beginner knitters, focusing on foundational techniques like increases.
- It utilizes seamless, top-down construction, allowing for continuous try-ons and easy fit customization.
- The design emphasizes simple shaping using slanting increases for shoulders and armholes, minimizing finishing work.
- Recommended materials include smooth DK weight yarn in a light or tonal color to enhance stitch visibility, and practicing knit and purl stitches is advised.
Topdown Knit Fit and Shaping
Sculpting a precise fit for the Sabai Top, this top-down knit pattern empowers makers to shape the shoulders and armholes through strategic increases and decreases, forming the basis of its airy, sleeveless silhouette. Common methods for achieving a truly custom fit with a top-down construction involve careful monitoring of stitch counts and row progression.
To ensure a precise length on this versatile wardrobe staple, a strategy for trying on the garment as you knit is essential, allowing for immediate adjustments.
paulastrickt design ensures this accessible pattern can be adjusted for different body types by recommending where to modify the shaping increases and decreases.
This popular pattern, a true modern knitters delight, offers a satisfying knit for most knitters.
Shaping Shoulders and Armholes
The foundation of good fit in your sleeveless knit, the Sabai Top, lies in its intelligent shaping. The pattern features subtle left leaning increase and right leaning increase techniques strategically placed along the neckline and yoke.
These simple shaping methods create the elegant contours of the shoulders and the clean lines of the armholes, essential for a comfortable drape. This stockinette variation, or the ribbed cuffs version, both benefit from this foundational technique.
This process is a transferable skill for future projects, making it a great learning opportunity for beginner intermediate knitters.
Achieving a Custom Fit
To achieve a custom fit for your minimalist garment, this top-down knit offers inherent flexibility.
One of the most effective customization methods is to periodically try on the piece as you progress, a practice highly endorsed by the creator, Susanne Muller creation.
This allows you to gauge the length and width, making adjustments to the number of increases or the placement of stitch markers as needed. The adjustable fit is a key reason why this accessible pattern is so beloved, catering to contemporary tastes effectively.
The quick project nature means you can test fit frequently.
Personalizing Length and Adjusting for Body Types
A key strategy for ensuring precise length on your summer knitwear is to continuously try on the garment as you knit. By sliding the live stitches from your needle onto a spare cable, you can easily slip the piece over your head and assess the length, making it a truly personalized experience.
For a perfect fit adjust the length by knitting more or fewer rows before the armhole shaping begins.
This pattern, a quick knit, is adaptable to different body types; simply modify the positioning or frequency of the slanting increases, especially around the shoulders, to accommodate wider or narrower frames.
This attention to detail makes the Sabai Top a standout choice for modern knitters.
| Pattern Feature | Benefit for Knitter | Technique Highlighted |
|---|---|---|
| Top-down knit construction | Allows for easy try-on and adjustments for a precise fit | Strategic increases and decreases for shaping |
| Customizable fit | Adaptable to different body types and personal preferences | Modifying placement/frequency of slanting increases |
| Accessible pattern | Suitable for beginner intermediate knitters, offering transferable skills | Left leaning and right leaning increases for shoulder/armhole shaping |