How To Sew An On Point Pincushion Tutorial

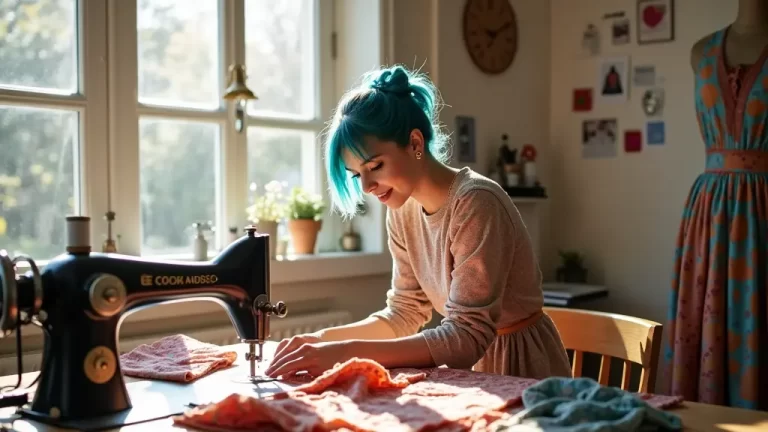
Sewing a pincushion project offers a delightful opportunity to transform small fabric pieces into a vibrant, functional accessory for any crafter’s haven. This beginner-friendly craft not only upgrades your sewing toolkit but also showcases your unique personal style.
Dive into the fulfilling world of fabric scrap craft, where every stitch contributes to a beautiful, one-of-a-kind creation.
Prepare to experience the satisfaction of a step-by-step sewing guide that makes crafting a pincushion an enjoyable journey, resulting in a perfect handmade sewing gift.
This sewing accessory tutorial is your gateway to creative fabric use and a more organized workspace. Let’s begin this inspiring craft project inspiration.
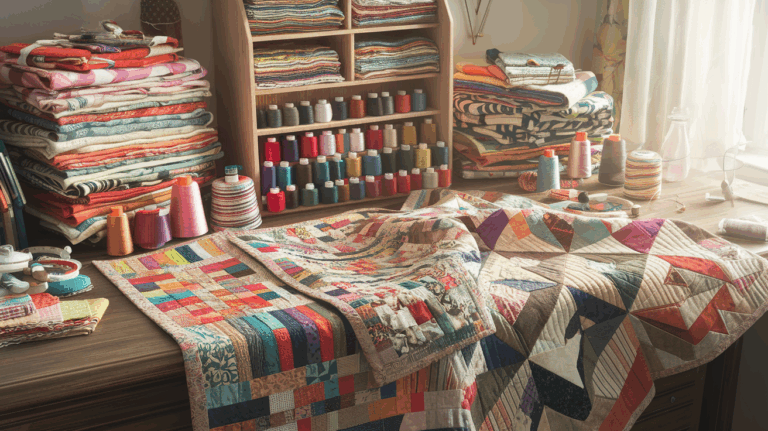
Fabric Selection for Custom Pincushion Design
Choosing the right materials is the foundational step in pincushion construction, setting the stage for both beauty and practical longevity within your sewing toolkit.
DIY sewing pincushion enthusiasts should lean towards tightly woven cottons or natural linens; these fabrics offer excellent durability and a satisfying tactile feel, making your needlework a pleasure. Crafting a pincushion that serves as a decorative sewing item invites the integration of unique fabric patterns or prints, harmonizing beautifully with cherished handmade sewing gifts.
Utilizing fabric scraps from prior quilting techniques represents a smart, sustainable crafting solution, particularly when favoring natural fibers that ensure breathability for stuffing a pincushion.
Your custom pincushion design can truly flourish through thoughtful color arrangement and layout.
For a cohesive, eye-catching patchwork sewing result, consider this tip for color coordination: Select a beloved anchor fabric, then choose either matching prints or contrasting prints from your available fabric arrangement to create a harmonious visual appeal. This approach to fabric arrangement ensures your pincushion is as stylish as it is useful.
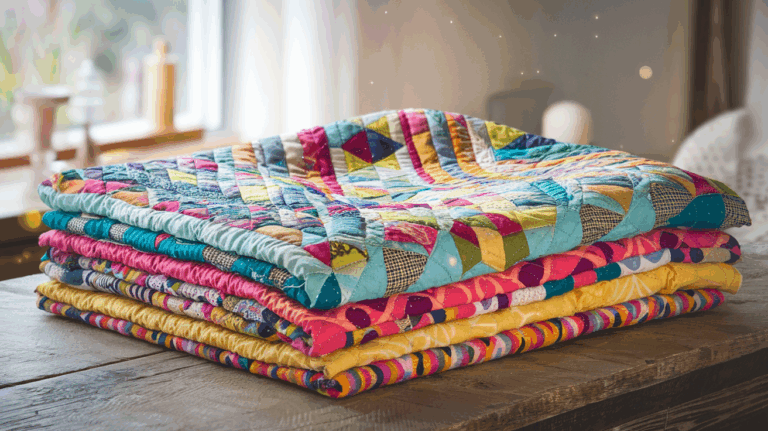
Patchwork Piecing for the Pincushion Top
Patchwork sewing forms the vibrant heart of this pincushion design, allowing for the creative use of small fabric pieces.
On Point pincushion guide makers will prepare exactly 25 fabric squares, each measuring 5 inches, to construct a visually engaging patchwork. This allows for extensive experimentation with color and pattern, transforming your collection of fabric scraps into a miniature quilt.
Plan your color layout carefully or embrace a more spontaneous approach, sewing randomly for a playful, eclectic look that reflects your personal style.
Ensure precision by stitching these squares into five distinct rows, remembering to press seams in alternate directions after each step; this technique is key for accuracy and allows your seams to nest together perfectly.
Assembling the Pincushion
With your patchwork top meticulously pieced, the next stage involves the careful assembly of your pincushion, a crucial part of its pincushion construction.
Quilting beginner sewers will find this process straightforward as you connect the prepared rows, paying close attention to corner matching for a crisp, professional finish. Pressing after each connection ensures clean lines and a well-defined geometric pattern.
Following this, place the two prepared backing rectangles right sides together with your pieced front, aligning all edges. Sew around the perimeter, leaving a small opening—essential for turning the pincushion right side out and for the subsequent stuffing.
The result is a beautifully constructed pouch, ready for its filling and final touches, a testament to your growing crafting skills.
Finishing Your On-Point Pincushion
The final steps in crafting a pincushion involve turning, stuffing, and closing, transforming your sewn pieces into a functional tool.
Once turned right side out through the prepared opening, carefully fill your pincushion with suitable stuffing, such as polyester fiberfill or crushed walnut shells, achieving a firm yet yielding texture.
This ensures a stable surface for holding pins and needles securely, making it a practical addition to your sewing room accessory collection. Hand-stitch the opening closed using a neat slip stitch or whip stitch, blending the stitches seamlessly with the surrounding fabric.
For added visual appeal and enhanced needlework functionality, consider optional embellishments like hand quilting, delicate embroidery, or decorative trims, further personalizing your creation. This DIY craft tutorial encourages exploring different embroidery options and decorative trims to make your pincushion truly special.
Tips for Personalization and Gifting
Making your on-point pincushion truly unique involves personalization, turning it into a cherished handmade gift or a distinctive sewing room accessory.
Experimenting with contrasting prints alongside matching prints can create dynamic visual interest, allowing your personal style to shine through the fabric arrangement.
This project also serves as an excellent example of sustainable crafting, brilliantly repurposing small fabric pieces that might otherwise go unused.
Each completed pincushion is a truly one-of-a-kind creation, perfect as a thoughtful gift for sewers or anyone who appreciates handmade items. Whether you’re looking for crafting ideas or seeking a fulfilling beginner sewing project, this tutorial offers a rewarding experience, bolstering your creative fabric use and sewing techniques.

Patchwork Sewing Techniques Explained
Patchwork sewing for an On Point pincushion truly begins with meticulous fabric cutting, establishing the foundation for sharp points and accurate alignment. Inspiration for unique fabric arrangement can be found in miniature quilt accent ideas; consider arranging your selected small fabric pieces in a 5×5 grid, playing with either contrasting prints or pleasing matching prints that reflect your personal style.
Maintaining a consistent seam allowance, typically ¼ inch, is paramount.
Utilizing a seam guide or tape on your sewing machine greatly simplifies block assembly, ensuring all corners meet precisely, reinforcing the stepbystep sewing method, which results in a beautiful personalized craft.
Rotary cutting accuracy is key; keep your ruler firmly planted and your blade sharp for perfect fits, making each small square contribute to the overall precision of your pincushion construction.
This approach forms the basis for a successful beginner sewing project. It’s a fantastic way to use fabric scrap craft effectively.
This project is a great sewing accessory tutorial. Your crafting skills will be enhanced.
This is a wonderful craft project inspiration.
Use this as a sewing pattern.
Scrap fabric repurposing is a hallmark of this project, allowing for a truly oneofakind creation.
The careful selection of unique fabric patterns enhances the aesthetic appeal of your custom pincushion design. Achieving precise corner matching is facilitated by accurate cutting and consistent seam allowances, contributing to a professional finish for your custom handmade gift.
This craft tutorial is a fantastic way to expand your sewing techniques.
Stitching Instructions for Points
Functional sewing tool selection—including sharp scissors, a dependable sewing machine, and fine pins—is essential for achieving those sharp, un-blunted corners and a polished look on your On Point pincushion guide. Proper seam pressing after each sewn row, especially with alternating press directions, guarantees accurate corner matching and a smooth sewing layout.
To ensure sharp corners, stop sewing precisely at the ¼-inch mark, securing if necessary with a quick backstitch.
These quilting techniques are fundamental.
Fabric piecing is central to the construction of this decorative sewing item.
The assembly guide emphasizes precision at each step. Consider adding a creative flourish by exploring alternative stitch work options, such as a zigzag stitch, a blanket stitch, or various decorative trims for your custom pincushion design.
This beginnerfriendly craft offers many opportunities for personalization. It’s a great way to practice needlework.
When it comes to stuffing a pincushion, a firm yet yielding consistency is desired, whether using polyester stuffing or crushed walnut shells.
The final hand sewing to close the opening should be neat and secure, ensuring the stuffing remains contained.
You might also explore embroidery options or other sewing embellishments to further enhance the visual appeal and utility of this delightful sewing room accessory.
This is a perfect handmade sewing gift.
- Maintaining a consistent ¼ inch seam allowance is paramount for accurate alignment and sharp points in patchwork sewing.
- Rotary cutting accuracy with a sharp blade and firmly planted ruler is key for perfect fits in pincushion construction.
- Proper seam pressing after each sewn row, especially with alternating press directions, guarantees accurate corner matching and a smooth sewing layout.
- The project emphasizes scrap fabric repurposing, making it a great way to use fabric scraps effectively and create a one-of-a-kind creation.
Stuffing a Pincushion Properly: Ensuring Needle Retention and a Smooth Shape
Sewing accessory tutorial emphasizes that achieving the perfect firmness isn’t just for aesthetics—it’s essential for your pincushion’s role as a functional sewing tool. Stuffing a pincushion firmly but not rigidly ensures excellent needle retention, allowing pins to glide in with ease yet remain secure—a must for any sewing toolkit upgrade.
Even Stuffing for a Lump-Free Surface
Even distribution of filling matters greatly; as you add stuffing, use your fingers to push it into all the corners and smooth the cushion’s surface to prevent lumps that disrupt the needle-piercing area.
For a smooth, rounded shape, begin stuffing at the center and work your way outward, shaping the pincushion as you go so your patchwork sewing project maintains its appeal and utility.
Ideal Firmness and Filling Options
Crafting a pincushion that offers ideal firmness is key; this ensures your needles are held securely without bending or getting lost. Excellent choices for stuffing include crushed walnut shells or high-quality fiberfill.
Always add stuffing in small amounts, pausing to check the firmness before you close the final stitches, a technique taught in stepbystep sewing guides. This process ensures your handmade sewing gift provides a functional sewing tool that lasts.
Hand Sewing Decorative Sewing Item: Adding Personal Flair to Your Pincushion
Personal style and creative fabric use are evident in your custom pincushion design, as each fabric selection sets the tone for a truly unique sewing room accessory.
For maximum visual appeal, consider pairing vibrant fabric scrap craft blocks or subtle matching prints in a 5×5 arrangement, adding dimension familiar to anyone mastering the On Point pincushion guide.
Embroidery and Embellishment Options
Embroidery options, such as French knots, running stitches, or simple hand quilting, can transform a basic cushion into a one-of-a-kind creation. These sewing embellishments add texture and visual interest, making your pincushion a true piece of art.
Achieving a Professional Finish
To maintain a professional finish, align edges carefully, press seams with care, and keep your hand sewing stitches neat. Using a consistent thread tension, a technique essential for all needlework, will prevent puckering and loose threads, ensuring your decorative sewing item looks polished and beautiful.
With careful stitching instructions, your DIY craft tutorial results in a perfectly finished, stylish pincushion ready for use or gifting.
Key Pincushion Crafting Insights
- Proper stuffing ensures excellent needle retention, allowing pins to glide in easily yet remain secure.
- Even distribution of filling prevents lumps, which can disrupt the needle-piercing area and affect the pincushion’s utility.
- Ideal firmness is achieved by stuffing firmly but not rigidly, preventing needles from bending or getting lost.
- Embellishments like French knots and running stitches can transform a basic pincushion into a unique piece of art.
Embroidery Options for Style
On Point pincushion guide crafters appreciate decorative sewing item details that set handmade gifts apart from store-bought accessories. Embroidery options deliver personality to any DIY sewing pincushion, especially when you combine a running stitch or backstitch for patchwork outlines with French knots or seed stitch for tiny, dimensional highlights.
Try a chain stitch to outline miniature quilt motifs or a whipstitch around the edge for neat, crafted definition—these techniques accentuate patchwork sewing elements beautifully.
Thread weight matters: finer embroidery floss (2-3 strands) achieves delicate results for miniature quilt accents, while thicker threads create striking lines and texture for creative fabric use.
Tip: Achieve even stitch depth by keeping needle motion perpendicular to the fabric and tension steady across each embroidery pass, ensuring consistent results—essential for a polished finish on your step-by-step sewing project.
Miniature Quilt Accent Ideas
Miniature quilt accents enrich your sewing toolkit upgrade by layering visual interest through authentic patchwork techniques. Integrate half-square triangles or combine tiny contrasting prints within the 5×5 grid to add sophistication to your DIY sewing pincushion layout.
These small design changes amplify the effect of repurposed scrap fabric craft and promote sustainable crafting.
Scale and proportion play a role: using 5 fabric squares maintains balance, preventing a look that feels busy. For functional embellishments, add a compact patchwork panel to the pincushion’s side or frame edges with decorative hand sewing.
Try simple arrangements, like alternating solid squares and mini florals, to make a beginner sewing project truly one-of-a-kind—perfect for crafting a pincushion that functions as both a tool and a unique conversation-starter.
- Embroidery techniques like running stitch, backstitch, French knots, seed stitch, and chain stitch can be used to add personality and dimensional highlights to DIY sewing pincushions.
- Thread weight is important for embroidery, with finer floss suitable for delicate details and thicker threads for striking lines and texture.
- Miniature quilt accents, such as half-square triangles and contrasting prints, can be integrated into pincushion designs using scrap fabric for a sustainable crafting approach.
- Maintaining proper scale and proportion, like using 5 fabric squares, is key to preventing a busy look and ensuring a balanced design on a pincushion.
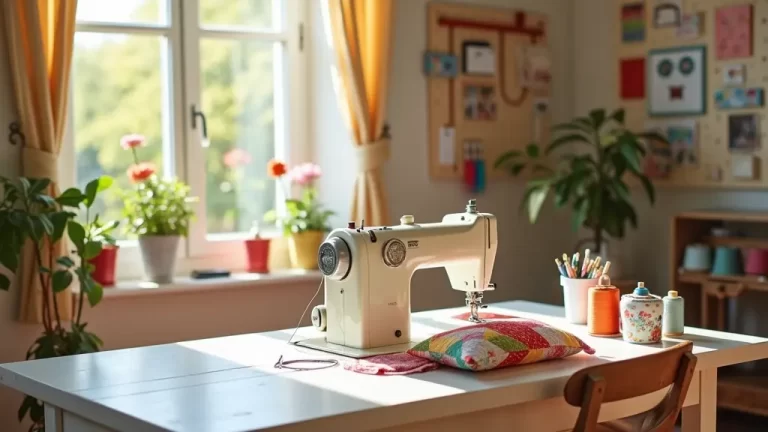
The Essence of a Functional Sewing Tool
Functional sewing tools represent the sophisticated culmination of various sewing endeavors, offering a streamlined approach to organizing needles and pins with exceptional efficiency. Crafting a workspace where every item serves a purpose elevates the entire stitching experience.
This intentional design of a sewing accessory, such as an expertly crafted pincushion, ensures vital supplies remain readily accessible, significantly contributing to the ease of completing intricate patchwork sewing.
DIY craft tutorials often highlight how these well-thought-out items simplify complex tasks.
Handmade sewing gifts beautifully embody the principles of functional sewing tools, frequently prioritizing ergonomic design for comfortable needlework.
The intuitive placement and stable support these tools offer minimize strain during prolonged crafting sessions. Sewing for beginners and experienced artisans alike benefit from select functional sewing tool choices that enhance their sewing toolkit upgrade.
A meticulously organized accessory, like a custom pincushion design, transforms potential disarray into an orderly system, smoothing every step of fabric piecing.
Crafting Your ‘On Point’ Pincushion: A Step-by-Step Guide
Embark on a delightful sewing accessory tutorial by creating your very own ‘On Point’ pincushion. This engaging beginner sewing project is perfect for a sewing toolkit upgrade or as a charming handmade sewing gift.
It allows for creative exploration with fabric selection and various stitching instructions, resulting in a charming and practical sewing companion.
This straightforward construction method ensures a satisfying outcome, even for those new to needlework.
Designing Your Unique Patchwork Top
For the creation of your personalized pincushion top, select precisely 25 fabric squares, each measuring 5 inches, to construct a distinctive patchwork.
Consider arranging these squares in a neat 5×5 grid; meticulous planning of your color layout can achieve playful effects, or you can opt for a random arrangement for a casual, spirited look.
Sewing a pincushion involves careful piecing of these fabric squares.
Stitch the squares together to form five distinct rows, ensuring you press seams in alternating directions for enhanced accuracy and easy nesting of fabric.
Assembling and Finishing Your Pincushion
With your rows meticulously stitched, proceed to assemble them into the pincushion’s main body.
Precisely matching corners at each stage is key; pressing after every step guarantees a crisp, professional finish to your patchwork.
Careful pressing throughout the construction process is paramount for a polished final product.
Next, position the two backing rectangles, right sides together with the prepared front panel.
Stitch around the entire perimeter, deliberately leaving an opening. This unsewn section is essential for turning the pincushion right side out and for stuffing.
Stuffing, Closing, and Embellishing
Once the pincushion is turned right side out, fill it firmly with cushion stuffing or, for a denser feel, use crushed walnut shells. Securely close the opening using careful hand stitching.
To add extra flair and functionality, consider incorporating hand quilting, decorative embroidery, or other sewing embellishments.
This allows for a truly one-of-a-kind creation that reflects your personal style.
Maximizing Fabric Scraps and Personalization
This project is ideally suited for utilizing small fabric pieces, ensuring each finished pincushion is unique.
Experiment with both matching prints and contrasting prints to express your individual taste and creativity. The sustainable crafting aspect makes it a rewarding endeavor for environmentally conscious sewers.
The ‘On Point’ pincushion project, a craft tutorial, embodies a beginnerfriendly craft. It provides an excellent opportunity for developing essential skills in fabric piecing, pressing, and finishing techniques.