How To Crochet Highland Cow Amigurumi Patterns

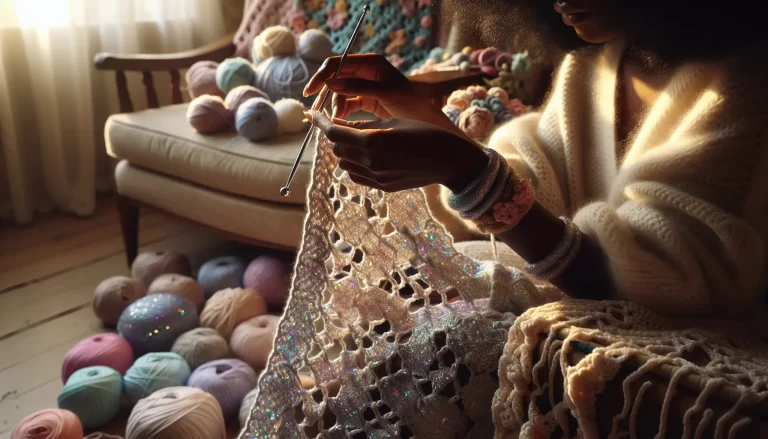
Highland cow amigurumi enthusiasts can explore an array of crochet patterns for lifelike Scottish cattle with shaggy coats and signature horns, suitable for both beginner crochet and advanced amigurumi makers. Step confidently into plushie making by selecting patterns with photo assembly guides and clear amigurumi instructions, ensuring successful safety eye installation, stuffing plush toys, and shaping plush features.
From mini Highland cows to pillow plushies, free patterns offer accessible entry points, while paid patterns deliver intricate detail designs, colorwork realism, and finishing tips such as fluffing hair and stitching horns.
Platforms like Etsy, Ravelry, and dedicated craft blogs host a rich amigurumi collection, letting you craft personalized cows or handmade gifts with customizable accessories.
Detailed yarn weights and fiber choices play a key role in achieving a wooly coat amigurumi with authentic plushie texture for your Scottish cattle crafts.
Select soft acrylic for beginner crochet projects, balancing fluffiness and durability, or opt for natural cotton blends for advanced amigurumi requiring crisp stitch definition and breathability. Consider the tactile experience: fuzzy and boucle yarns add lifelike cows effects, while smoother yarn yields refined horn yarn and snout yarn.
Techniques like single crochet and half double crochet provide a snug plushie structure and support basic sewing assembly for secure ears and horns.
Pick main yarn colors reflecting the Highland cow’s coat, then integrate embellishment tips for embroidered hooves or pompom tails, elevating your DIY plush toys for nursery decor or collectible plush toy displays. These craft patterns are essential for creating delightful stuffed animal patterns.
When embarking on your yarn craft project, focusing on the core crochet hook usage and yarn needle skills is paramount.
Understanding the magic ring technique is foundational for creating seamless starts for your plush toy pattern.
Mastering increase decrease methods efficiently shapes your small plush cows and larger creations, while working back loops can add definition to specific textures.
Curly forelock patterns and twisted horn patterns are often highlighted within these comprehensive guides, offering pathways to achieve realistic markings. Exploring various learning styles is supported by both written tutorials and video tutorials, making the journey of yarn sculpting accessible.
Creating these lovable creatures involves careful attention to detail, from the initial yarn selection to the final assembly. Each stitch contributes to the overall charm of your fluffy Highland cow, whether intended as cuddle toys or cherished collectible plush toys.
The process itself is a rewarding experience, offering crafting inspiration and opportunities for personal growth in your crafting abilities.
Choosing Your Highland cow amigurumi
Dive into selecting the right yarn for that iconic wooly coat, differentiating between acrylic and cotton for plushness and durability.
Consider the tactile experience of different fibers, choosing those that best suit your cuddly creation.
Remember the foundational stitches discussed earlier for crafting snug joins and ensuring the structural integrity of your piece, making it a perfect example of a crochet plushie pattern.
Detailed yarn weights and fiber choices play a key role in achieving a wooly coat amigurumi with authentic plushie texture for your Scottish cattle crafts. Select soft acrylic for beginner crochet projects, balancing fluffiness and durability, or opt for natural cotton blends for advanced amigurumi requiring crisp stitch definition and breathability.
Consider the tactile experience: fuzzy and boucle yarns add lifelike cows effects, while smoother yarn yields refined horn yarn and snout yarn.
The foundational stitches like single crochet and half double crochet provide a snug plushie structure and support basic sewing assembly for secure ears and horns. Pick main yarn colors reflecting the Highland cow’s coat, then integrate embellishment tips for embroidered hooves or pompom tails, elevating your DIY plush toys for nursery decor or collectible plush toy displays.
These craft patterns are essential for creating delightful stuffed animal patterns.
Highland cow amigurumi patterns allow crafters to make unique plushies showcasing the breed’s shaggy fur and curved horns, often with step-by-step photo instructions.
Most patterns list detailed yarn weights, hook sizes, and embellishments for realism, such as embroidered hooves or pom-pom tails.
Amigurumi Highland cows make charming handmade gifts, nursery decor, and collectibles, and can be personalized with colors and accessories.
Experienced pattern writers often include finishing tips—like how to fluff the hair for maximum cuteness and securely stitch horns and ears for safe play, ensuring your creation becomes a safe play plushie. Free and paid patterns offer a wide range of designs, ensuring styles for both beginners learning basic stitches and experts seeking creative amigurumi challenges.
This section is a gateway to mastering amigurumi instructions for truly charming stuffed Highland cows.

Finding the Best Crochet Patterns
Crochet patterns crafted for animal forms, particularly Highland cow amigurumi, often showcase expert shaping and intricate detailing, appealing to enthusiasts of plushie making. Seek out pattern designers who specialize in Scottish cattle crafts, as they tend to incorporate unique touches like twisted horn patterns and wooly coat amigurumi textures, elevating the finished product.
Understanding stitch notations beyond the common US and UK conventions will broaden your access to amazing crochet patterns, simplifying the interpretation of instructions from advanced amigurumi creators worldwide.
Always prioritize patterns that include clear photo assembly guides and detailed shaping instructions; these visual aids are indispensable for creating lifelike cows and are often found within detailed yarn weights and crochet hook sizes.
Photo-rich crochet animal patterns that teach customizable accessories, securing horns, and assembling plush toy pattern details with precision are highly recommended for a rewarding crafting inspiration.
Mastering Plushie Making Basics
Stuffed animal patterns, such as those for Highland cow amigurumi, necessitate a firm grasp of foundational techniques for even distribution of stuffing plush toys and achieving seamless basic sewing assembly. Successful plushie making begins with carefully turning pieces right-side out to create neat seams, ensuring your Scottish cattle plushies possess well-defined, fluffy shapes and are safe play plushies.
For optimal structural integrity and to achieve the best results, vary stuffing densities; use firmer filling in limbs and softer stuffing in large plush cows or the main body sections. Seamless joins—accomplished using a yarn needle and matching yarn—are essential for invisible attachments, particularly when stitching horns or securing ears to a fluffy Highland cow, and are a hallmark of professional amigurumi.
Reliable amigurumi tutorial resources, available as both written tutorials and video tutorials, cater to diverse learning styles and significantly enhance the finish of every DIY plush toy and collectible plush toy within your amigurumi collection.
Key Takeaways for Crafting Highland Cow Amigurumi
- Seek patterns from designers specializing in Scottish cattle crafts for unique details like twisted horns and wooly coat textures.
- Understanding various stitch notations beyond US and UK conventions is crucial for accessing advanced global amigurumi patterns.
- Achieving well-defined shapes in plushies requires careful turning of pieces, even stuffing distribution, and seamless joins using a yarn needle.
- Clear photo assembly guides and detailed shaping instructions are indispensable for creating lifelike amigurumi, especially when securing elements like horns and ears.
Creating Scottish Cattle Crafts
Scottish cattle crafts offer a rich tapestry of creative possibilities, extending well beyond the classic Highland cow amigurumi crochet patterns. Crafters are encouraged to explore alternative mediums such as needle felting or simple sewn plush shapes to represent these iconic animals.
Needle felting, for instance, allows artists to sculpt incredibly lifelike shaggy manes and intricately twisted horn yarn details.
This is achieved by skillfully layering colored wool, employing multi-needle tools for added fluff, and shaping the horns separately before securely attaching them using basic sewing assembly or a robust fabric glue.
Simple sewn plush shapes, typically crafted from felt or fleece, present an accessible beginner crochet alternative. These projects can feature fringed fabric expertly cut to mimic fluffy coats, and felt horns that attach with ease to small plush cows.
Stuffed animal patterns, in general, can be adapted in scale. Whether you aim for miniature Highland cows or generously sized pillow plushies, these adaptable patterns promise quick, satisfying results and foster confidence in every DIY plush toy enthusiast.
By embracing these beginner-friendly practices and integrating elements like curly forelock patterns and straightforward sewing techniques, creating charming and display-worthy Scottish cattle plushies becomes an achievable delight.
Crafting Wooly Coat Amigurumi
The world of Highland cow amigurumi truly shines when focusing on textured stitches that beautifully showcase their famously fluffy coats, leading to unique plushie making experiences suitable for all skill levels.
Crochet patterns frequently utilize the bobble stitch or the loop stitch to authentically replicate the breed’s iconic wooly mane.
Achieving the desired density and plushness often involves a combination of worsted or chunky weight yarn and a small crochet hook. These specific stitch patterns, when placed strategically along the cow’s back and forehead, naturally create a wonderfully tousled fleece effect.
Following an amigurumi tutorial, a crafter can employ the magic ring technique and single crochet stitches for seamless body shaping. Subsequently, adding carefully selected horn yarn and other embellishments will bring a lifelike quality to the Scottish cattle plushie.
Stuffed animal patterns also offer ample room for personalization.
Consider adding charming flower embellishments, intricate embroidered hooves, or playful pompom tails.
This flexibility allows crafters to easily transition between creating mini Highland cows and larger pillow plushies, depending on their individual creative challenges and desired outcomes. This versatile approach invariably results in plush toy patterns possessing irresistible fuzzy hair effects, yielding collectible plush toys that are perfect for both display and delightful cuddling.
| Crafting Mediums | Techniques for Texture | Customization Options |
|---|---|---|
| Needle Felting, Simple Sewn Plush Shapes, Crochet Amigurumi | Bobble stitch, Loop stitch, Layering colored wool | Fringed fabric, Felt horns, Flower embellishments, Embroidered hooves, Pompom tails |
| Versatile for various plush sizes | Skillful layering for lifelike manes and horns | Adaptable stuffed animal patterns for different scales |
Beginning Beginner Crochet Projects
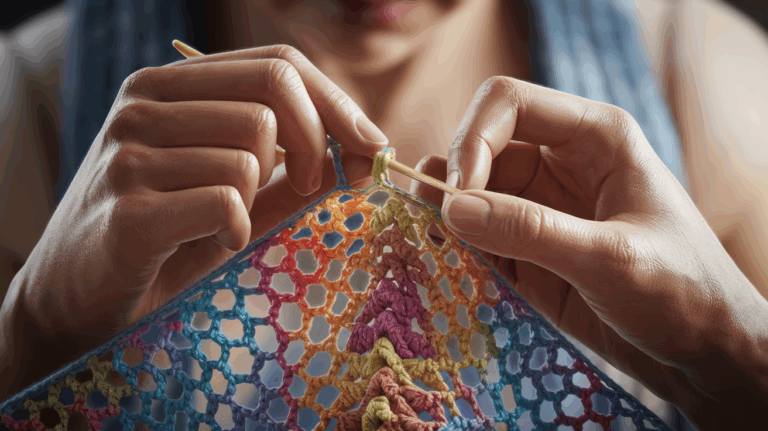
Highland cow amigurumi projects introduce beginners to the delightful world of plushie making, perfect for capturing the charm of Scottish cattle crafts. Crochet patterns employing the intarsia method simplify colorwork, enabling the creation of distinctive patches of color for realistic markings without complex yarn management.
Practicing with swatch samples helps maintain consistent tension, a vital skill for achieving uniform stitch sizes and a polished finish in your yarn sculpting.
Minimal shaping patterns, such as simple flat circles or basic cow bodies, are excellent for building confidence as you master foundational stitches like single crochet and half double crochet.
Starting with a free pattern that highlights straightforward color changes, secure weaving of yarn ends, and basic sewing assembly will ensure your first DIY plush toys are delightful and stress-free creations. This approach supports different learning styles, offering both written tutorials and video tutorials for guidance.
Understanding Advanced Amigurumi Techniques
Advanced amigurumi designs elevate stuffed animal patterns by introducing sophisticated shaping techniques beyond basic increase and decrease.
Mastering variations of the magic ring technique creates tighter, gap-free bases essential for premium plushies. Enthusiasts also employ front and back post stitches, adding subtle texture to simulate the realistic fur of a fluffy Highland cow or to create intricate detail designs on horns and forelocks.
Jointed elements, such as poseable legs and tails, are crafted using durable yarn or safety joints, granting your stuffed animal patterns increased movement and lifelike features.
To add realism, securely encase weighted pellets in fabric pouches before stuffing plush toys, preventing leaks and enhancing their substantial feel.
These more complex techniques are often detailed in comprehensive crochet tutorials and paid patterns, distinguishing your wooly coat amigurumi within an amigurumi collection.
Key Takeaways for Amigurumi Crocheters
- Beginners can start with Highland cow amigurumi using intarsia crochet patterns for simplified colorwork.
- Consistent tension is crucial for achieving uniform stitch sizes and a polished finish in amigurumi projects.
- Advanced techniques include mastering the magic ring for gap-free bases and using post stitches for texture.
- Jointed elements and weighted pellets can be incorporated into amigurumi for increased movement and a more substantial feel.
Assembling Your DIY Plush Toys
Bringing your Highland cow amigurumi to life relies on thoughtful plushie assembly and careful feature placement. Consider the art of assembly, focusing on the precise placement of safety eye installation and embroidered features like noses for character expression.
For added charm, embroidered features—like the nose—are stitched with matching or contrasting yarn, using a fine yarn needle skills for clean details and character, enhancing its appeal as a plush toy pattern.
Attaching Limbs and Internal Support
When attaching limbs, each piece is neatly aligned and sewn into the body using basic sewing assembly and ladder stitches for a polished finish.
Stuffing plush toys with small amounts of filler and shaping as you go maintains the plushie’s structure. For toys intended for more handling, learn about adding internal support or armature for durability and posability.
Secure limbs and use even stitches to ensure your DIY plush toy stands up to frequent cuddling or display as a collectible Scottish cattle crafts creation.
Adding Expressive Details
The secure installation of safety eyes; test positions while lightly stuffing the head, ensuring they’re symmetrical and reflect your chosen expression. Consider the curly forelock patterns and twisted horn patterns to achieve a lifelike cow.
Many patterns include photo assembly guides and techniques for shaping plush features and securing horns, along with tips for fluffing hair to create fuzzy hair effects for a more realistic look.
Key Aspects of Plush Toy Assembly
- Precise placement of safety eyes and embroidered features is crucial for character expression.
- Ladder stitches are recommended for neatly attaching limbs to the body for a polished finish.
- Internal support or armatures can be added for durability and posability, especially for toys intended for frequent handling.
- Utilizing photo assembly guides and techniques for shaping plush features, securing horns, and fluffing hair contributes to a more realistic and appealing final product.